
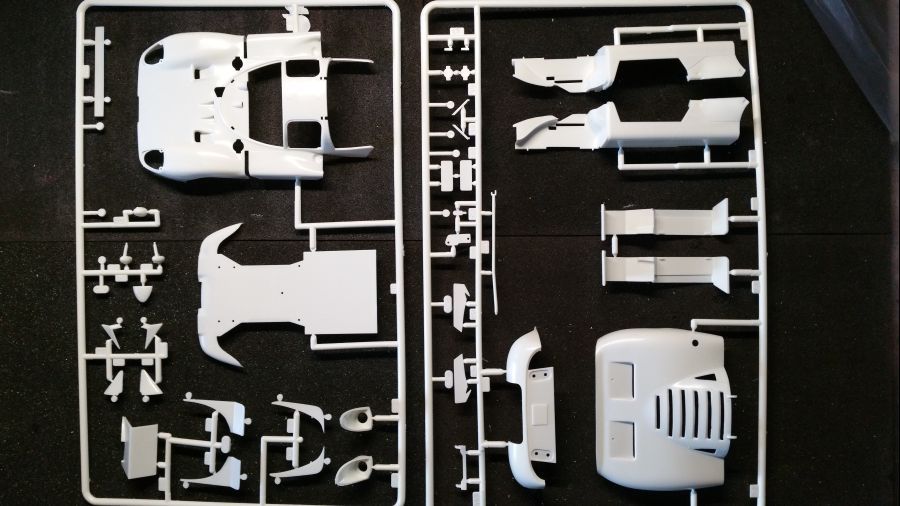
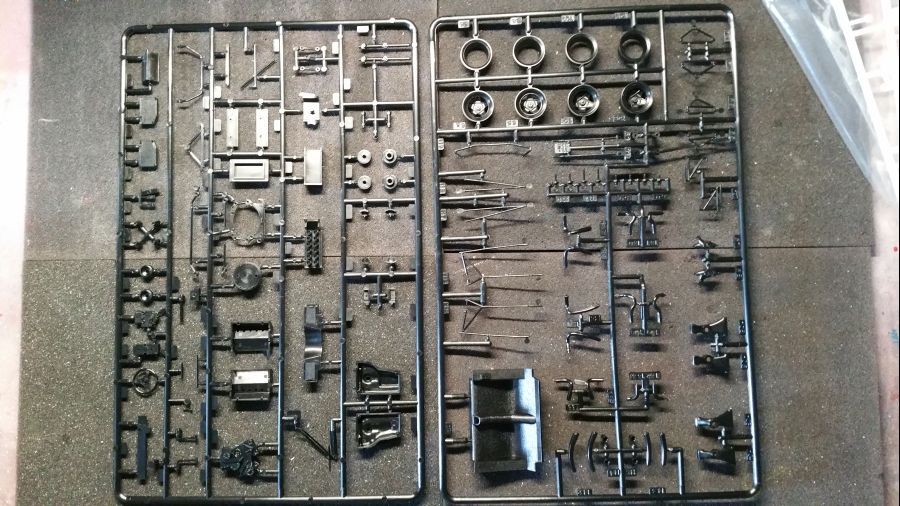
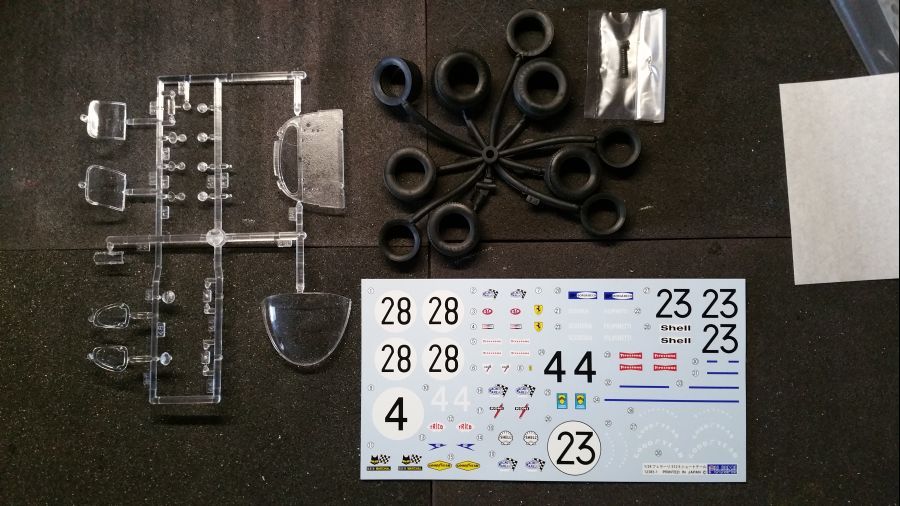
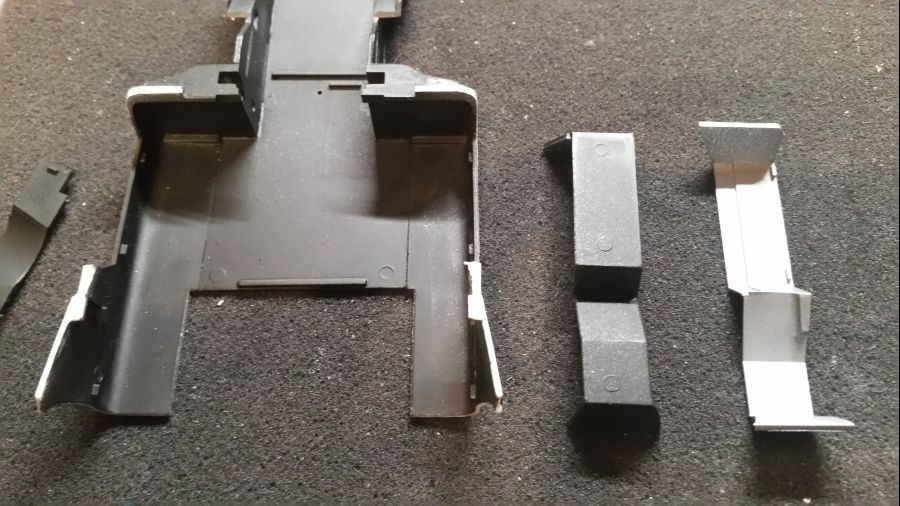
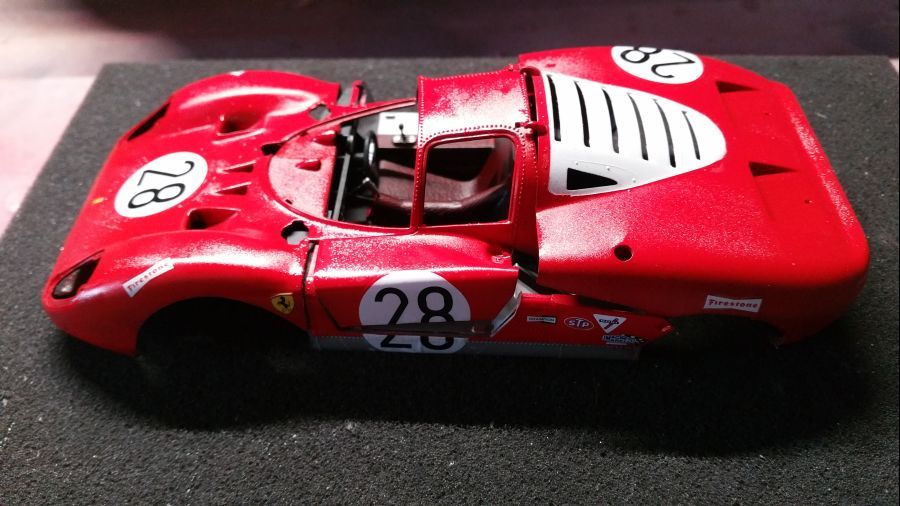
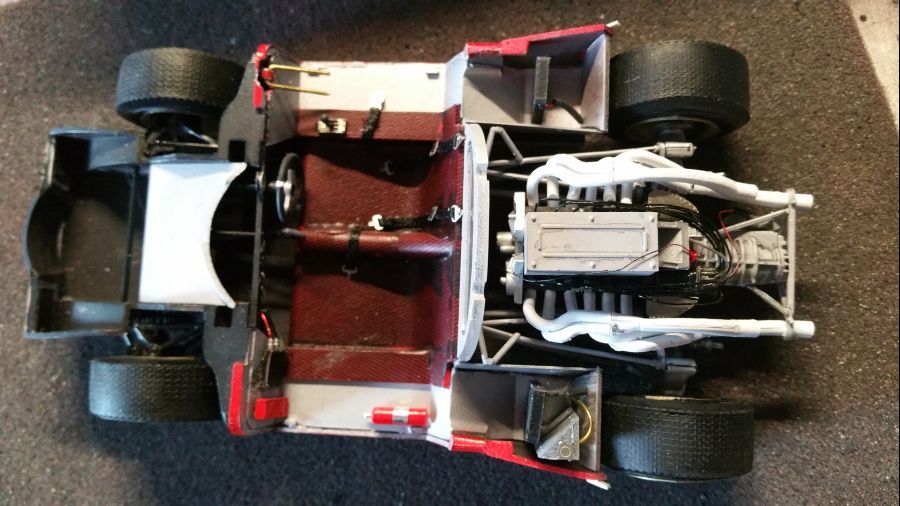
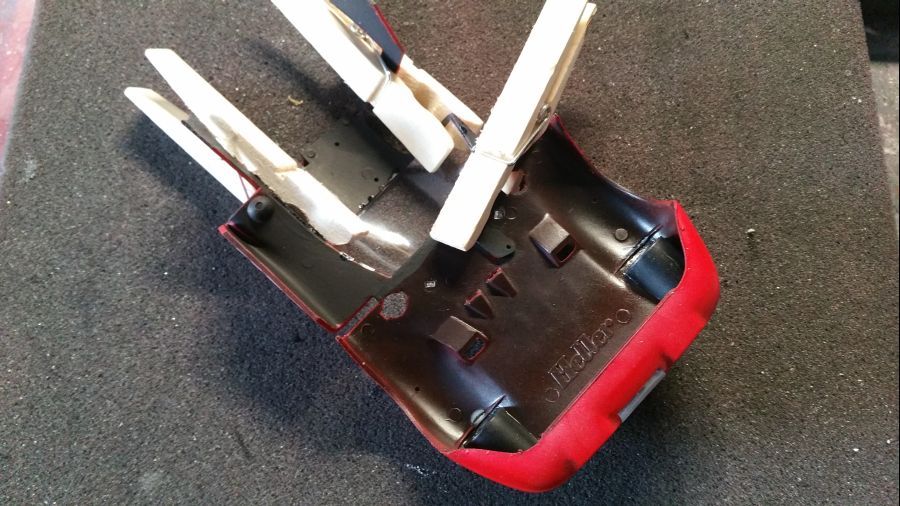
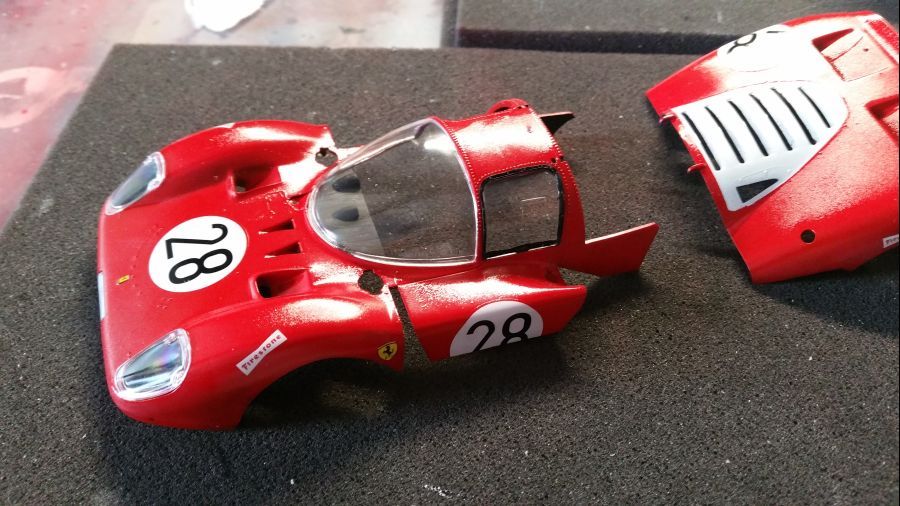
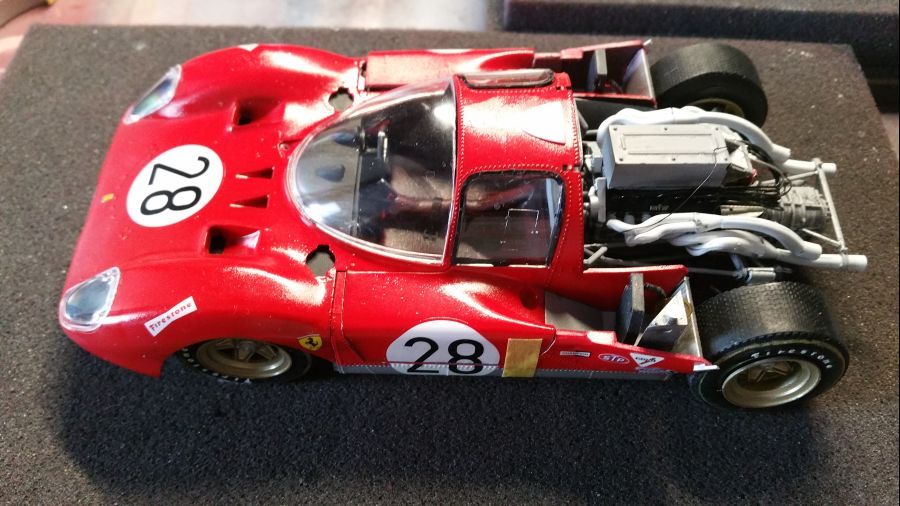
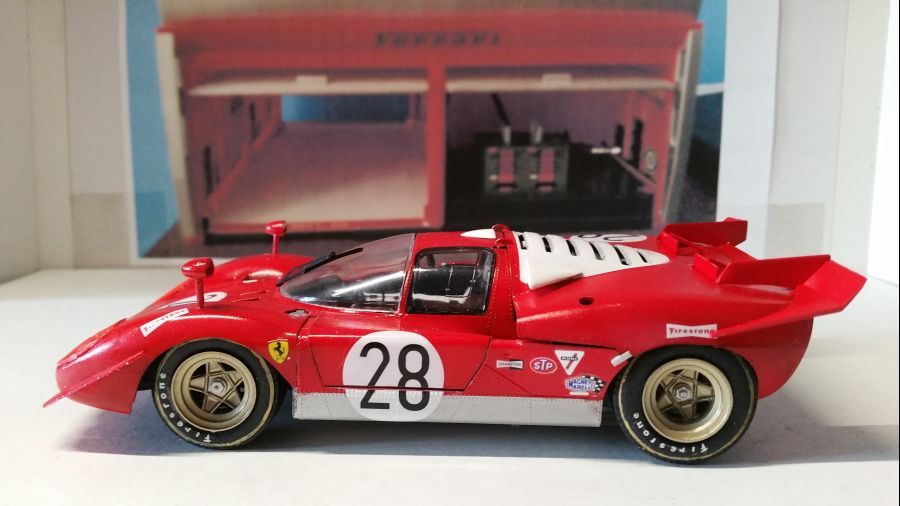
Voor de verandering maar eens weer iets anders. Ik wil nu deze Ferrari 512S Short Tail #28 bouwen. Deze wagen deed in deze uitvoering mee aan de 24 Uur van Daytona in 1970 en werd toen bestuurd door het trio Mario Andretti / Arturo Merzario / Jacky Ickx. In mijn ogen een prachtige wagen. Het betreft een kit van Fujimi (art. nr. 123851 / RS-). Standaard kan alleen de achterkap open. Fujimi heeft gelukkig wel een motor ingesloten bij deze kit. Ik wil echter ook bekijken of ik een deur kan openen, zodat je ook een beetje zicht van binnen hebt. Daarnaast moet ik beslissen hoe ik de auto wil bouwen. Aan het begin van de race waren de koplampen en de mistlampen afgeplakt om beschadiging te voorkomen. Gedurende de race werd dit verwijderd. Mijn Joe Honda Sportscar Spectacles nr.05 (Ferrari 512S) zal een goede hulp zijn. Dit zal een vrij lange WIP worden. Veel dingen laten zich niet van te voren plannen en veel beslissingen worden ad hoc genomen. Eerst maar weer even de foto's waarop de inhoud van de kit te zien is.
Something new for a change. I would like to build this Ferrari 512S Short Tail #28. This car acted in this livery during the 24 Hours of Daytona in 1970 and was driven by the trio Mario Andretti / Arturo Merzario / Jacky Ickx. A beautiful car in my eyes. This is a Fujimi kit (art. no. 123851 / RS-). When built out of the box, only the rear cover can be opened. Fortunately Fujimi added an engine to this kit. I want to see if i can open a door, so you are able to see something of the inside too. Also i need to make decisions on what car to build. At the beginning of the race the headlights and mistlights were covered to avoid damage. During the race these covers were removed. My Joe Honda Sportscar Spectacles no.05 (Ferrari 512S) will be a good help. This will be a long WIP. Many things are not planned and many decisions need to be made at that moment. First of all the pictures showing the content of the kit.
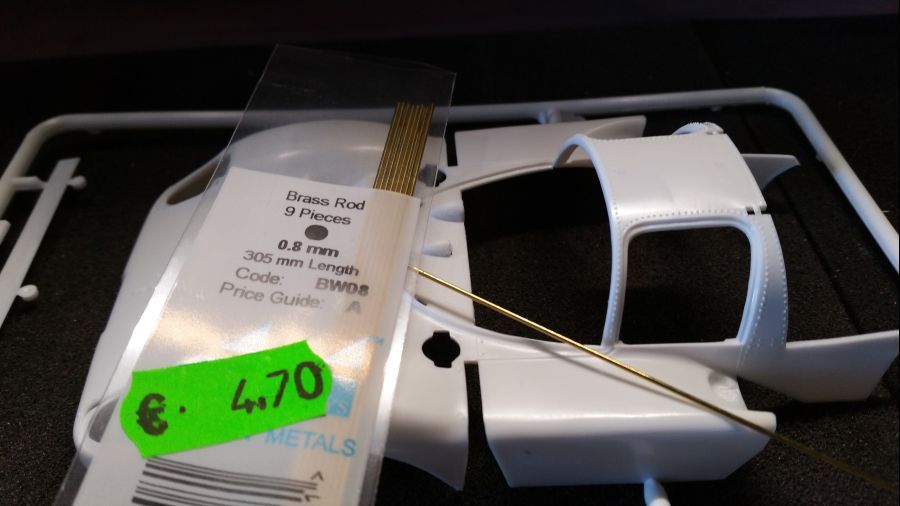
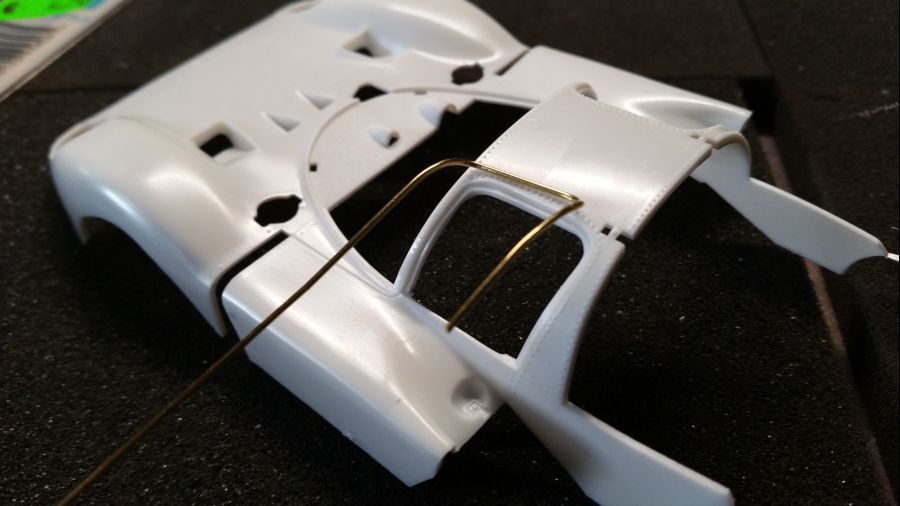
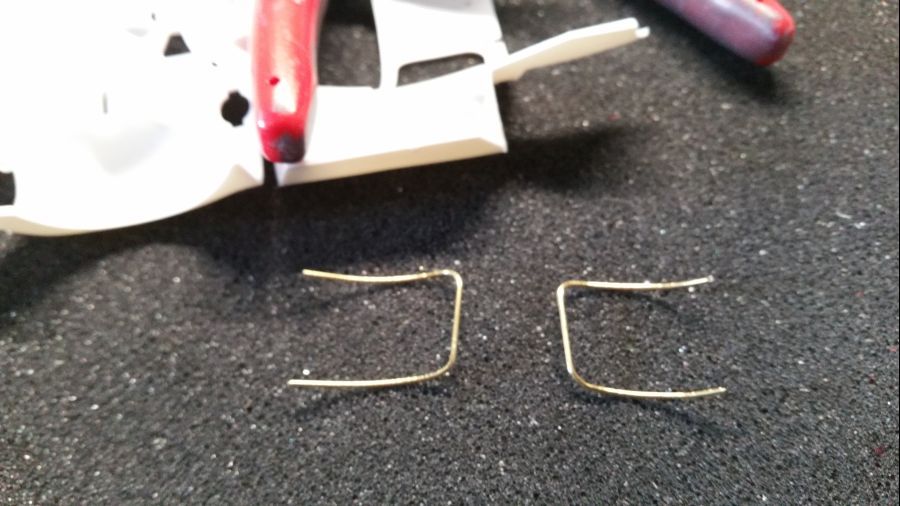
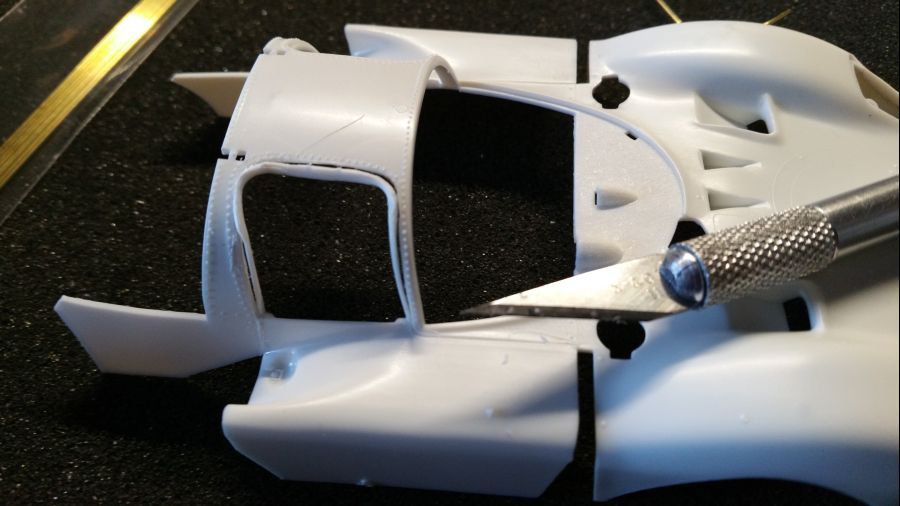
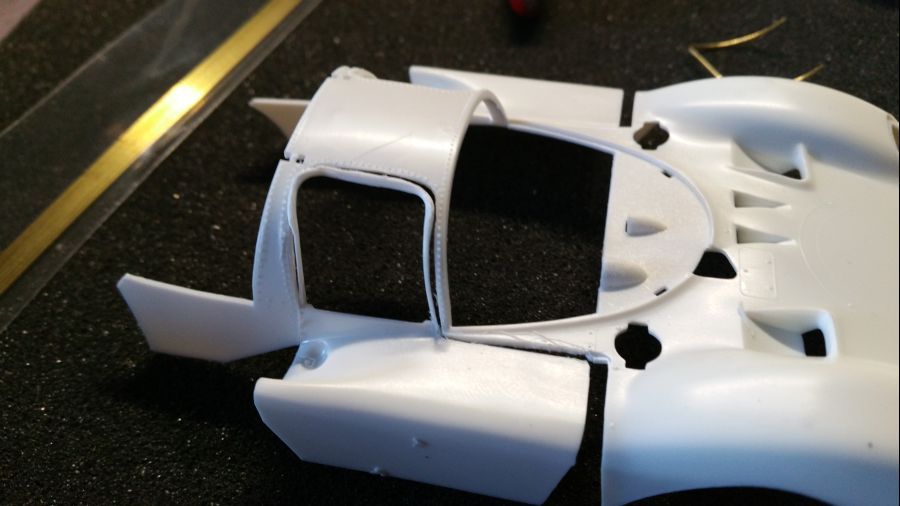
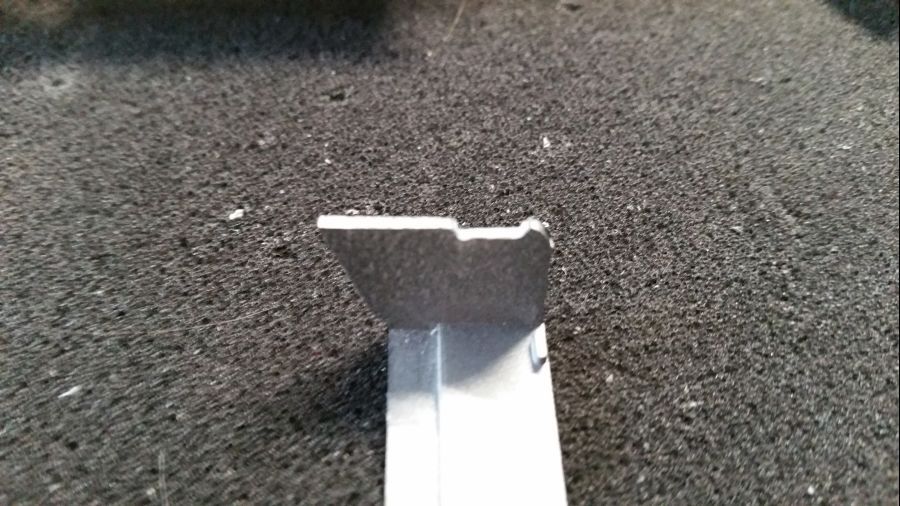
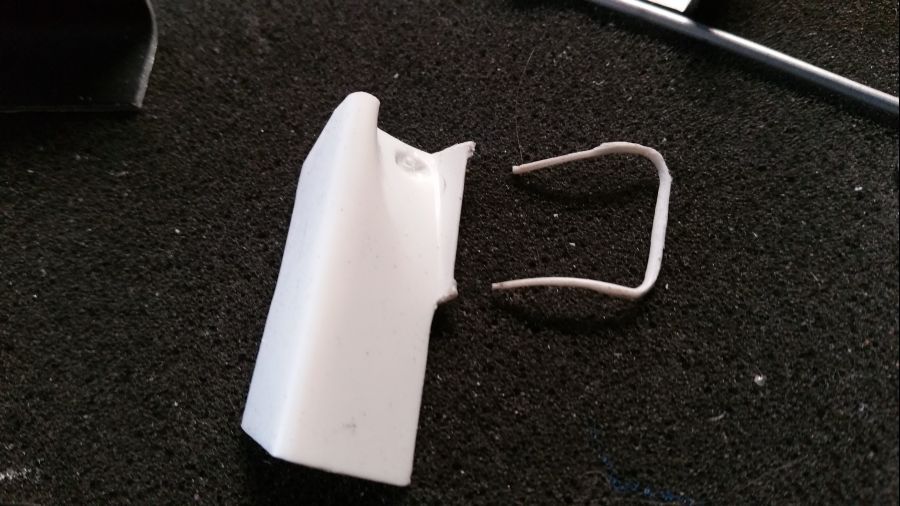
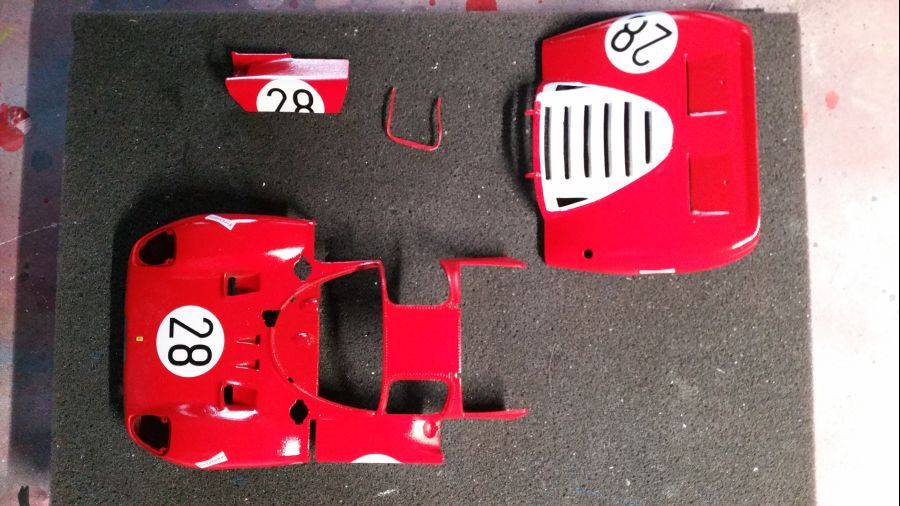
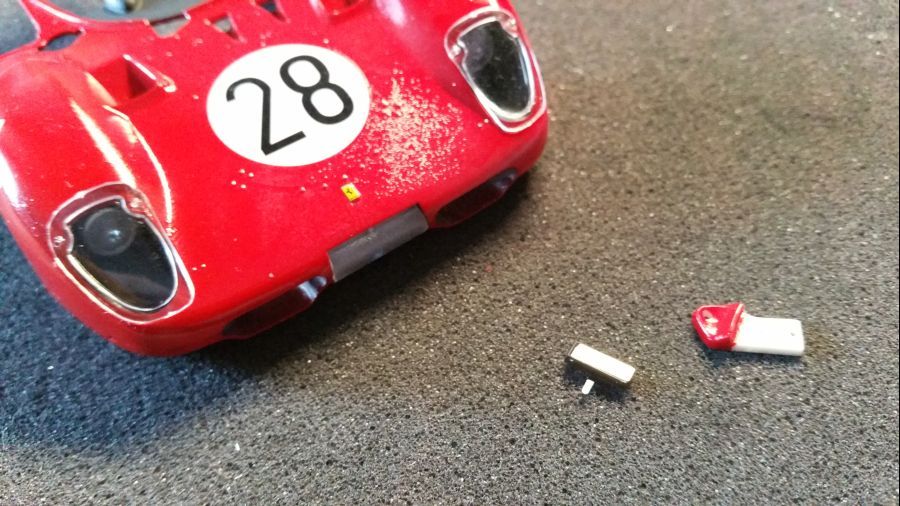
Zoals je kunt zien, is het zeer lastig om de deur er heel uit te krijgen. Er is maar heel weinig ruimte om te snijden bij het raamdeel. Ik begin hiermee, wanneer het mislukt kan de kit in de prullenbak. Het zou zonde zijn wanneer alles al klaar is. De popnagels moeten aan het bodywerk blijven. Daarom ga ik eerst van 0,8 mm messingdraad deze omlijsting kopieëren. Wanneer het fout gaat kan ik dan de kopie gebruiken om als nieuwe omlijsting te dienen. Hoewel ik nu denk dat ik maar 1 deur ga openen (bestuurderskant), maak ik toch alvast een nieuwe lijst voor beide deuren. Het is een rechts bestuurde auto, dus de rechterdeur gaat eruit.
As you can see, it is very difficult to cut the door. There is only little space for cutting at the window part. I start with this job, if it fails the kit can be thrown in the bin. It would be a shame if everything would be ready. The rivets should be kept to the body. That's why i will copy the window part with 0,8 mm brass wire. When this goes wrong i can use the copy as a new window part. Although i think i will only open 1 door (drivers side), i will make new window frames for both doors. It's a right steered car, so the right door will be removed.
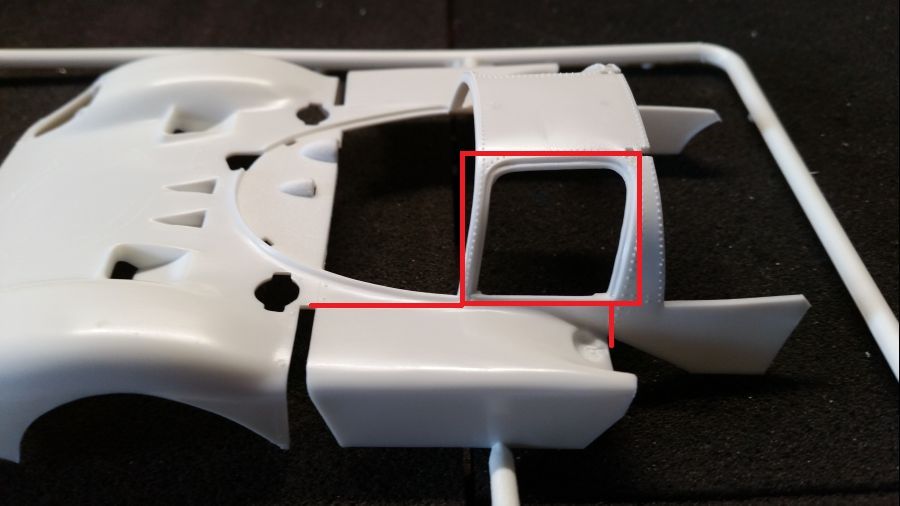
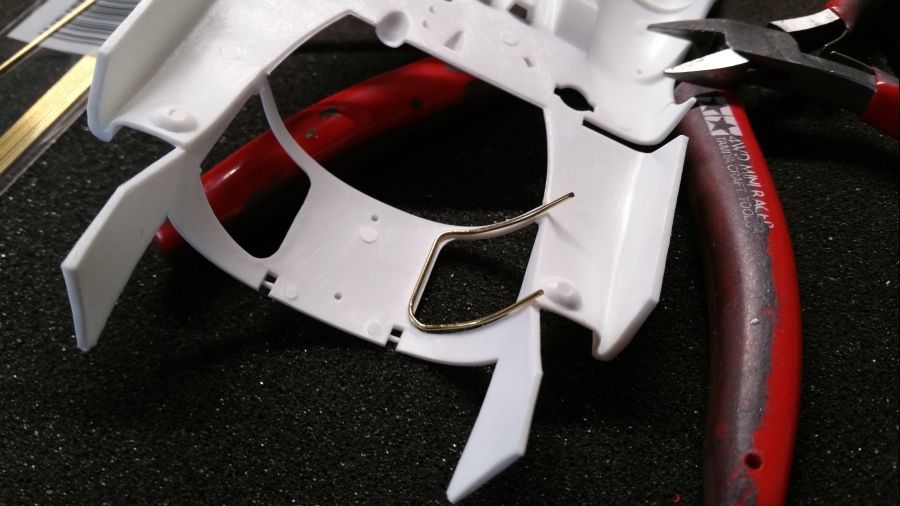
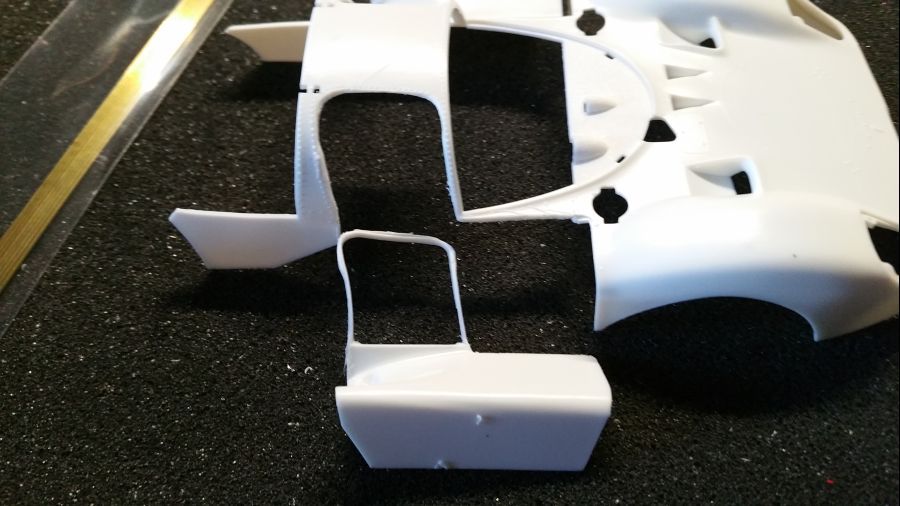
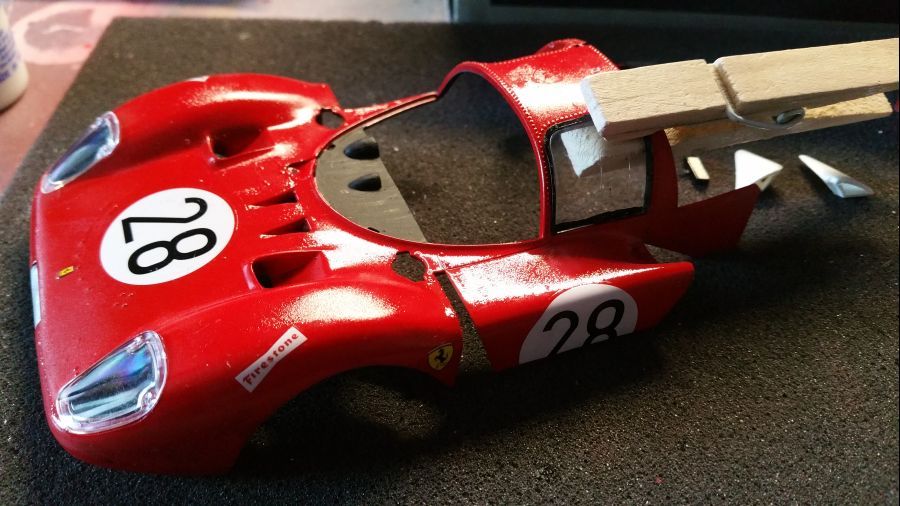
Daarna ga ik de deur eruit snijden. Ik begin met het meest moeilijke deel, die raamlijsten, die zijn het meest fragiel. Wanneer ik eerst de rest zou doen, zou er bijna geen verband meer in de deur zitten en dus amper steun meer. De raamomlijsting wordt later weer stevig wanneer het zijraam wordt geplaatst.
Then i start cutting the door out. I will start with the most difficult part, the edges around the window, these are most fragile. If i would start on the rest, the door would have no support any more. The window frame will become more strong again when the window is attached.
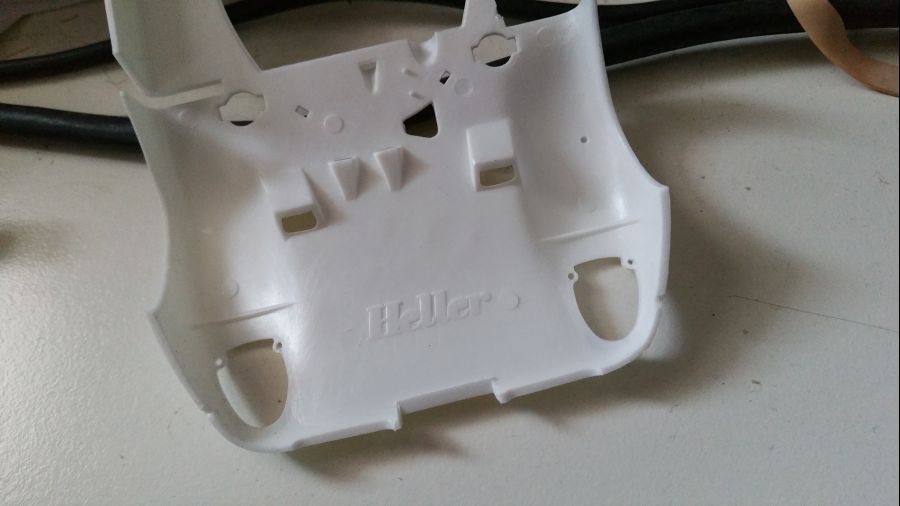
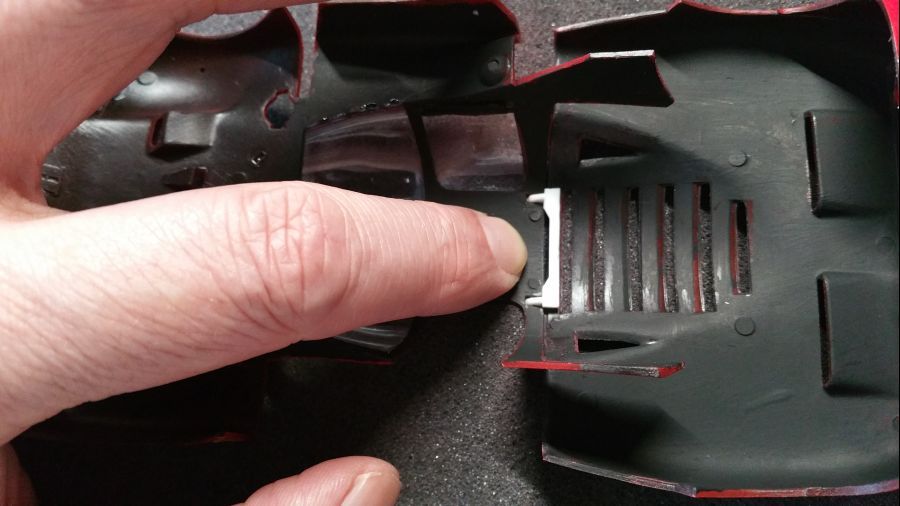
Ik zag bij toeval dit aan de binnenkant..... Heller, niet mijn favoriete merk, staat bekend om het slecht passen. Inmiddels hebben diverse Facebook-vrienden me al een waarschuwing gestuurd. Een uitdaging dus...
Noticed this by accident on the inside.... Heller, not my favorite brand, well known for a bad fit. In the meantime several Facebook-friends warned me. So a real challenge...
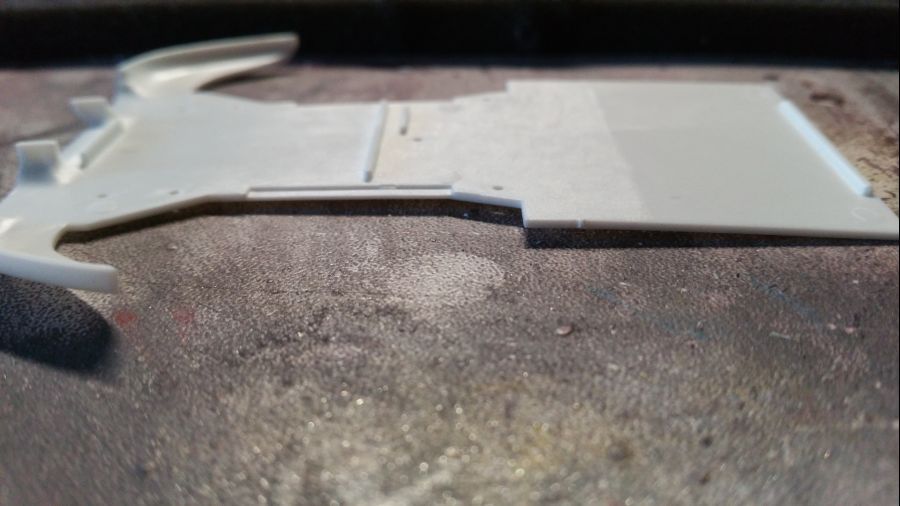
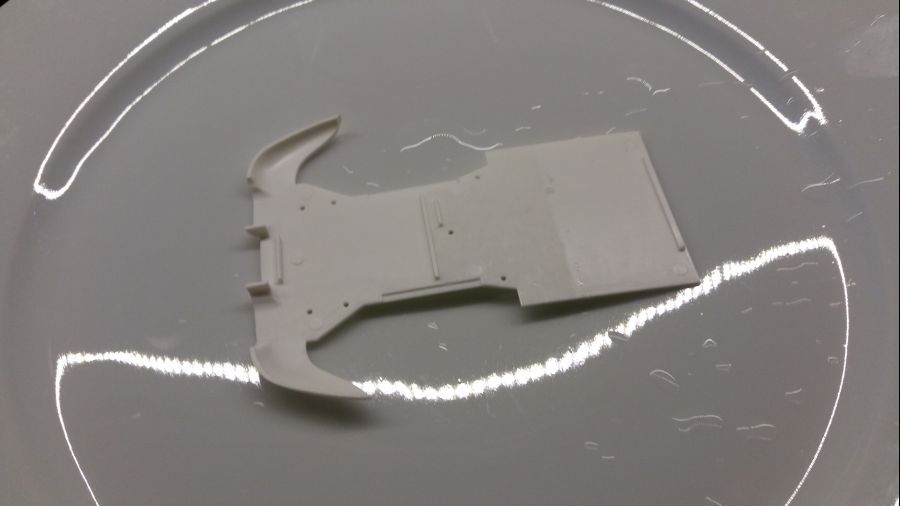
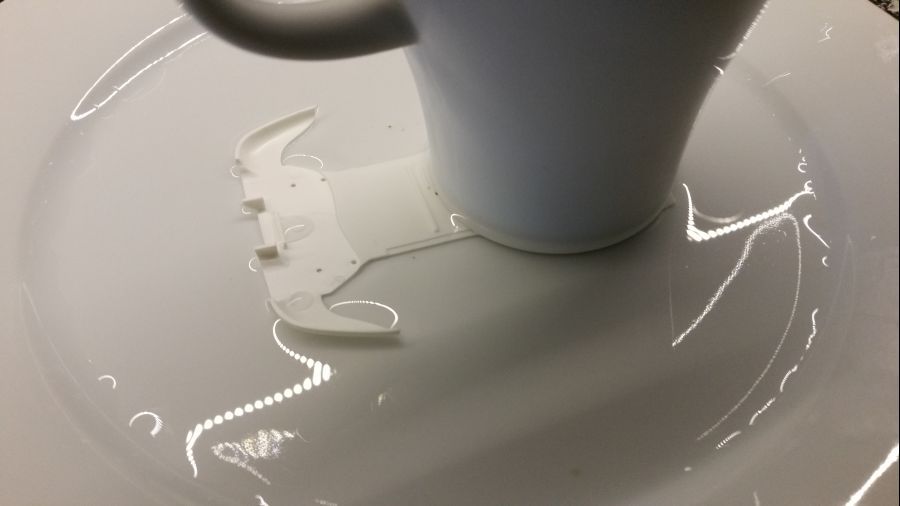
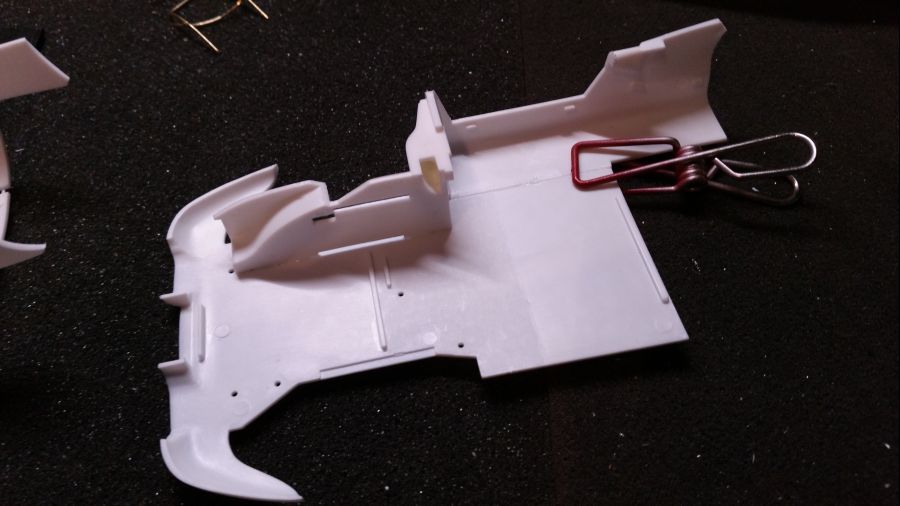
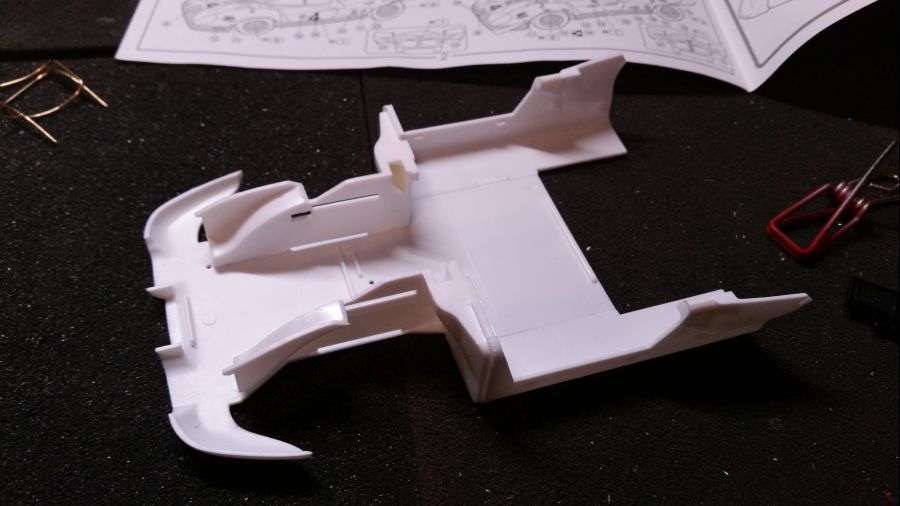
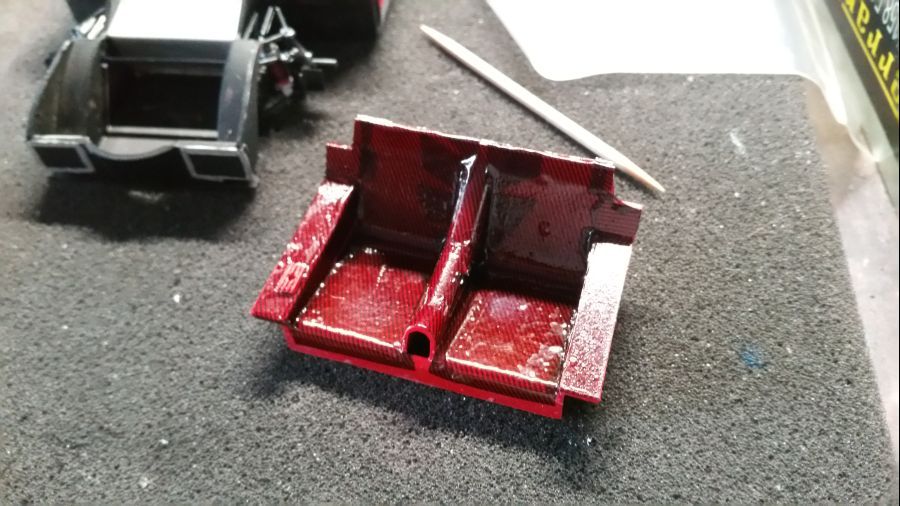
De vloer is in ieder geval niet plat. Deze leg ik op een plat bord, kokend water erbij en vervolgens een beetje gewicht erop. Dit laat ik een tijdje staan en haal het dan eraf en laat het afkoelen.
The floor is not flat. I put it on a flat plate, add boiling water and put some weight on it. I leave it alone for a while, then take it out of the water and let it cool down.
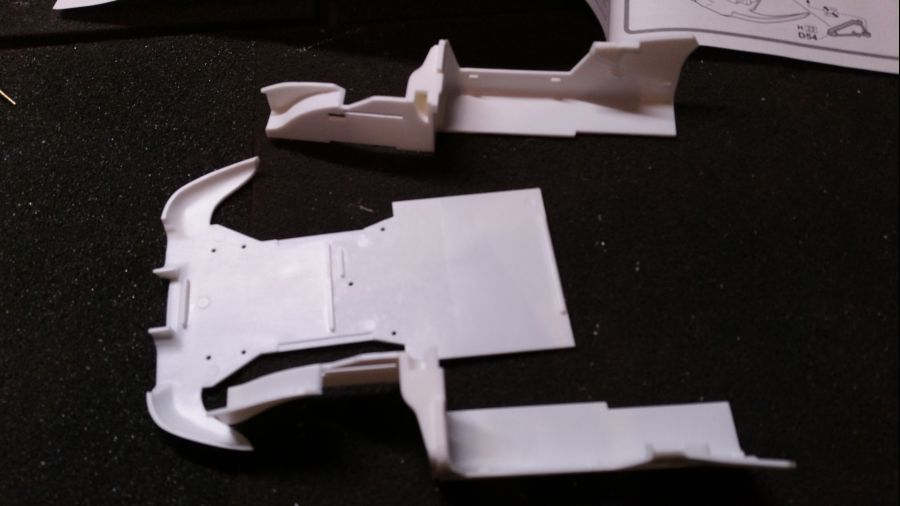
Het resultaat is niet helemaal vlak, maar ik doe het ermee. Daarna de zijkanten. Deze moeten met de bodemplaat worden verlijmd. De rechterplaat lijkt wat vervormd....de alarmbellen gaan bij mij al rinkelen...wat kom ik nog meer tegen. De linker wand is geen probleem
The result is not completely flat, but i have to do with it. Then the side walls are attached to the floor. The right one seems to be warped a bit....alarms are making noise...what else will cross my path. The left wall has no problem.

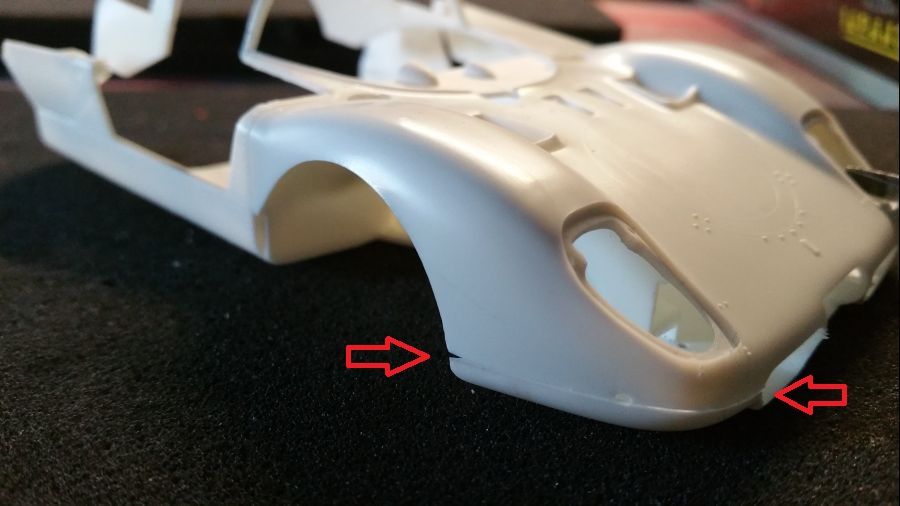
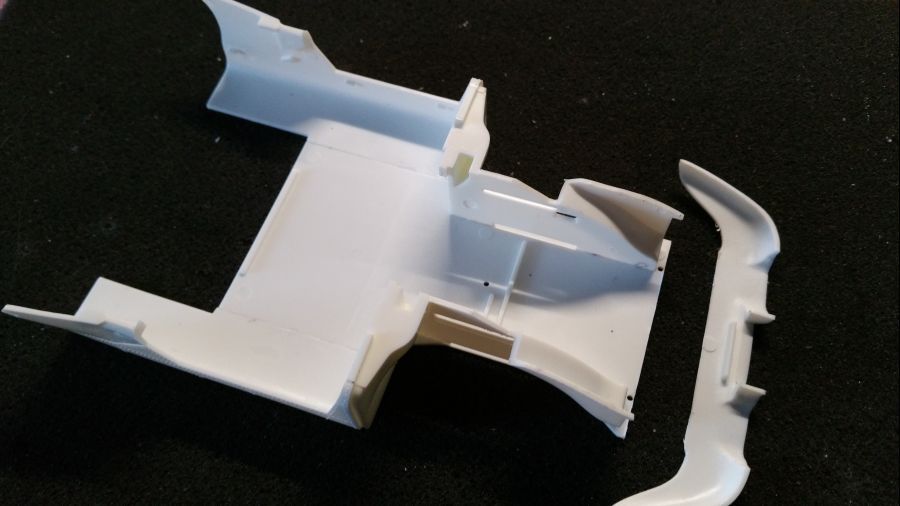
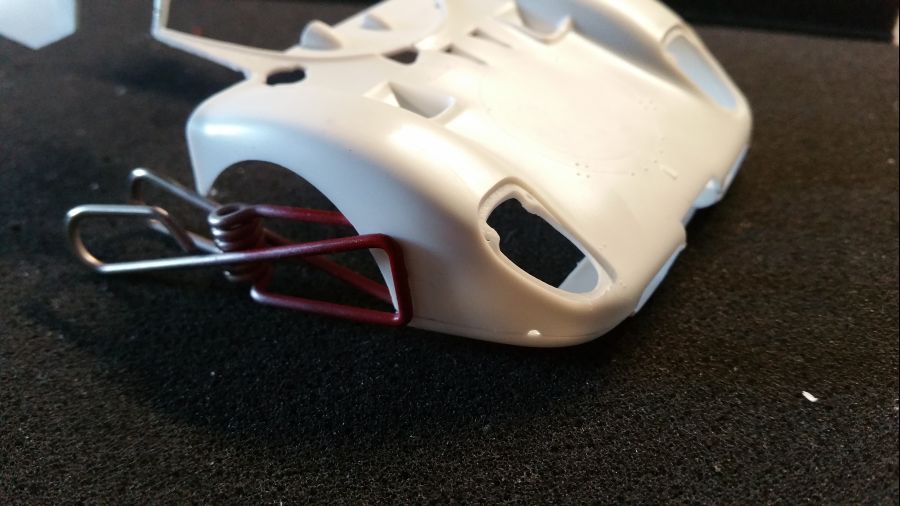
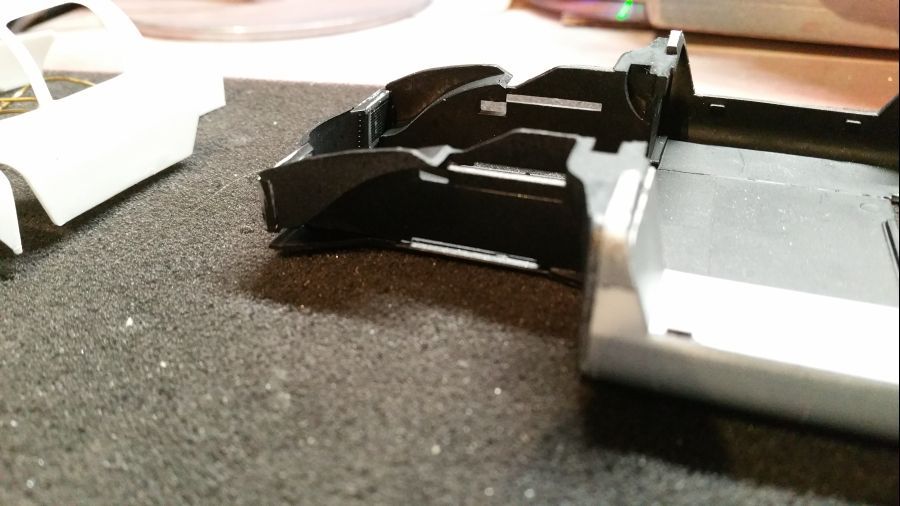
Wanneer ik de standaard procedure volg, wordt de body op de vloer gelijmd. Je krijgt dan aan de voorkant een lelijke naad. Dit wil ik voorkomen. De echte auto had dit ook niet. Daarom verwijder ik een deel van de vloerplaat, lijm dat alvast aan de body, zodat ik de boel met putty kan bijwerken.
When following the instructions, the body will be glued to the floor. On the front there will be a seem visible. I want to avoid it. The real car didn't have it either. Therefore i will cut a part of the floor, attach it to the body, so i can work with putty to smoothen it.

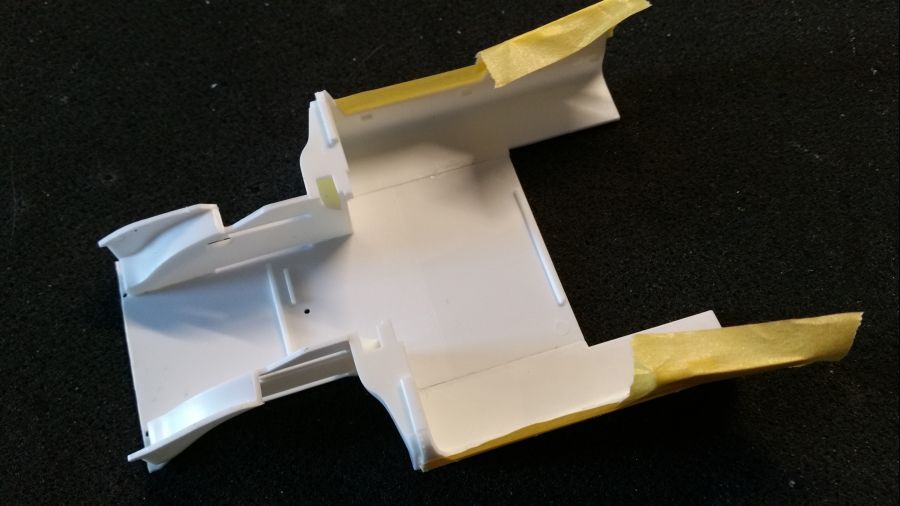
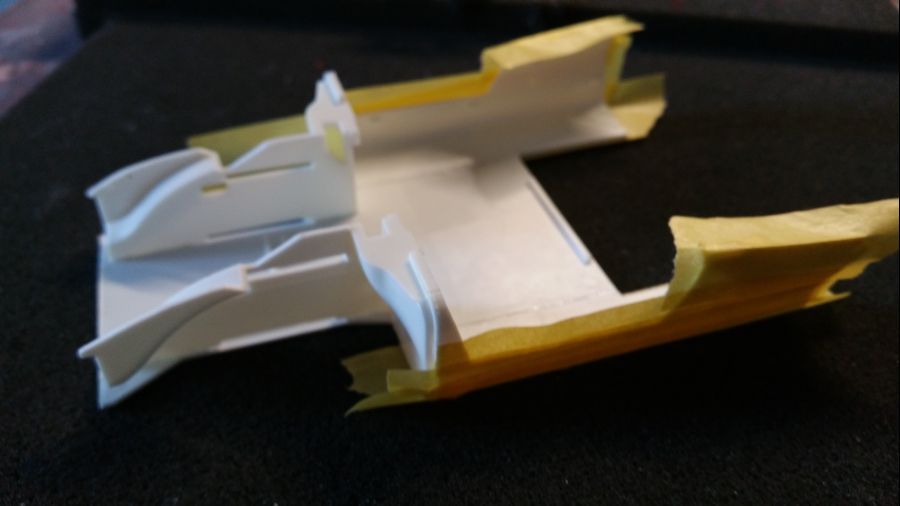
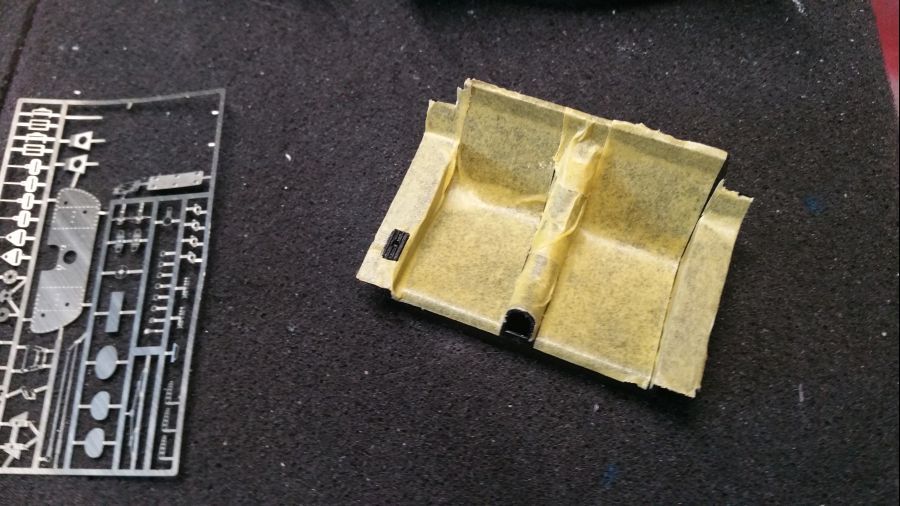
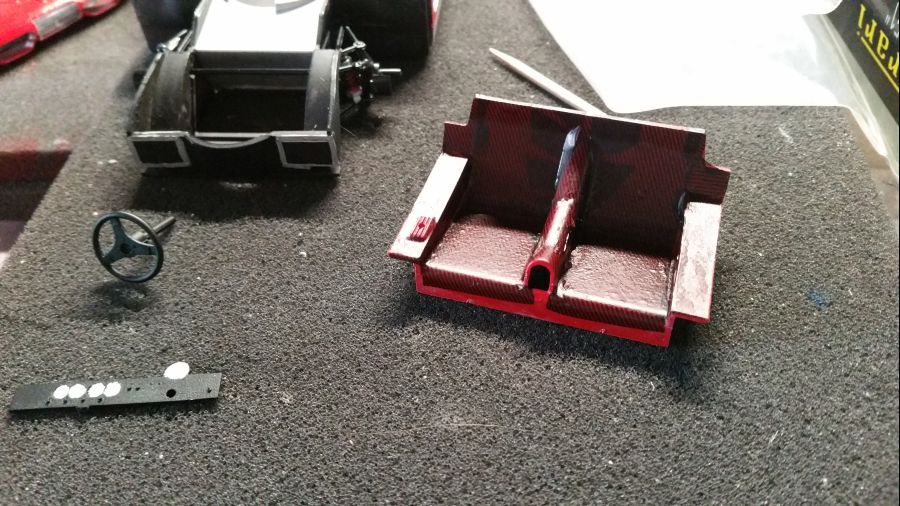
Terwijl de putty droogt, ga ik eerst verder met het afplakken en spuiten van de bodem. Omdat er meerdere onderdelen van verschillende kleuren met elkaar worden verbonden, zal dit spuiten in delen gebeuren.
While the putty dries, i will continue with masking and painting the floor. Because multiple parts need different colours, i will do this in parts.
Terwijl de verf droogt ga ik weer verder met de body. De putty wordt glad geschuurd.
While the paint dries i will continue with the body. The putty has been sanded.

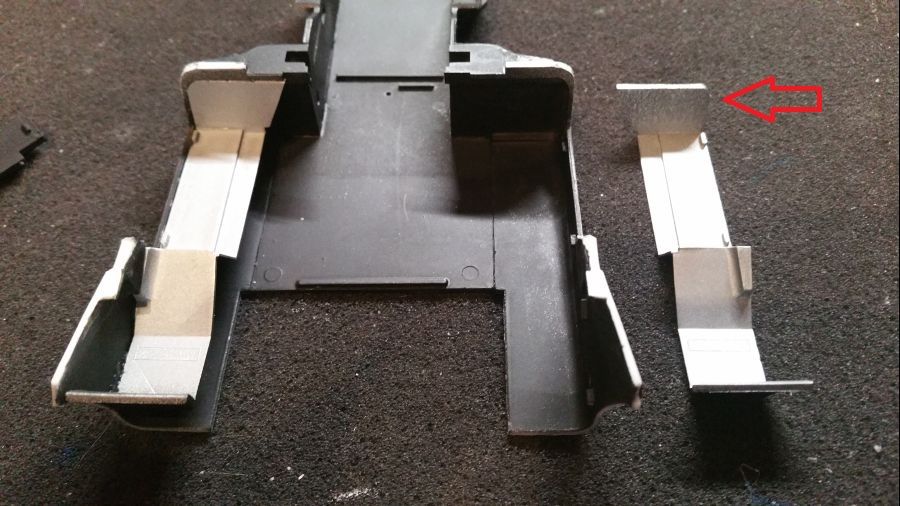
Nu eerst nog wat onderdelen voor de binnenkant. De linkerkant kan worden aangebracht. De rechterkant moet nog even wachten. Ik moet een soort scharniersysteem bedenken voor de deur... Ik weet nog niet of ik deze dan kan openen en sluiten...
Then some parts on the inside. The left side can be glued. The right side has to wait. I need rto come up with some kind of henge system for this one. I don't know if i will be able to open and shut it...
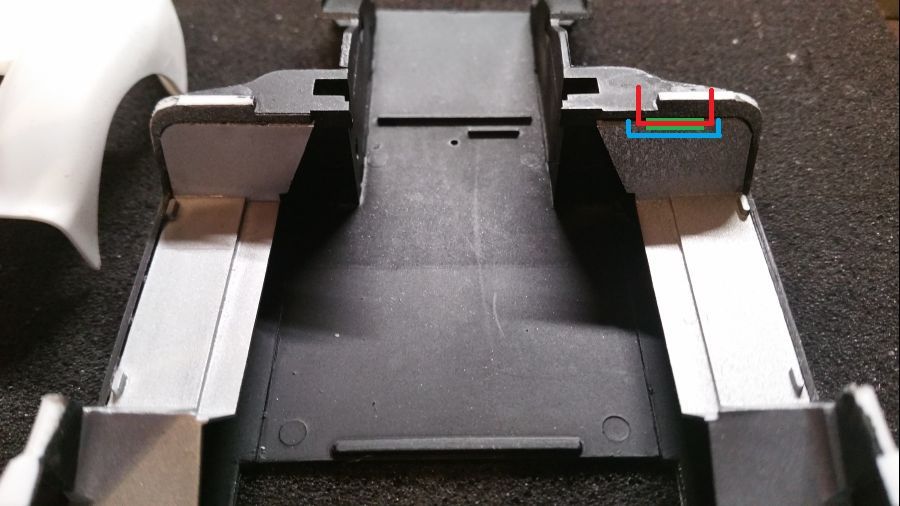
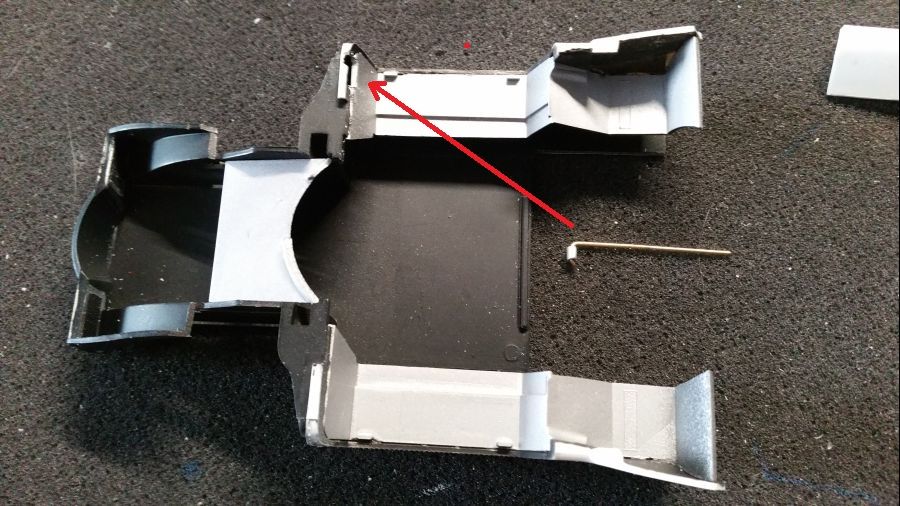
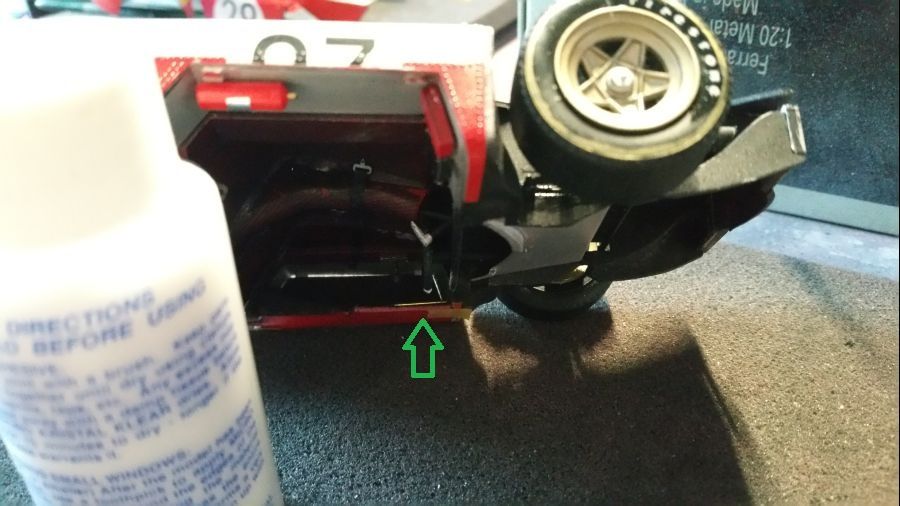
Ik denk aan dit... een deel wegsnijden (blauw), een stukje buis aanbrengen (groen) en een stuk metaal draad en doorheen en buigen (rood). De uiteinden lijm ik aan de deur. Misschien kan ik het zelfs wegwerken in 2 gleuven en weer dichtmaken met putty. Een klein buisje aan de deur is ook een optie.
I am thinking of this... I will cut a piece (blue), attach a piece of tube (green), and put a piece of metal wire through it and bend it (red). The ends i will glue at the door. Or make 2 trenches and close them with putty. A small piece of tube attached to the door is another option.
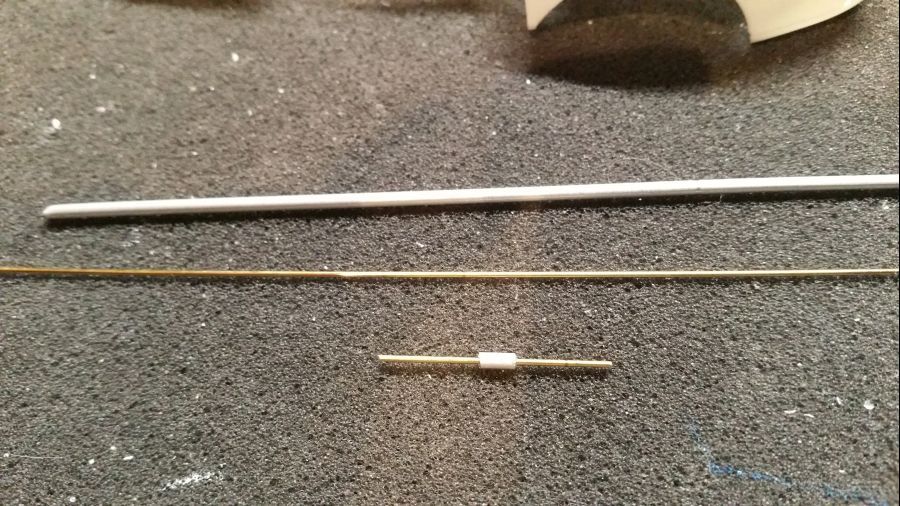
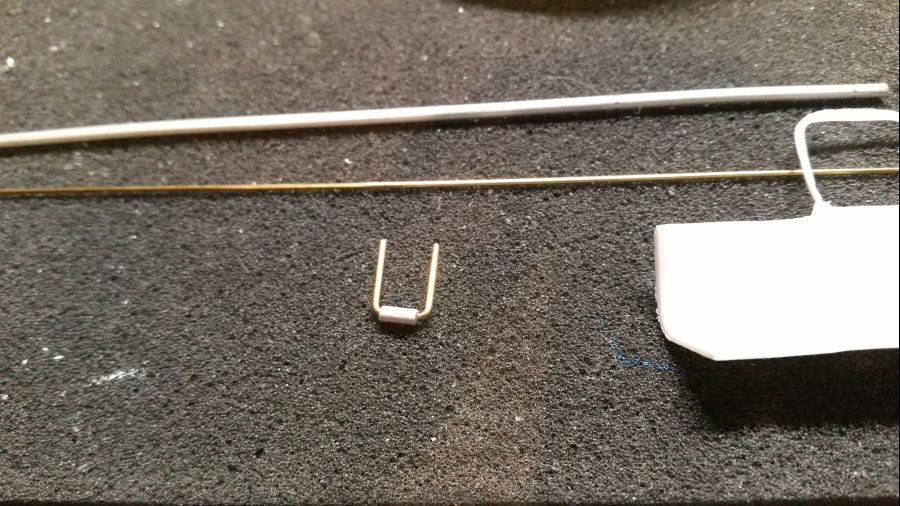
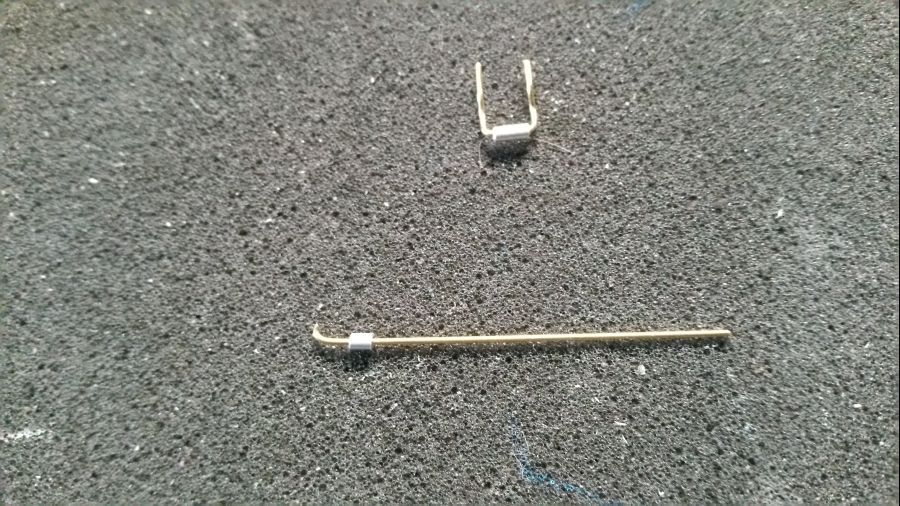
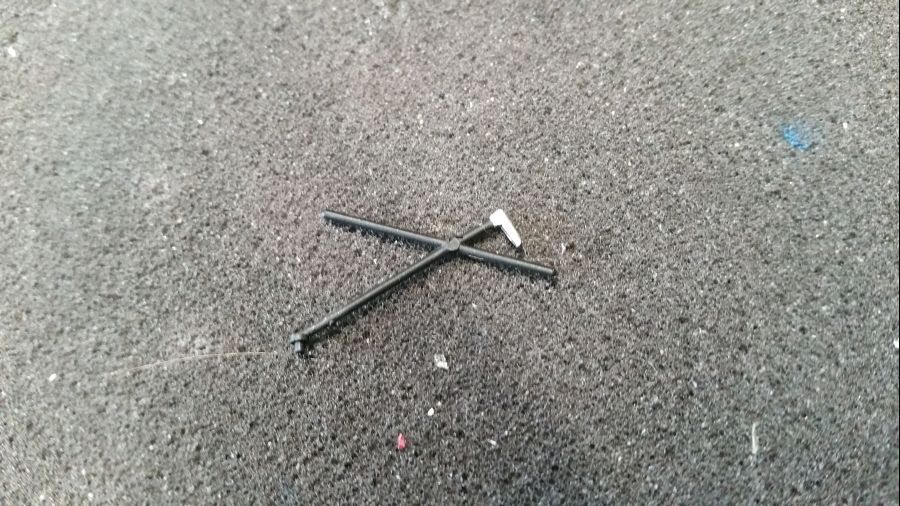
Lang over nagedacht, maar daar gaat ie. Een stukje aluminium buis en een stukje messing draad, wat buigwerk, wat slijpwerk, wat lijmen en dat zou dan een functionerend scharnier moeten opleveren.
I thought it over, but there we go. A piece of aluminium tube and brass wire, some bending, some cutting, some glue and this should result into a working hinge.
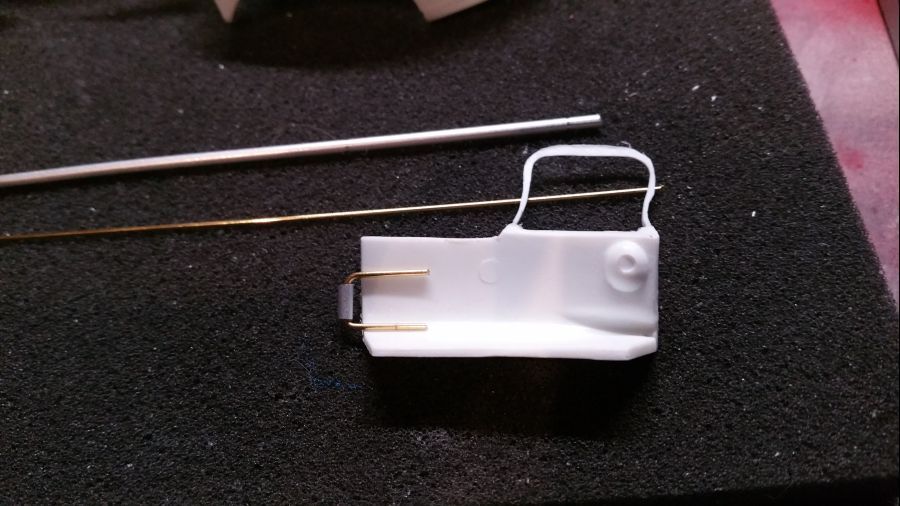
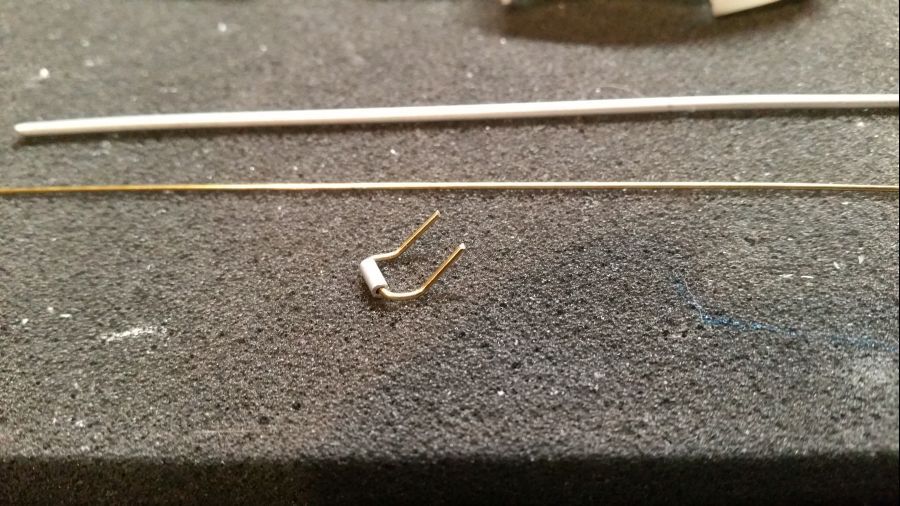
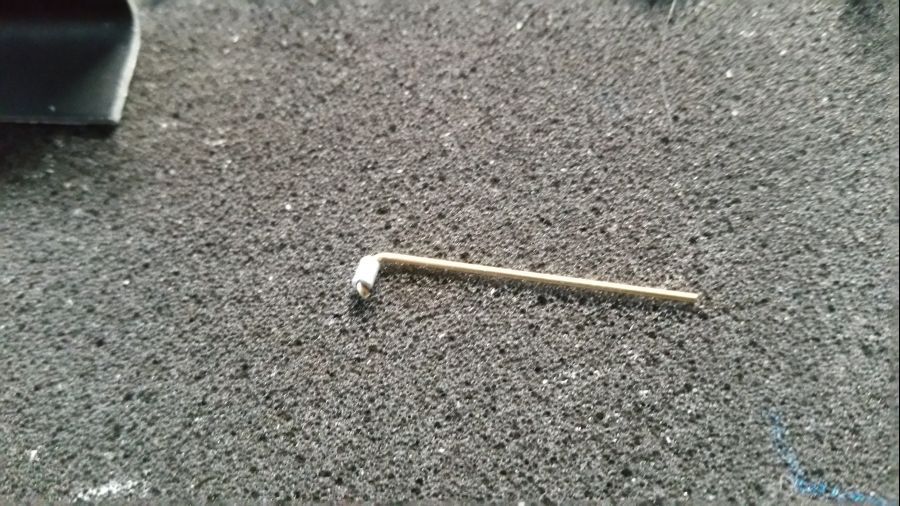
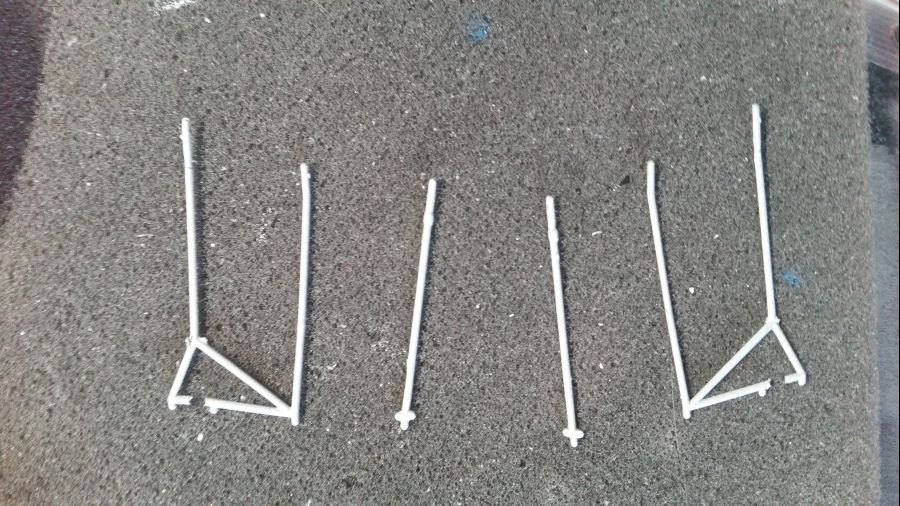
Na wat proberen zie ik dat dit niet gaat werken. Ik ga weer een nieuw scharnier maken. Deze keer een met maar 1 arm.
After some tests it is obvious this will not work. So i will make a new hinge. This time one with only 1 arm.
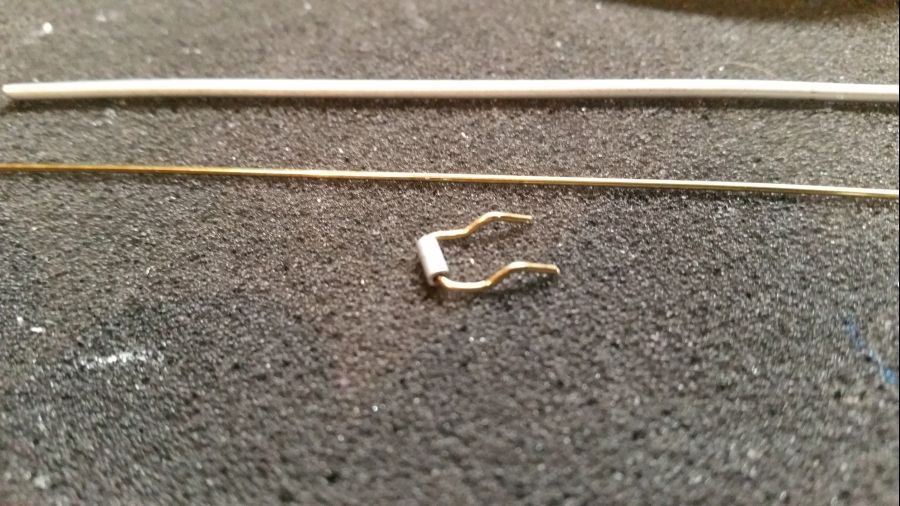
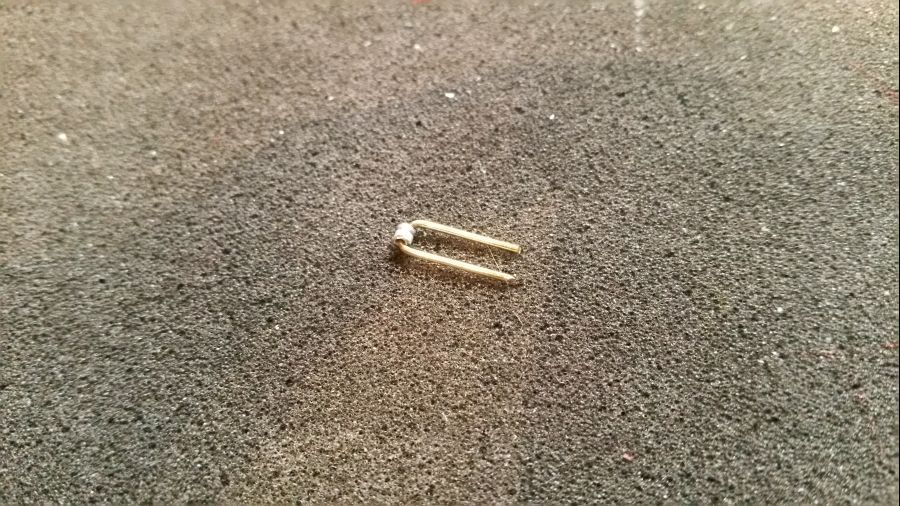
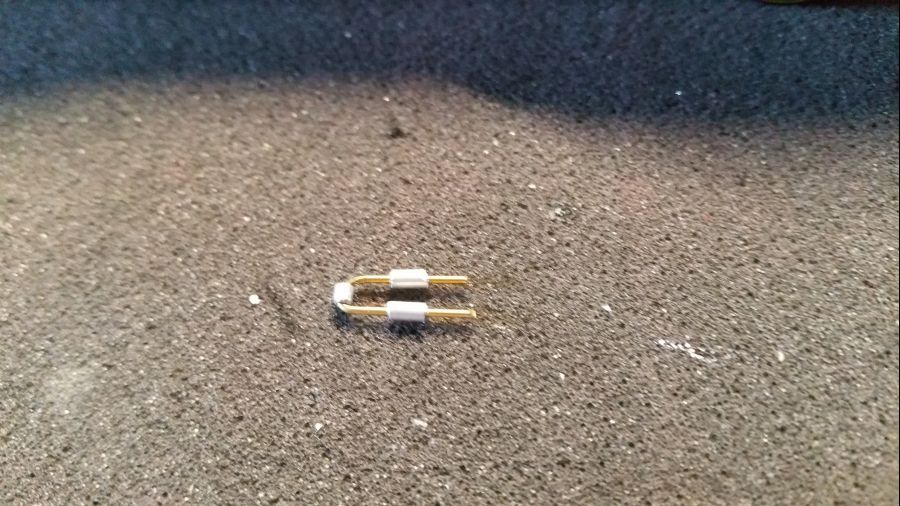
Ik heb niet veel vertrouwen in het scharnier met 1 arm.. daarom maak ik nog eens een 2 armig exemplaar...dan kan ik kiezen.
I am not too confident about the 1 armed hinge...therefore i make another 2 armed one...so i can choose now.
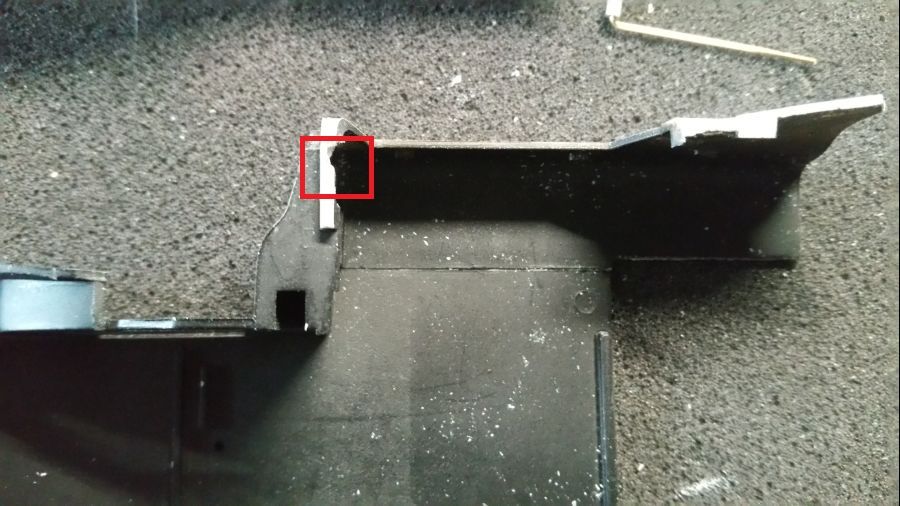
Daarna ruimte maken in een rand, zodat het scharnier vrij kan bewegen.
Then creating some space so the hinge has space for movement.
Dan gebeurt waar ik bank voor was. Het vele passen heeft zijn tol geëist. Dat komt wel weer goed wanneer het doorzichtige raam wordt geplaats. Bovendien heb ik de zelf gemaakte raamlijsten nog.
Then what i feared for has happened. All the test fits have it's toll. This will be ok when the window gets attached. And i have my home made window frames.
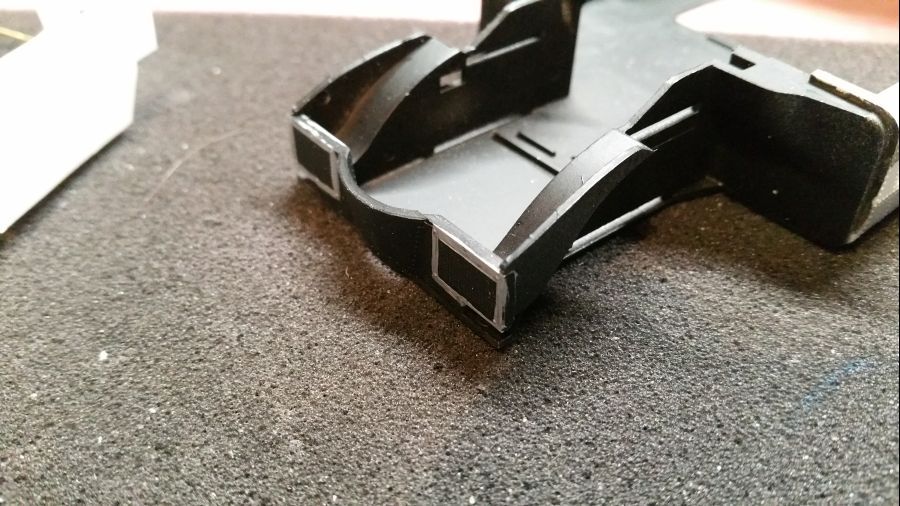
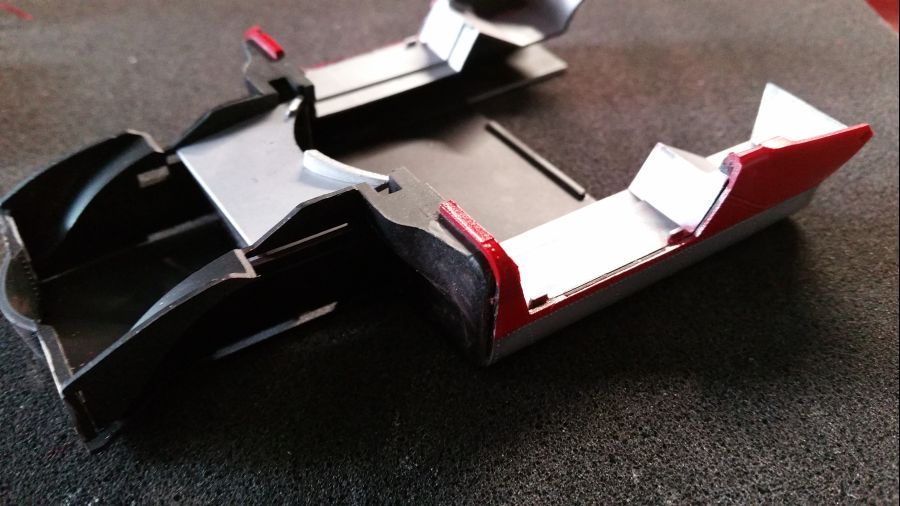
De drempels bij de deuren zijn nu geplaatst. Voordat het scharnier wordt geplaatst, ga ik eerst nog de benodigde delen met rood spuiten. Het kan nu nog goed worden afgeplakt.
The doorsteps are mounted. Before attaching the hinge, i will paint some red on some parts. At the moment it is still possible to mask.
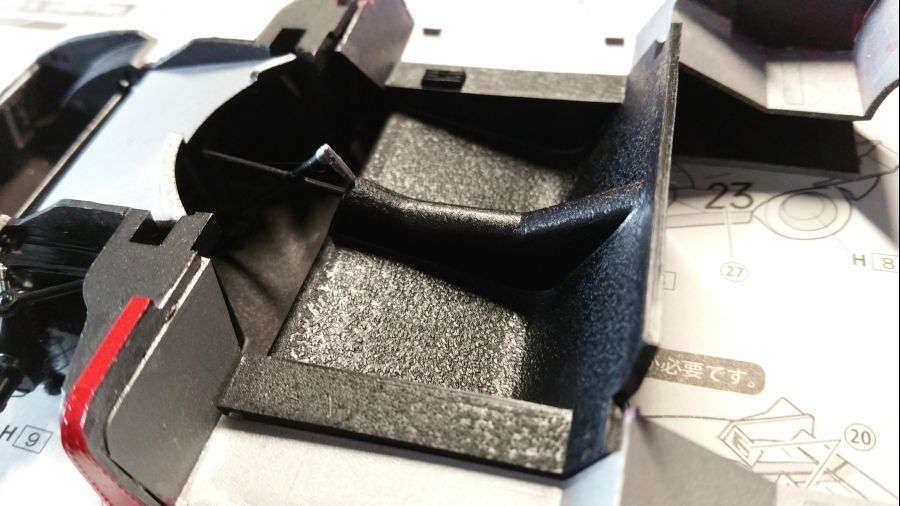
Dan verder met iets wat lijkt op een koeling... Hiervandaan loopt een pijp naar de remmen toe. Dit moet ik zelf maken. Eerst maar eens zien of er ruimte voor is.
Next is something that looks like a cooler... From this a kind of pipe leads to the brakes. I need to create this myself. First i need to find out if there is space for this.
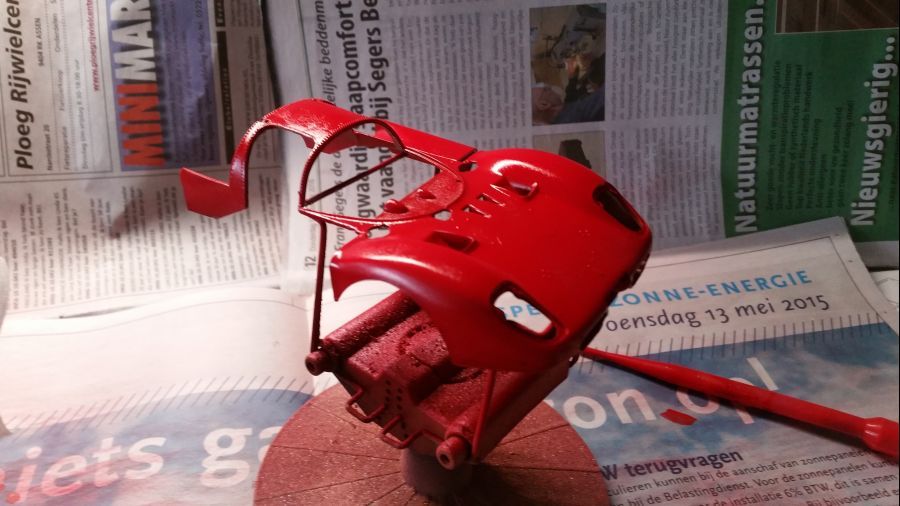
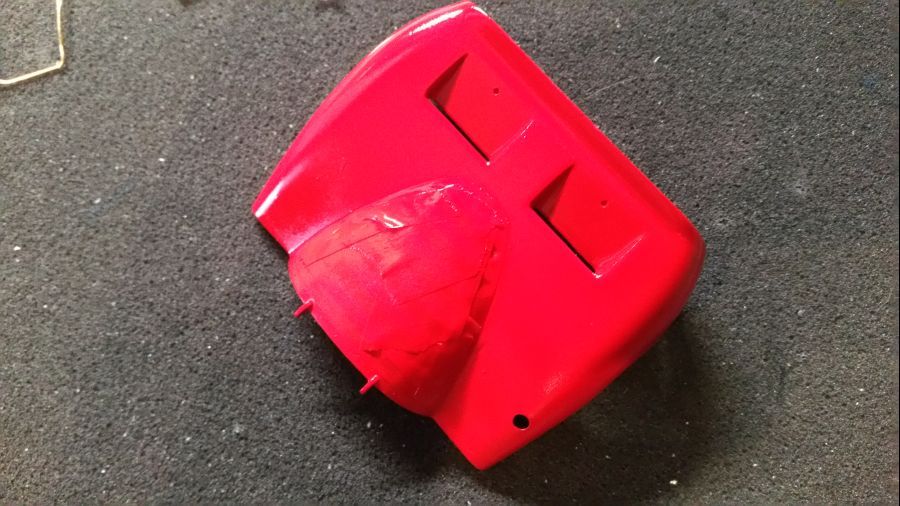
Tijd voor het eerste rood. Voor deze wagen gebruik ik Zero Paints ZP-1007 1970's-1980's Rosso Formula 1. Dan de glanslak eroverheen en goed laten drogen.
Time for the red. For this car i will use Zero Paints ZP-1007 1970's-1980's Rosso Formula 1. Then the clear gloss will cover the paint and i will let it dry for a while.
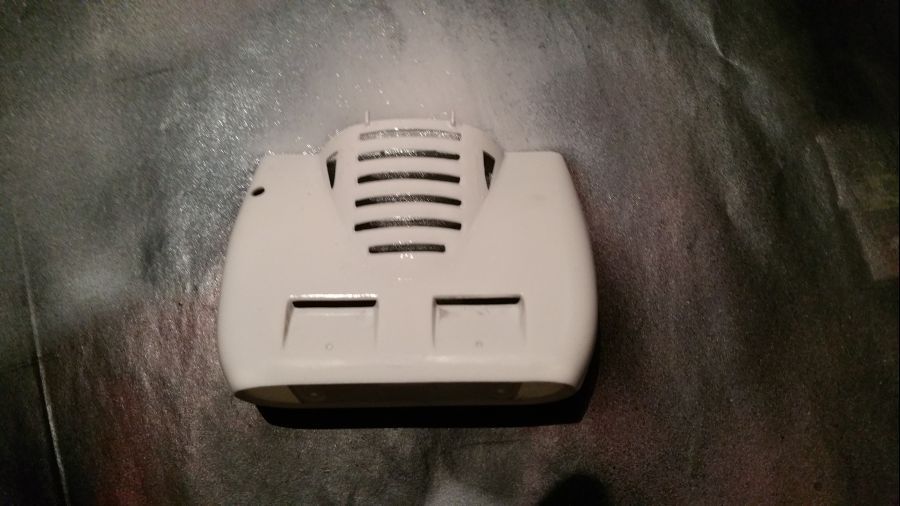
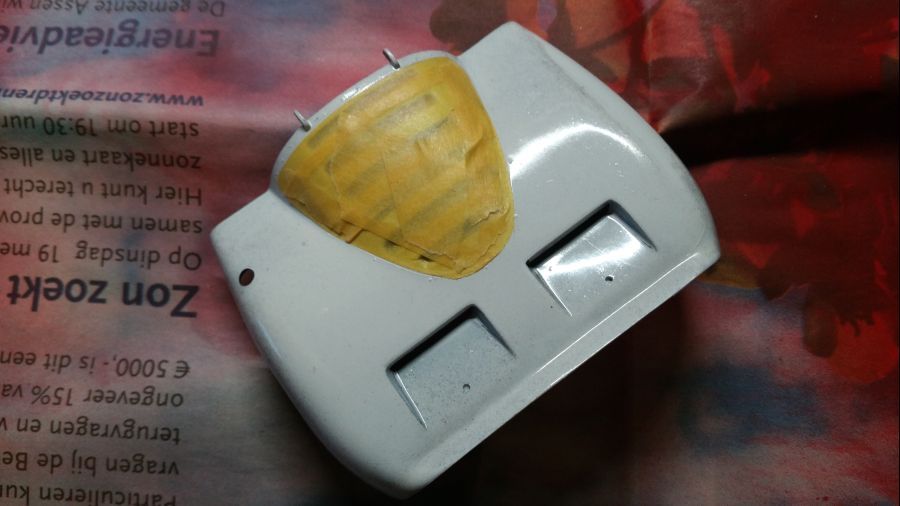
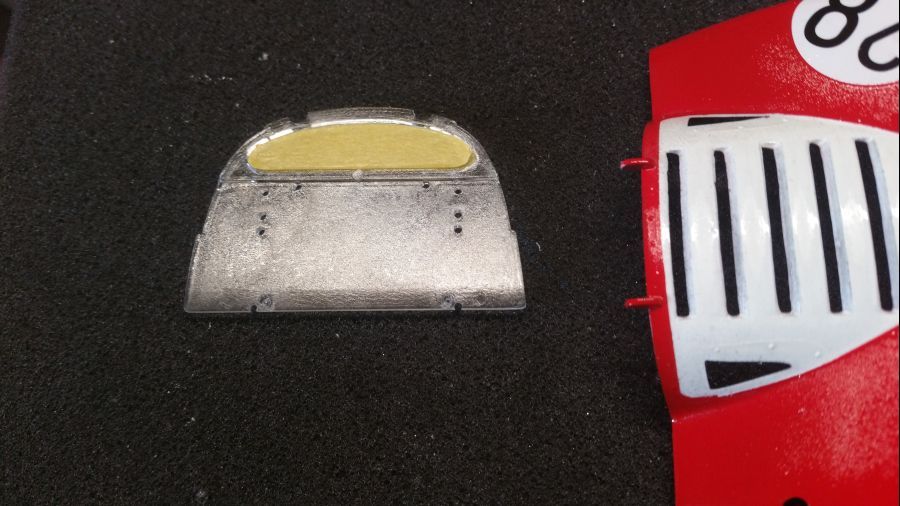
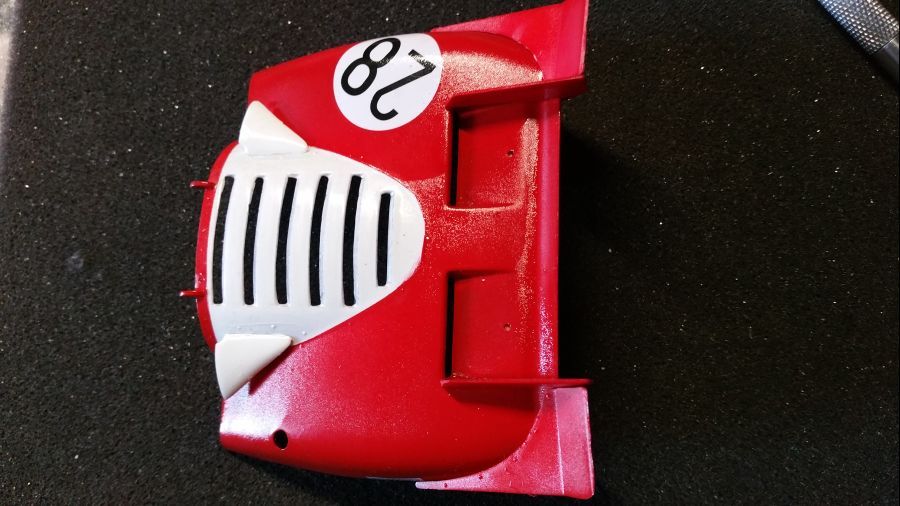
Het deel dat straks de motor bedekt krijgt eerst Tamiya Pure White TS-26 op het roosterdeel gespoten.
The engine cover gets some Tamiya Pure White TS-26 on the part with all the openings.

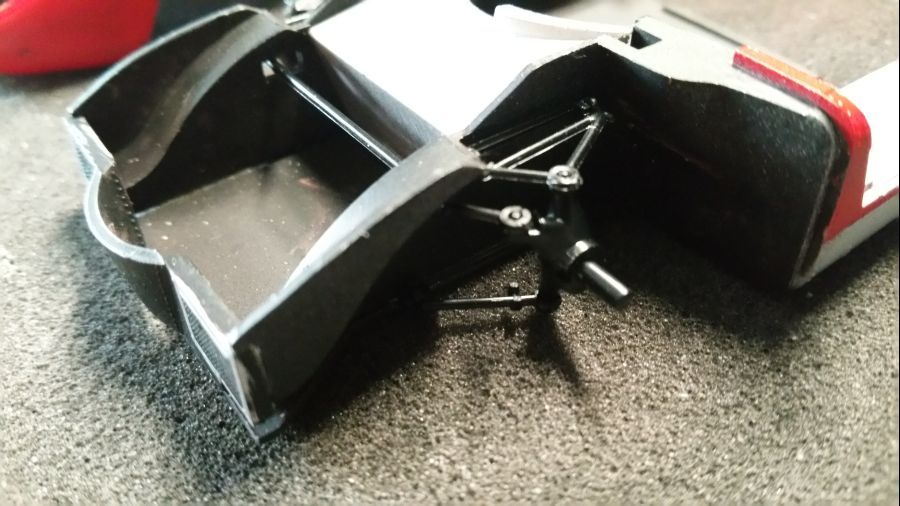
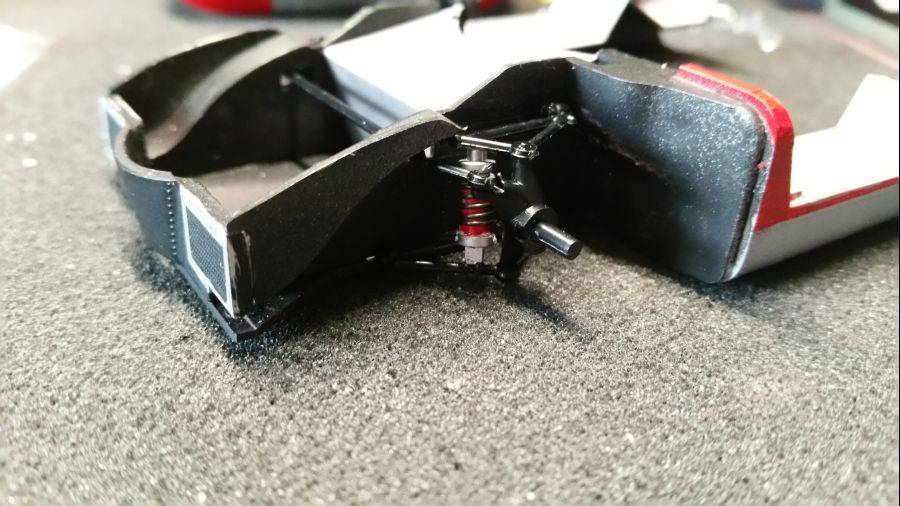
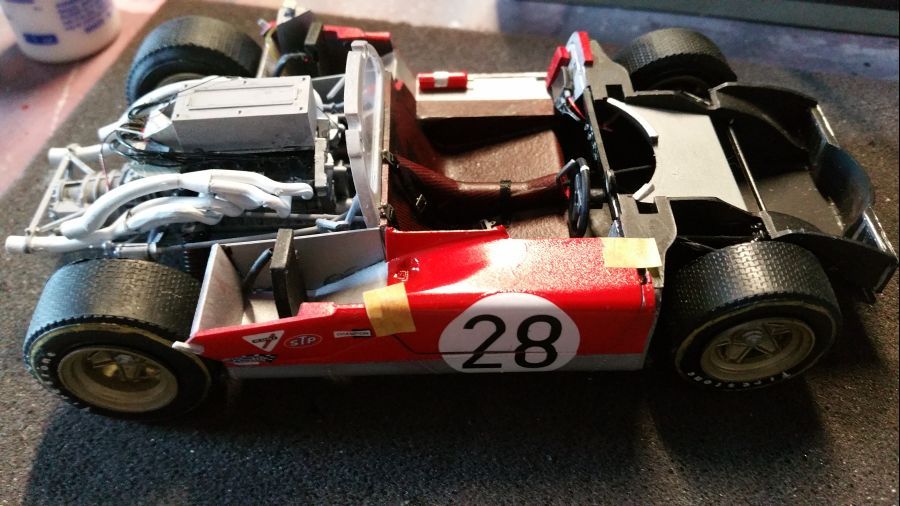
Dan eerst de wielophanging aanbrengen...
Then the front wheel suspension is attached...
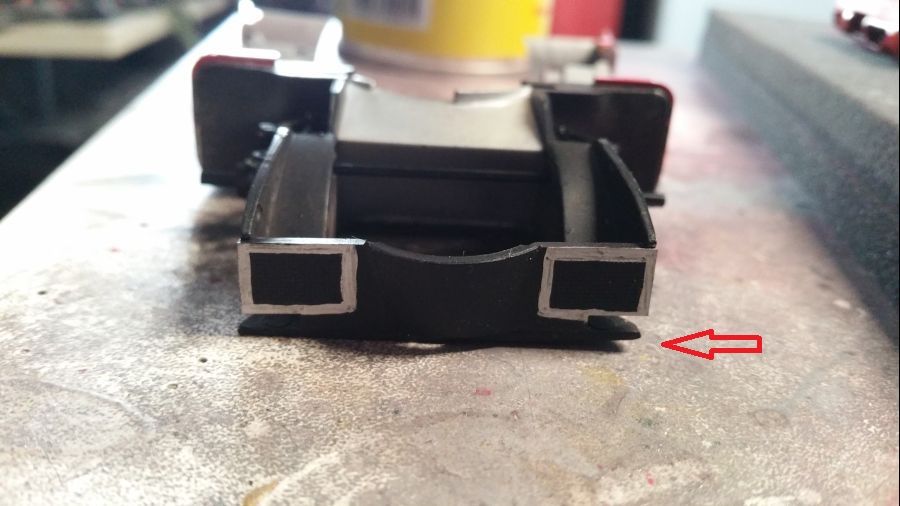
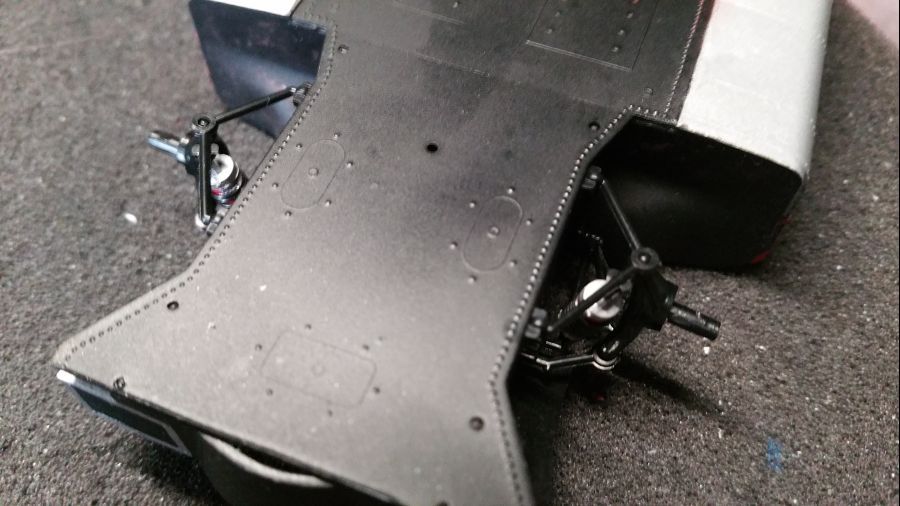
Nu valt op dat ook de bodemplaat niet vlak is. Mijn Facebook vrienden krijgen gelijk. De hele kit is wat vervormd.
Now you can see the floor isn't flat. My Facebook friends were right. The complete kit seems to be warped.
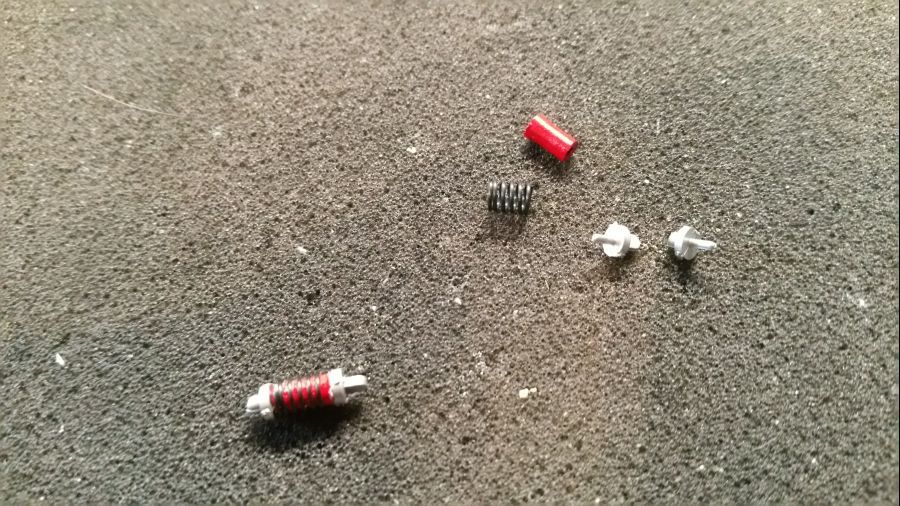
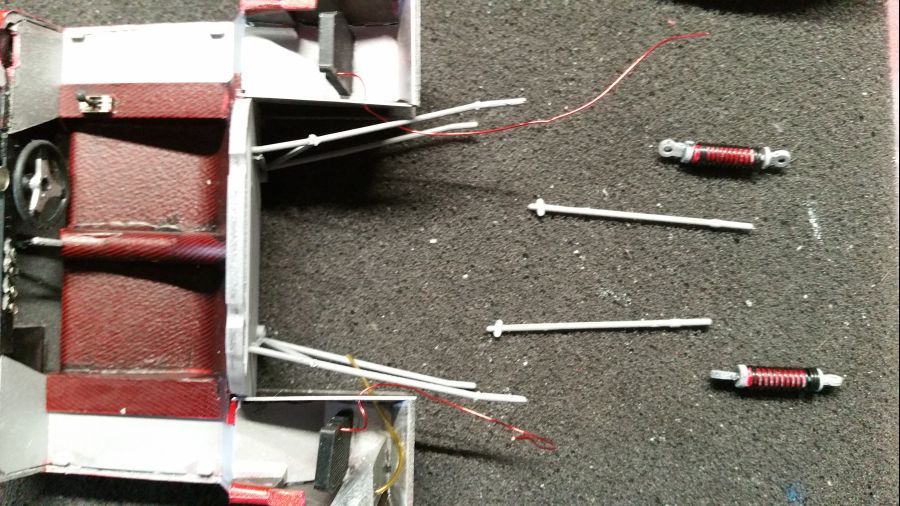
Gewoon doorgaan, zien waar het eindigd. Nu verder met de schokbrekers.
Just continue, see where it ends. Now continuing with the shocks.
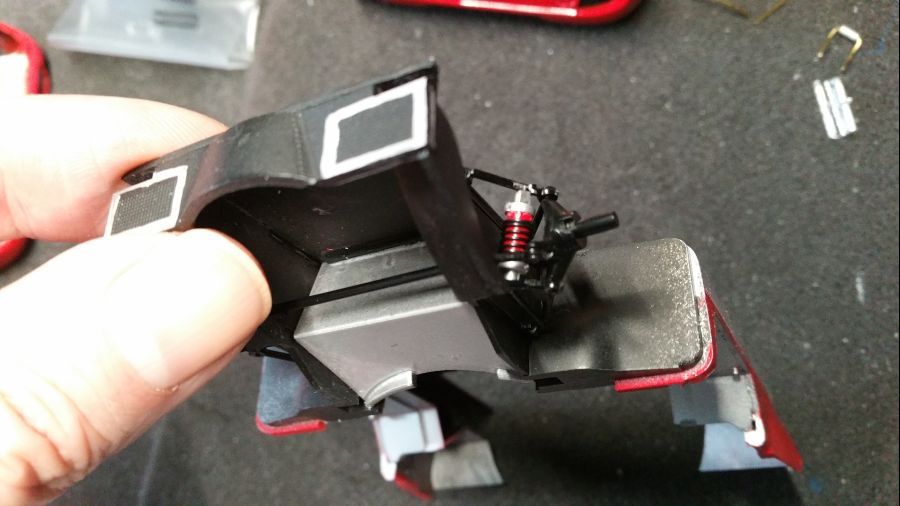
Nu pas kan ik zie of er genoeg ruimte is om die koelingbuizen te plaatsen waar ik het over had. Lijkt mij van wel.
Only now i can determine if there is space enough for those cooling tubes i was talking about. Looks like a yes to me.
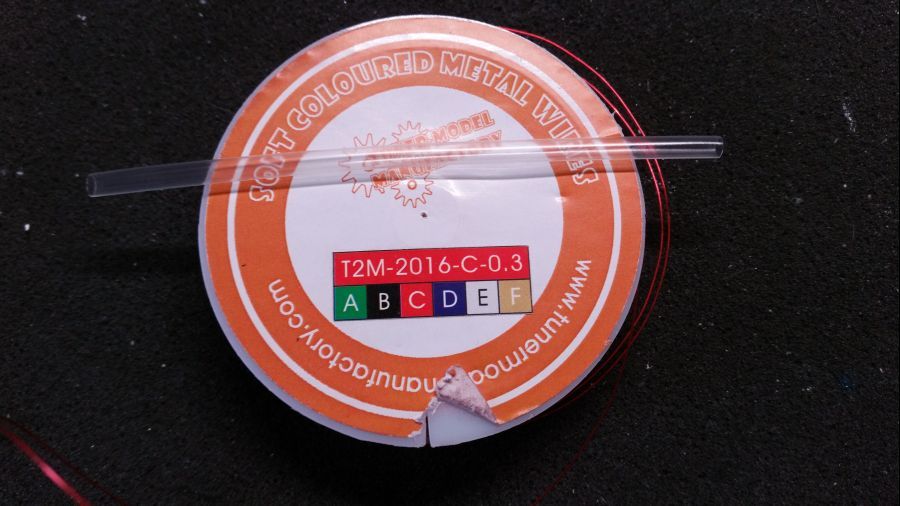
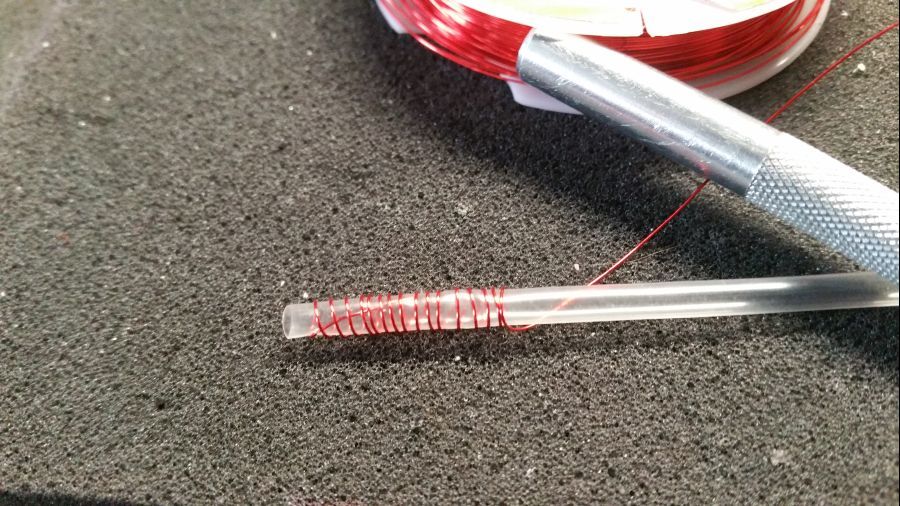
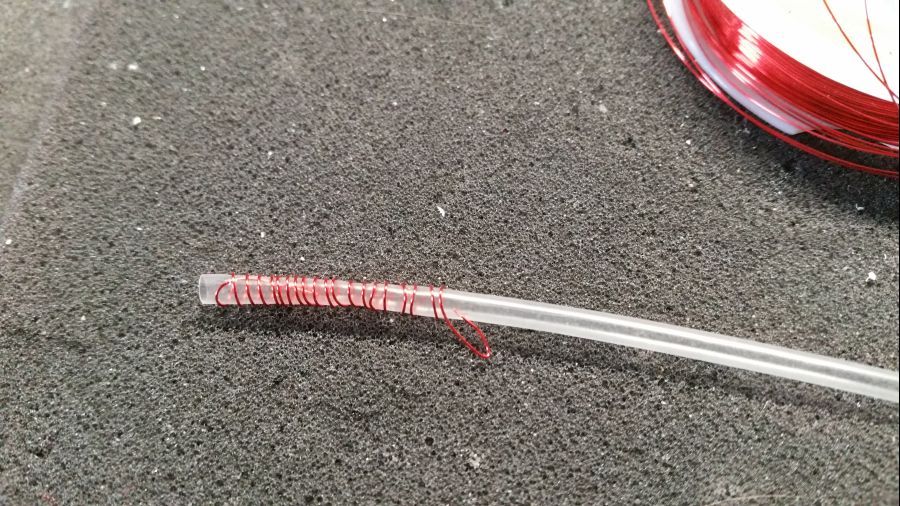
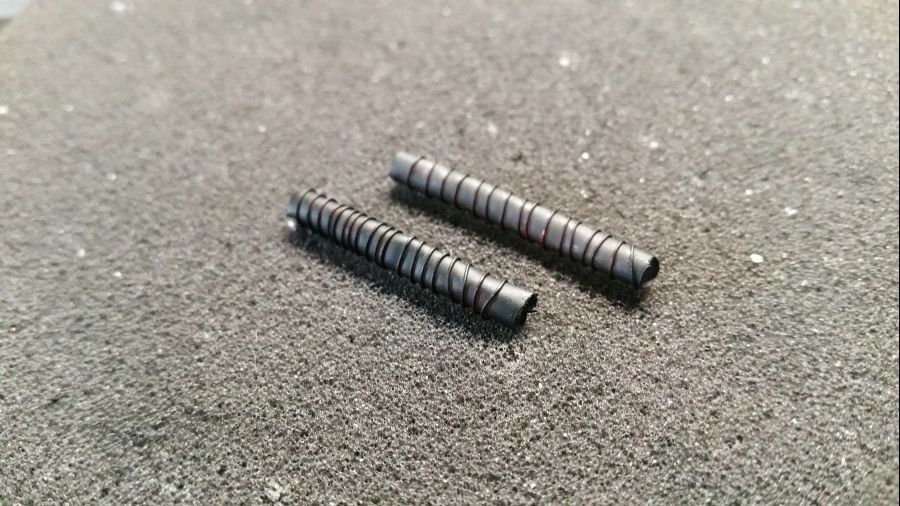
De ribbelige buis die ik heb is te dun. Daarom ga ik proberen iets te maken van krimpbuis en draad... De metaal draad draai ik om de buis, aan het eind prik ik een klein gaatje in de buis en steek de draad erin om te fixeren. Daarna wat verf erover. Het is geen perfecte oplossing, maar het grootste deel verdwijnt achter de velg. De buis is nog steeds buigzaam en kan zelfs plat worden gemaakt.
The corrugated tube i have is too thin. Therefore i will try to create something from shrink tube and wire... I will turn the metal wire around the tube, at the end i punch a hole in the tube and put the wire in it to fixate it. Then some paint on it. No perfect solution, but the main part will be hidden behind the rim. The tube can still be bent and can even be more flat.

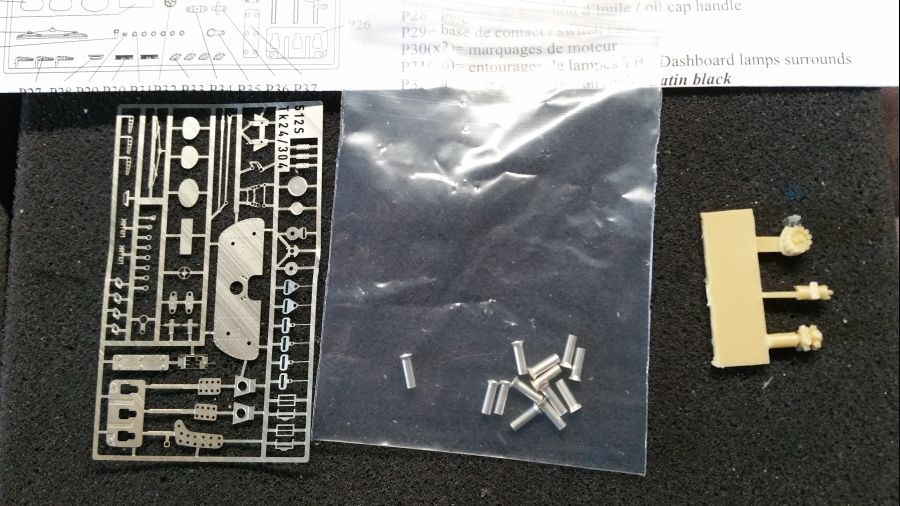
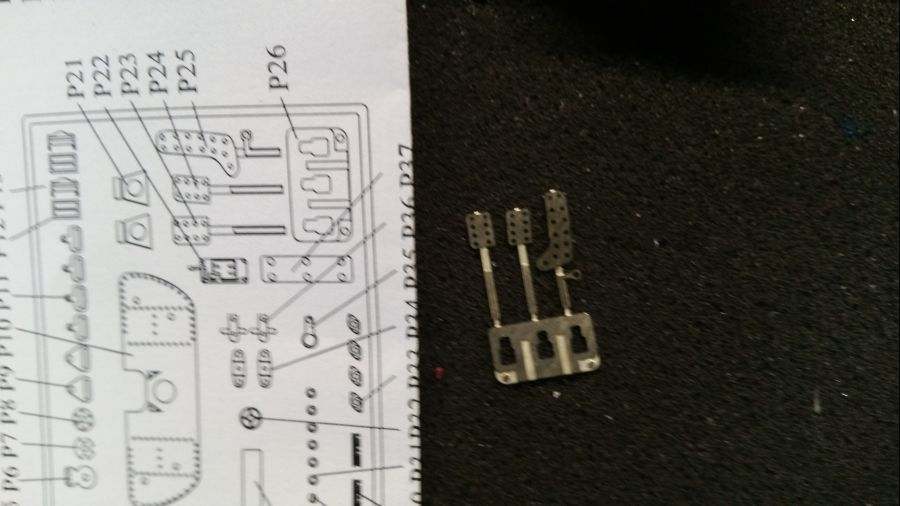
Bij mijn speurtocht op het web kwam ik nog een etched set tegen voor een Ferrari 512S van Renaissance. Deze kwam vandaag binnen. Ik nu de pedalen etc installeren. Daar had ik nog even mee gewacht.
At my search on the web i came across an etched set for the Ferrari 512S from Renaissance. This one arrived today. Now i will be able to install the pedals. I waited for the arrival.
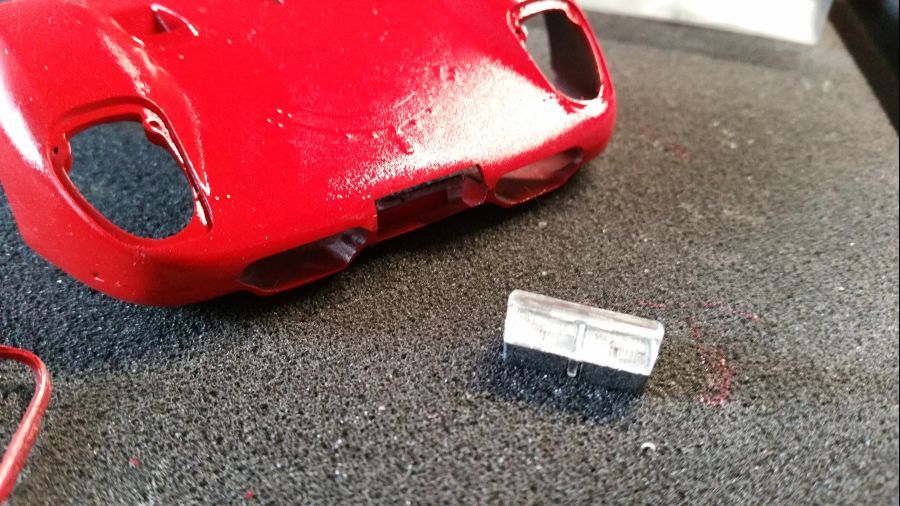
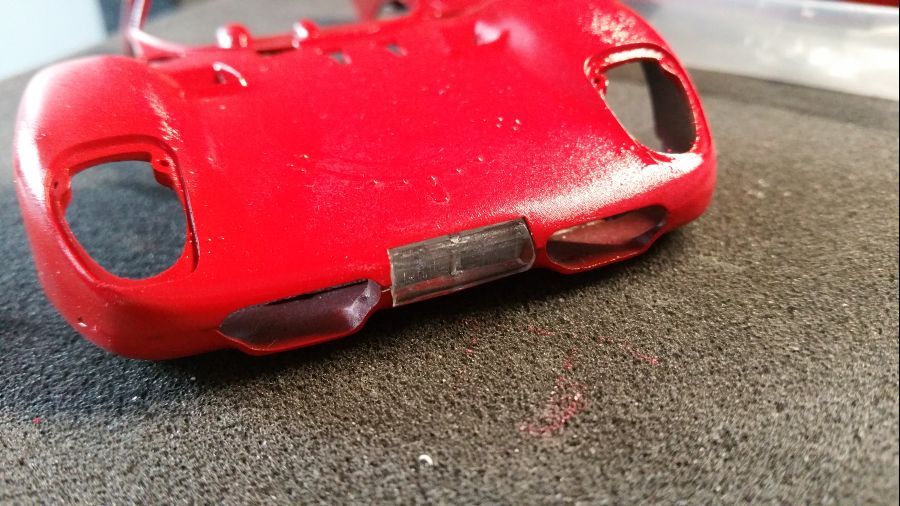
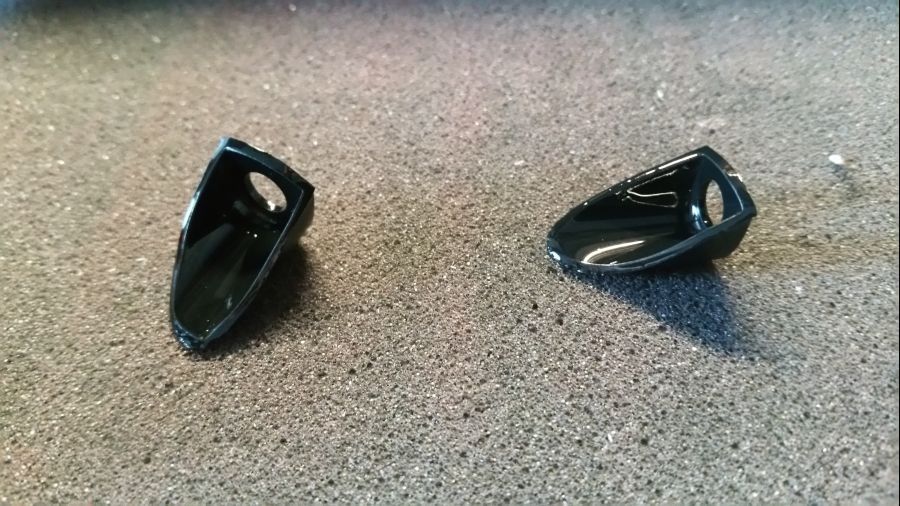
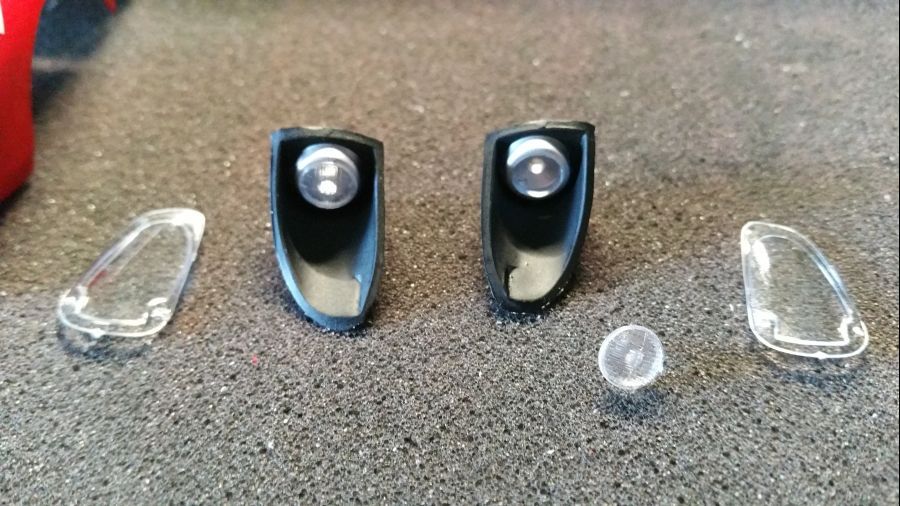
De mistlamp wordt in elkaar gezet en geplaatst. Ik ga waarschijnlijk een versie maken zoals de wagen aan de start kwam. De mistlamp en koplampen worden dan bedekt. Dit doe ik pas aan het eind.
The fog lights are assembled and attached. I will probably make a version of the car as it looked like when it started the race. The lights need to be covered for this version. I will do this when almost ready.
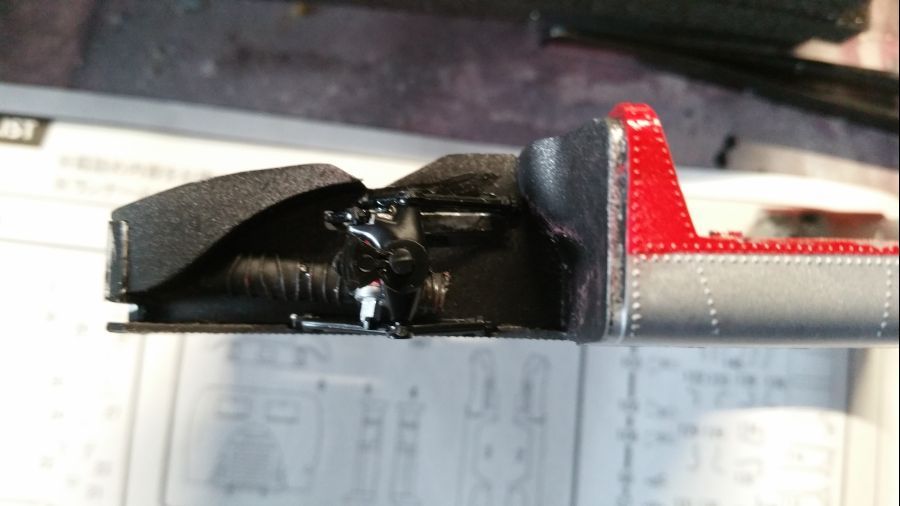
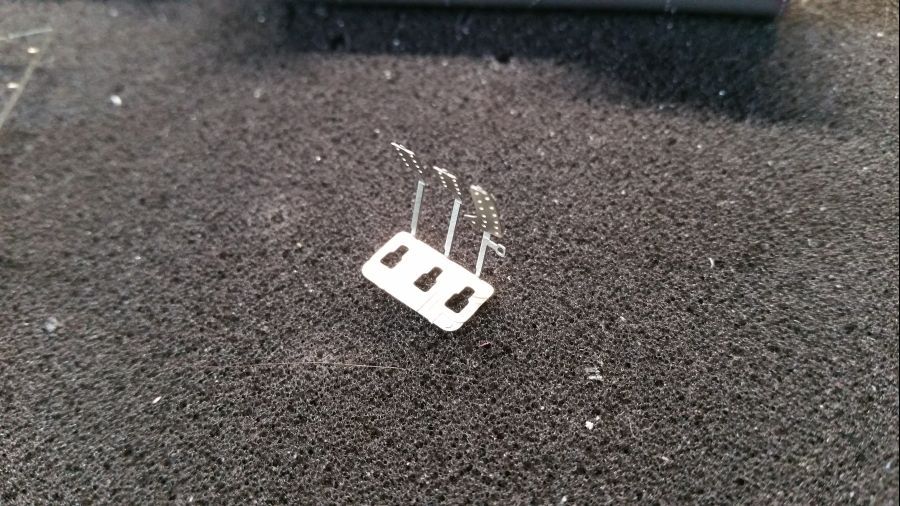
Dan eerst maar de pedalen. Ik weet niet precies hoe dit werkt. Volgens de tekening lijkt het of alles losse onderdelen zijn. Ik ga voor het buigen, passen en bevestigen. Los knippen kan altijd nog. Het lijkt mij echter niet verkeerd. Denk er wel om dat het gaatje in het midden vrij blijft voor het bevestigen van de andere onderdelen.
Next are the pedals. I don't know how it works. On the instructions it looks like everything has to be cut as separate parts. I will go for the bending, fit and mount. Cutting is always a possibility if it doesn't work. It looks ok to me. Please keep in mind the hole in the middle needs to be kept free for attaching the other parts.
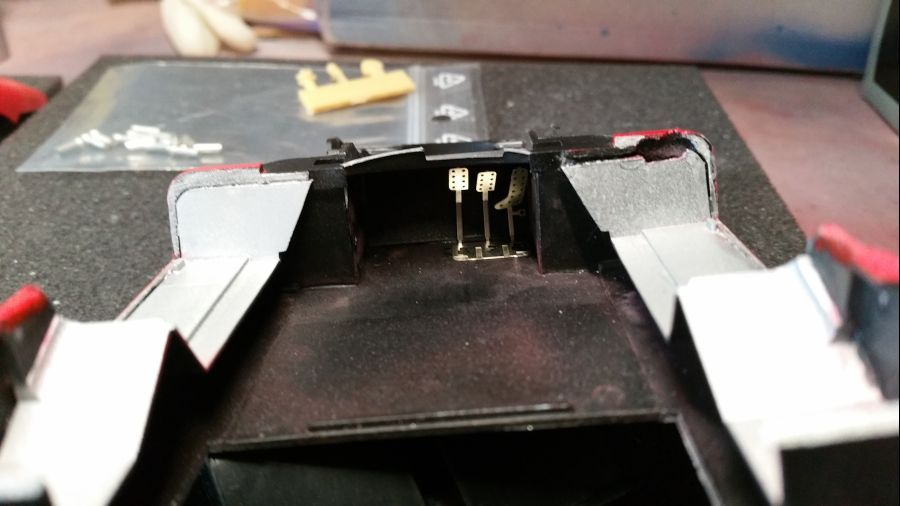
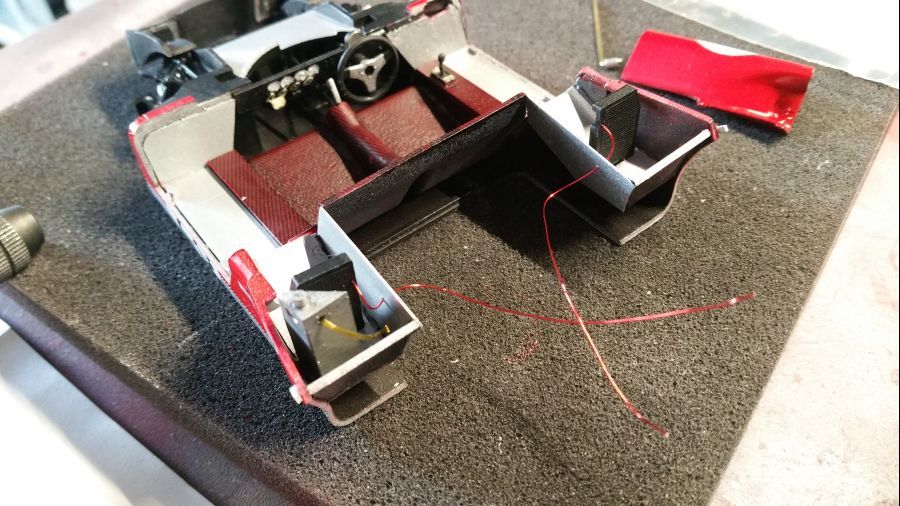
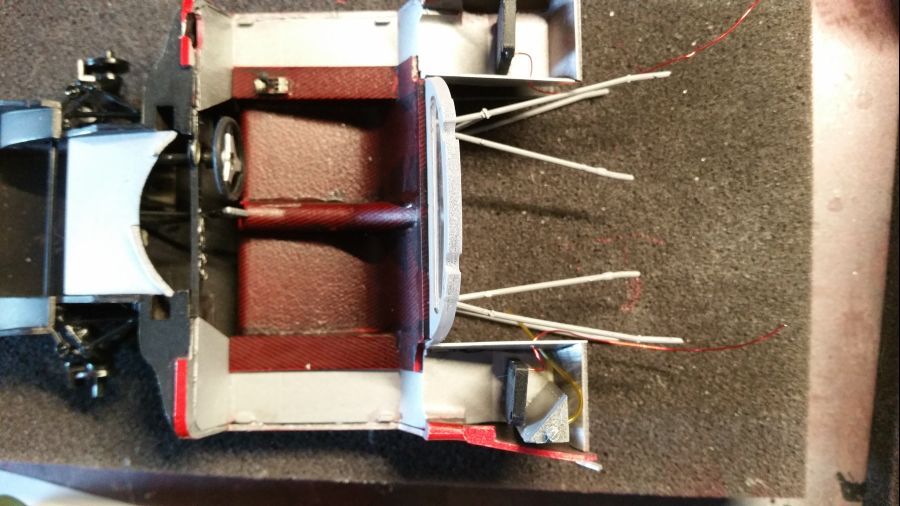
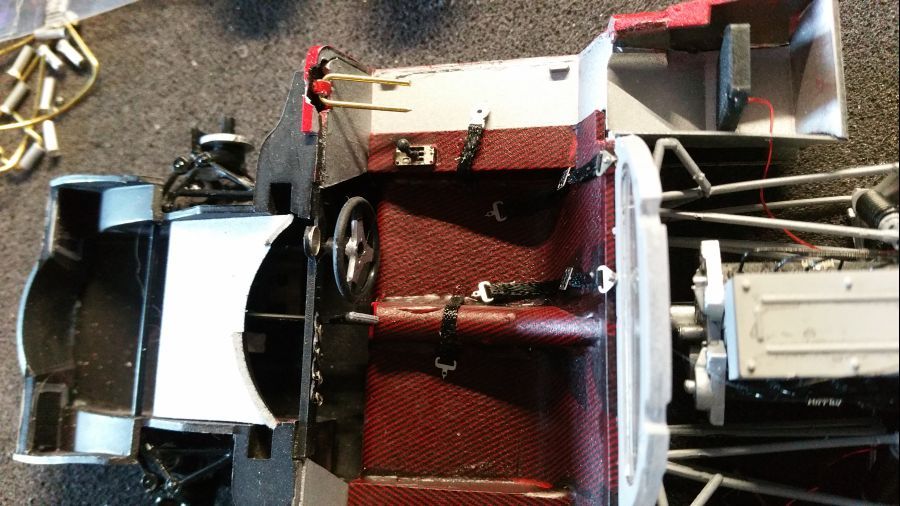
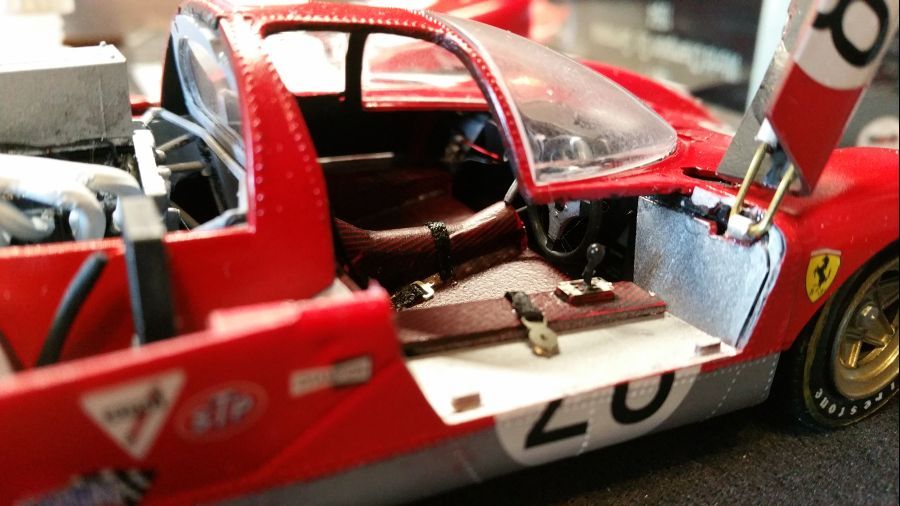
En dan bedoel ik dit deel. De stoel heb ik even tijdelijk geplaatst om er zeker van te zijn dat alles onder een goed hoek staat.
I mean this part. The seat was placed temporarily to be sure everything has a correct angle.
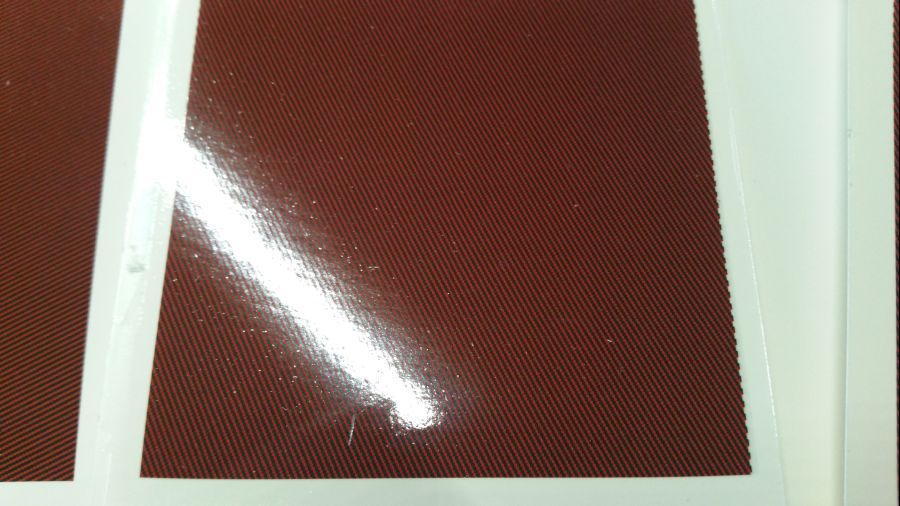
Ik ga templates maken om de stoelen te bekleden. Het patroon is afgedrukt op doorzichtig decalpapier. De stoel wordt rood gespoten om vervolgens het decalpapier aan te brengen. Ik hoop dat dat er goed uitziet.
I am creating templates to cover the seats. The pattern has been printed on translucent decal paper. The seat gets a red colour and then decals are applied. I hope it will look good.


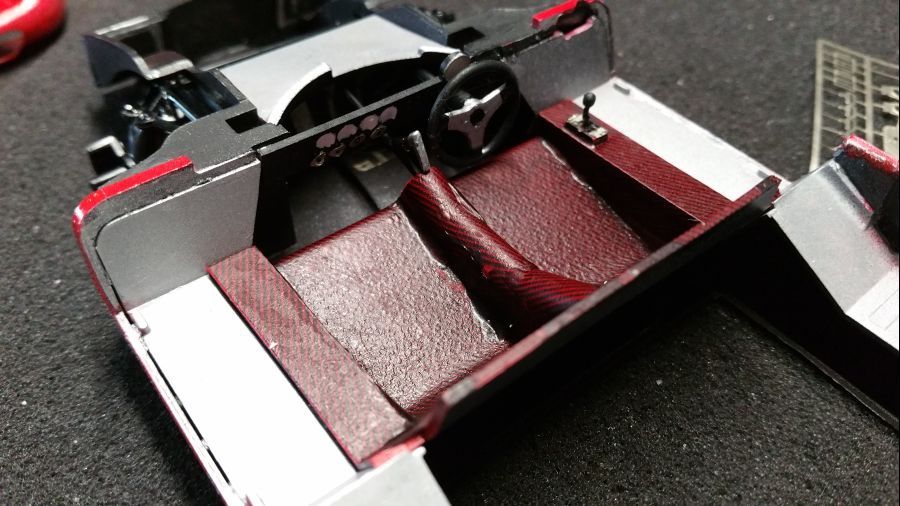
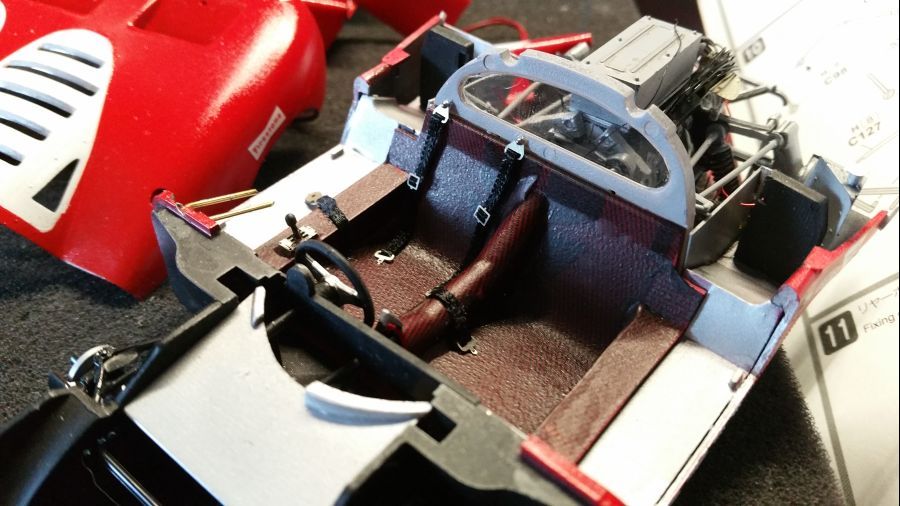
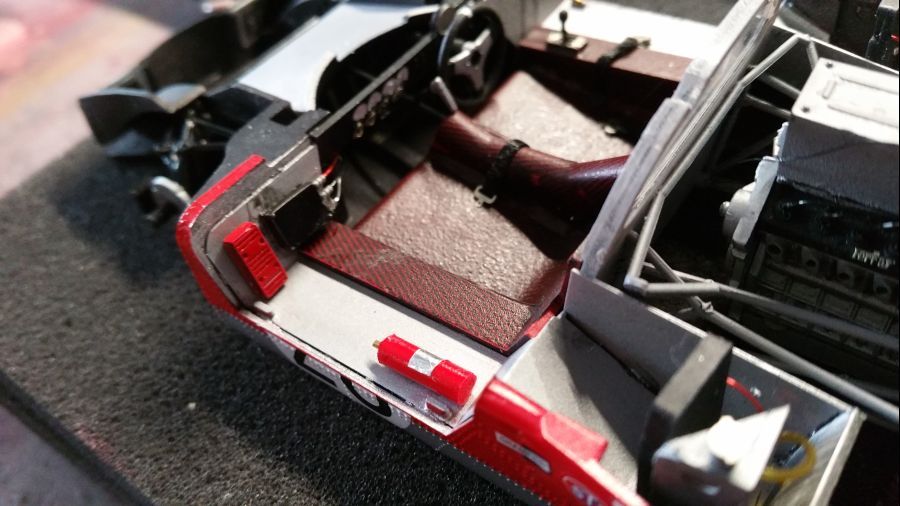
De decal krijgt een laagje mat lak en de bank en het dashbord worden op de bodem geplaatst.
The decal gets a layer of matt lacquer and is attached to the floor together with the dash.
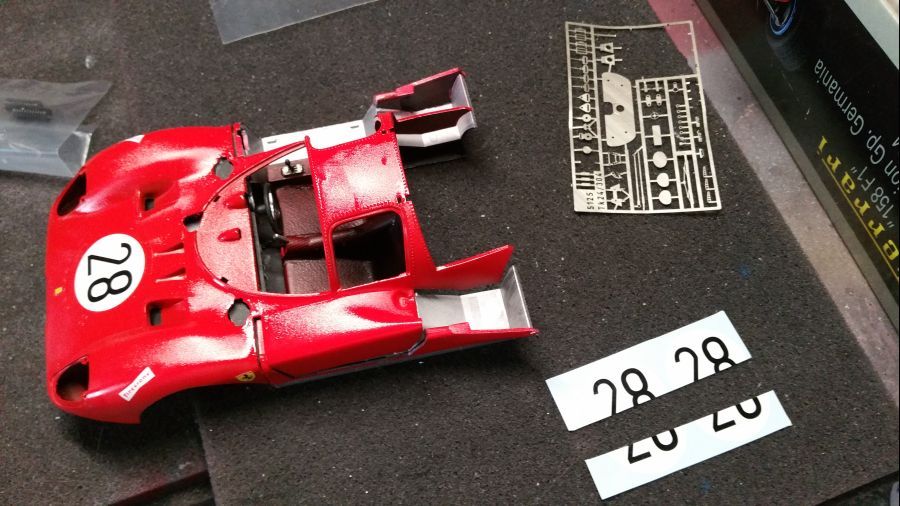
Dan de decals op de body. Ze zijn wat stug. Micro Set en Micro Sol zijn niet sterk genoeg. Daarom heb ik de sterkste versie van Daco gebruikt. De decals voor de deuren zijn op maat geknipt. Altijd riskant, je kunt je geen fout veroorloven. Nu eerst goed laten drogen. Daarna weer glanslak er overheen.
Next are the decals for the body. They are a bit stiff. Micro Set and Micro Sol don't do the job. That is why i used the strongest version of Daco. The decals for the doors are cut to size. Always tricky, no mistake is allowed. Now let it dry. Then apply gloss coat again.
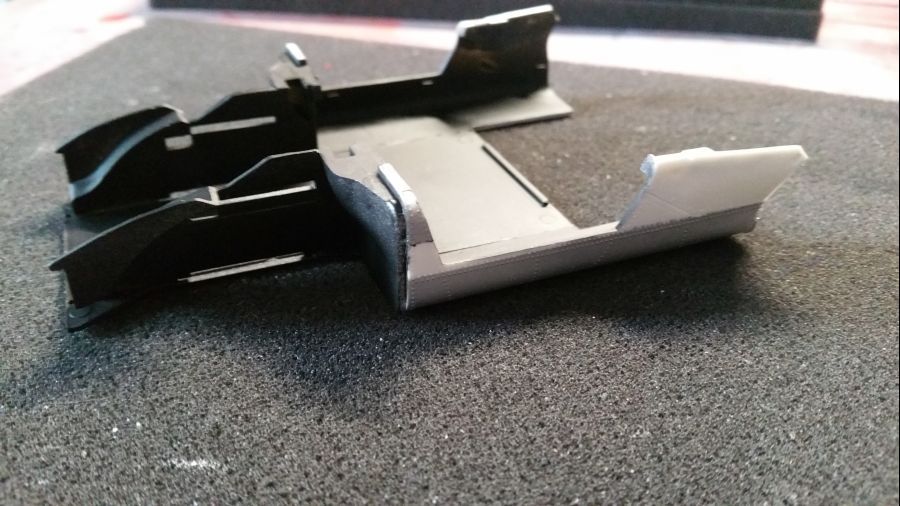
Van Evergreen plaat maak ik de zijwanden voor de vloer. Daarin boor ik gaatjes voor de leidingen. De tank en koelers zijn gespoten en voorzien van leidingen.
I create some bulkheads out of Evergreen card. Holes are drilled for the tubes. The tank and coolers are provided with hoses.
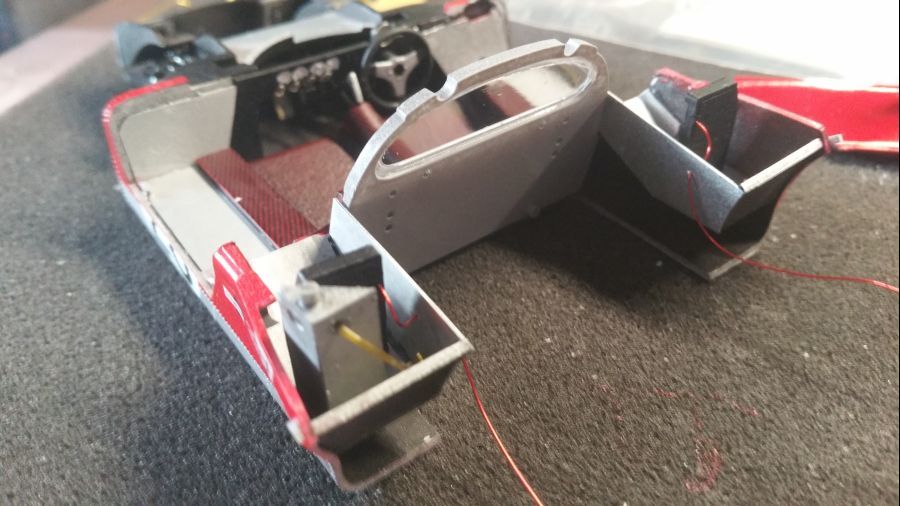
Het achterraam wordt gemaskeerd. Daarna wordt de wand grijs gespoten en geplaatst.
The rear window was masked. Then the bulkhead was painted grey and put into place.
De steunen voor de motor zijn gespoten en tijdelijk geplaatst. Eerst ga ik de schokbrekers in elkaar zetten. Pas als de motor ook klaar is volgt definitieve plaatsing.
The supports for the engine are painted and temporarily attached. First i will combine the shocks. Only when the engine is ready final attaching will take place.
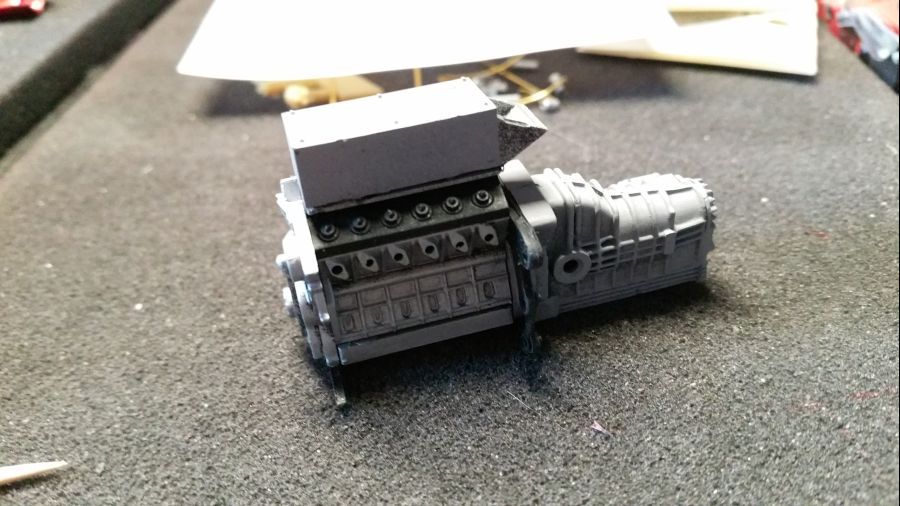
Om deze armen goed te kunnen uitlijnen, zet ik eerst een deel van de motor in elkaar. Het zou dan stukken gemakkelijker moeten gaan.
To be sure these supports are correctly mounted, i will assemble a part of the engine first. This should make it more easy.
Nu dus de steunen aanbrengen, nog zonder de schokbrekers.
So now the supports are attached, still without the shocks.
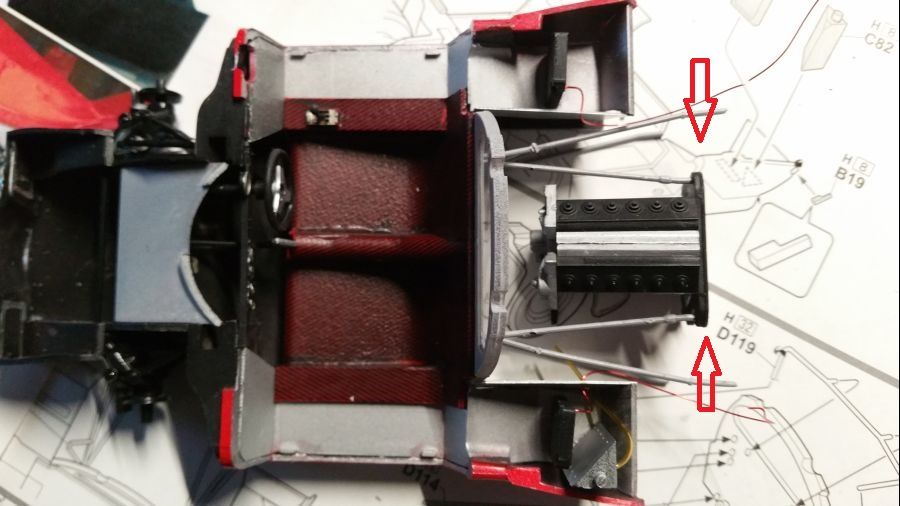
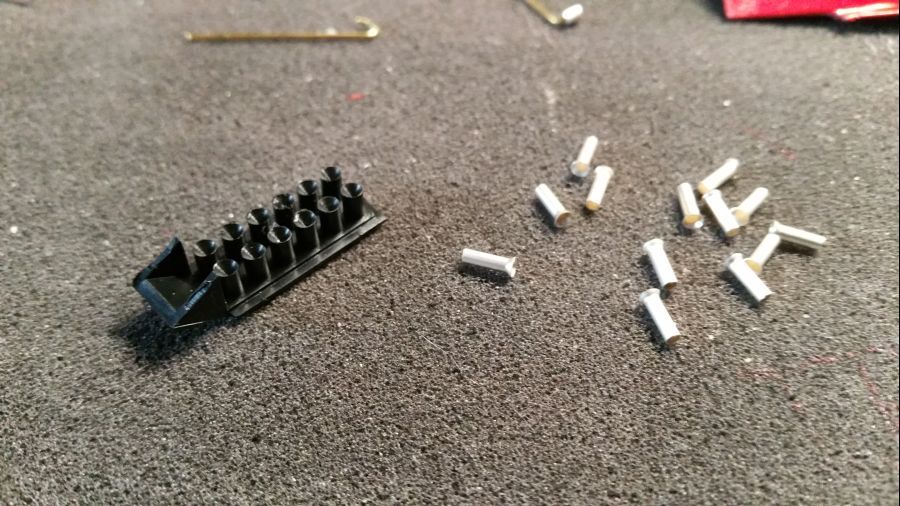
Terwijl de lijm droogt, ga ik verder met de luchtinlaten van de motor. De plastic exemplaren ga ik verwijderen en deze worden vervangen door metalen versies.
While the glue dries, i will continue with the funnels. I will cut off the plastic ones and change them by metal ones.
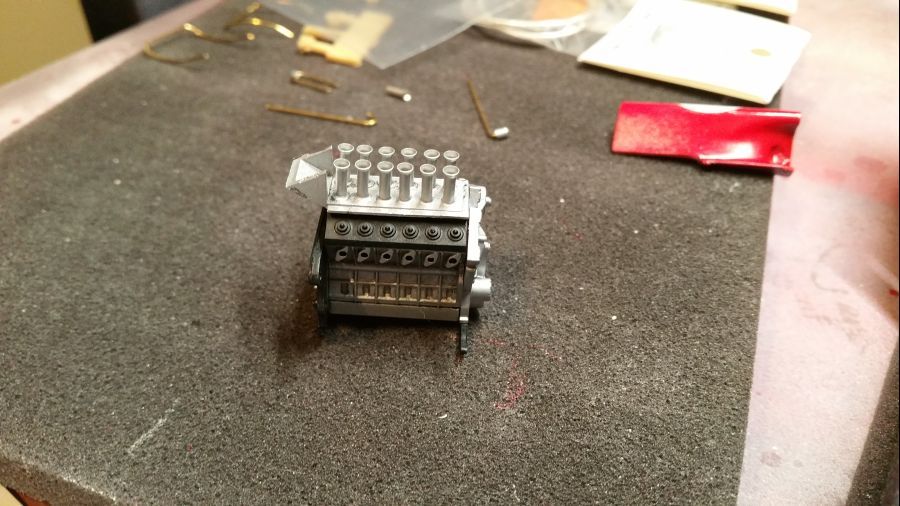
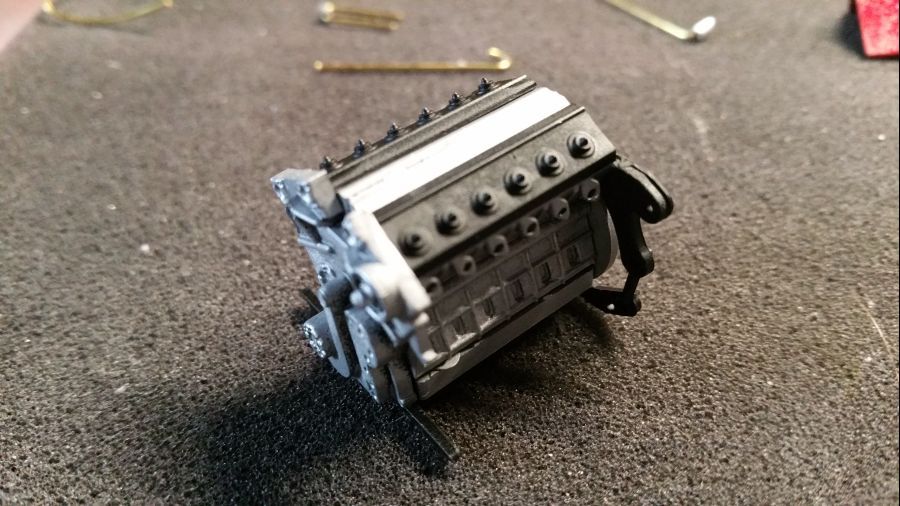
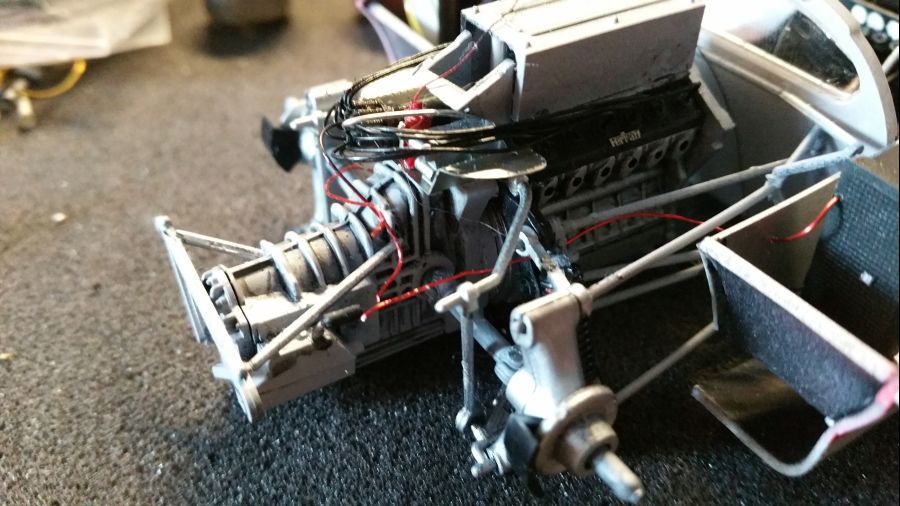
Dit is ongeveer de complete motor zoals deze standaard in de kit zit...dit moet ik wat opleuken.
This is about pretty much the engine as provided by the kit...i need to change it into something nicer.
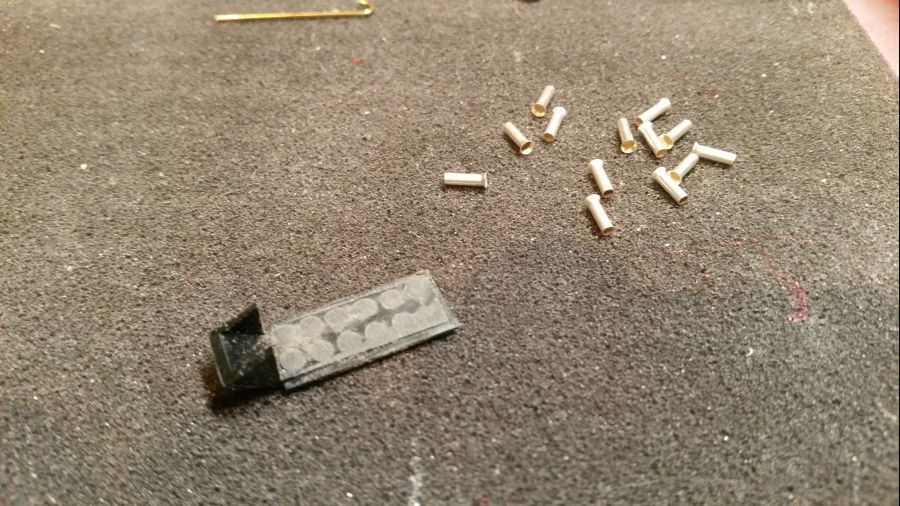
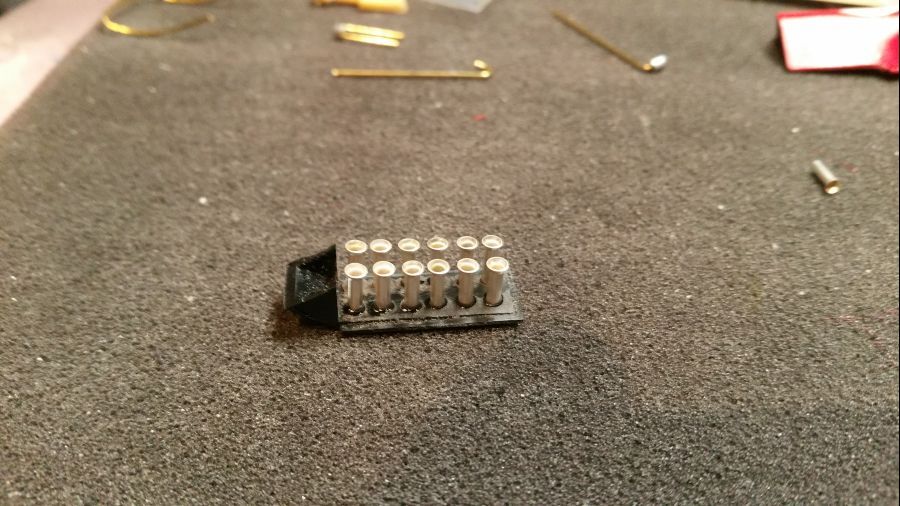
Daar gaat ie..
So there we go...
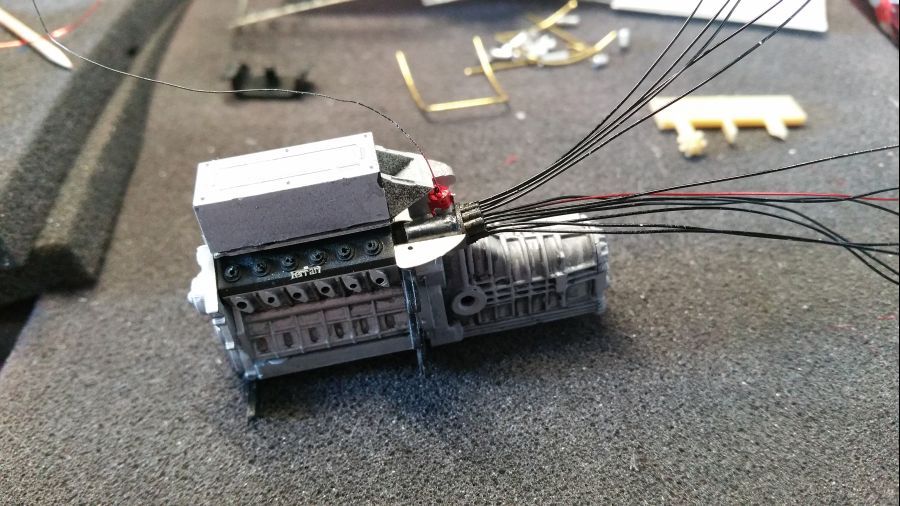
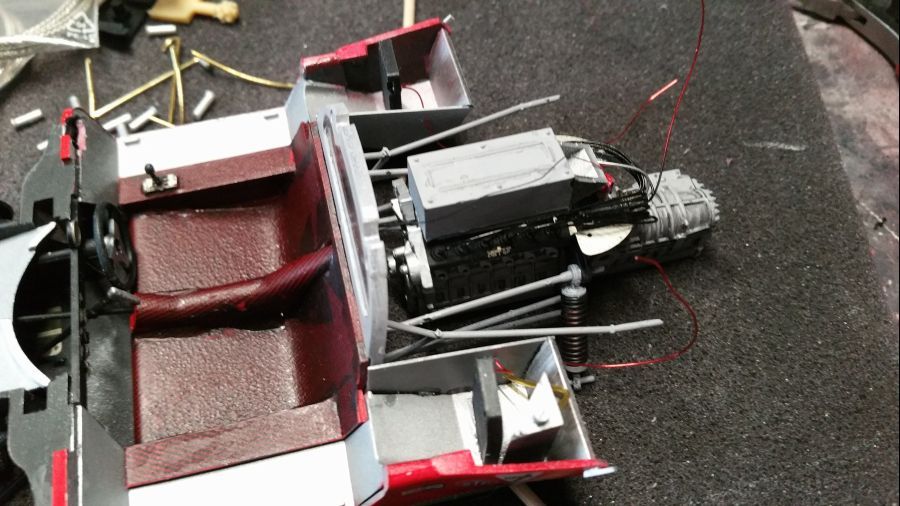
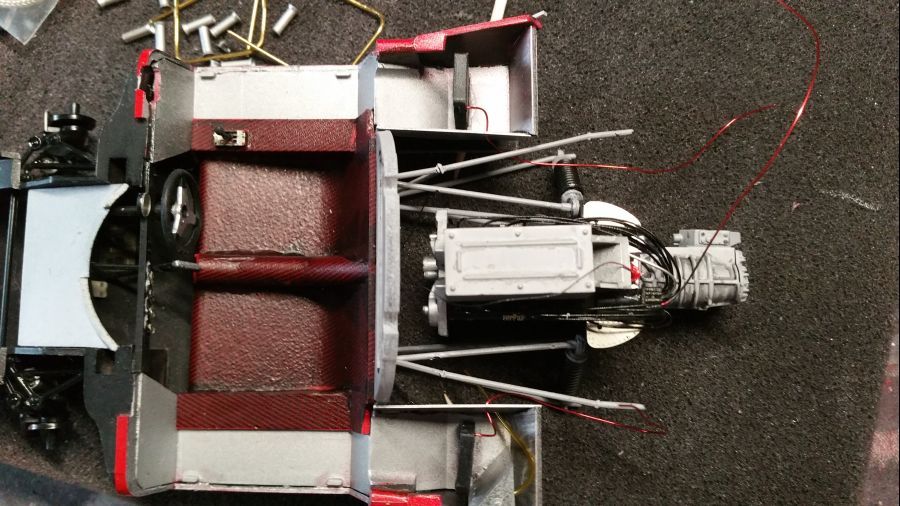
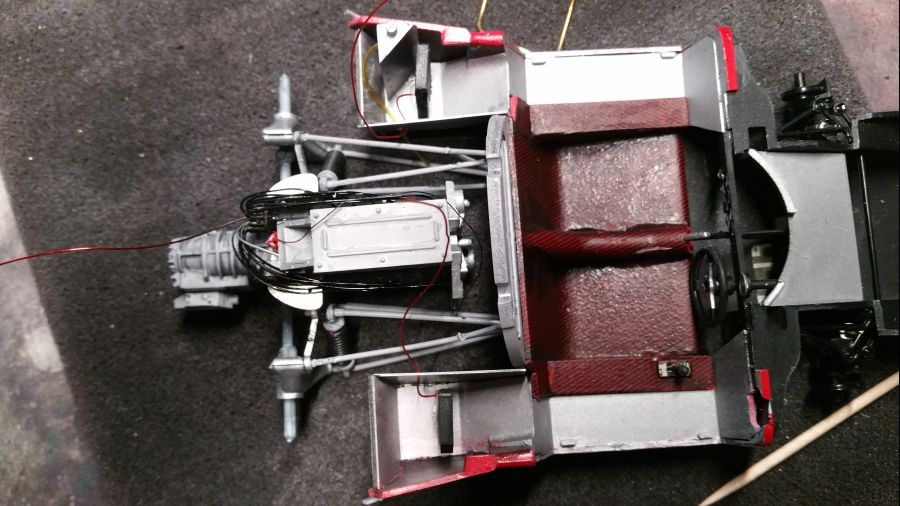
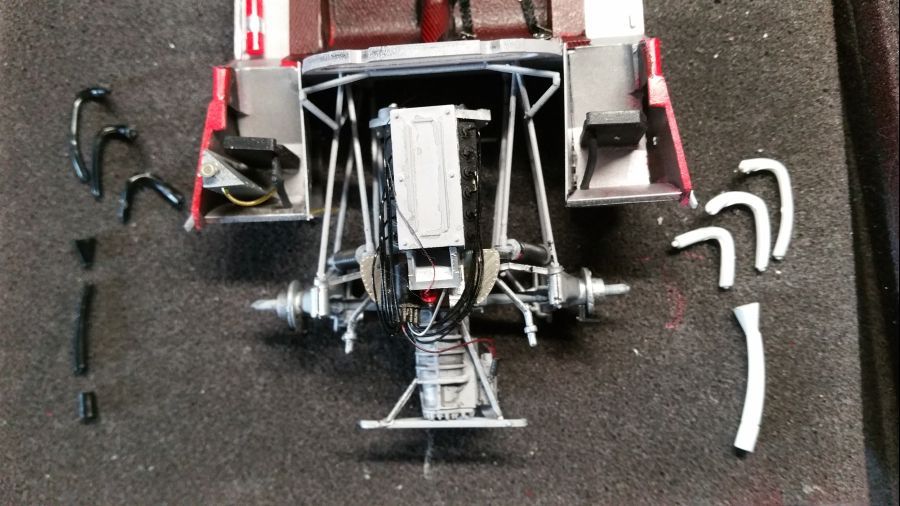
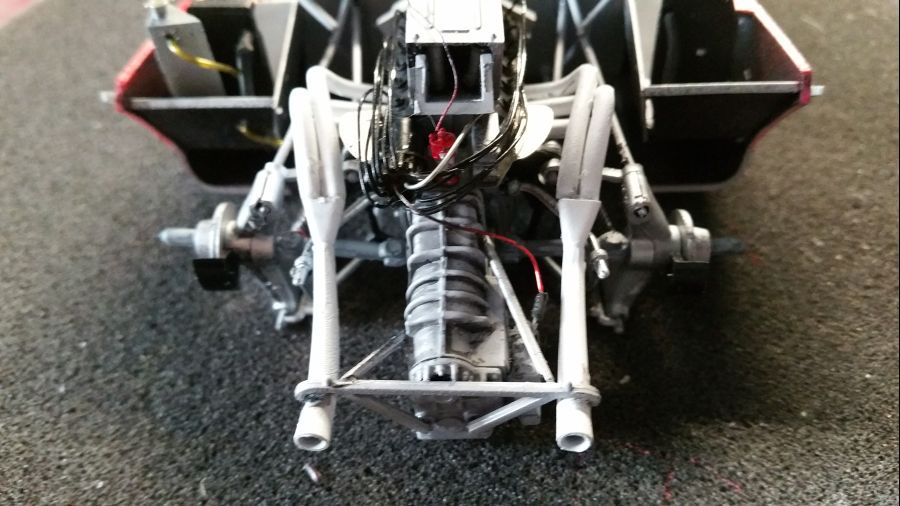
Daarna wordt de motor geplaatst... Lastig met al die buizen die in de gaatjes moeten... Edit: laat de draden van de koeling niet door de zijwanden lopen. Je krijgt dan problemen bij het monteren van de cabine.
Then the engine is attached... A bit tricky with all those pipes that need to go in the holes... Edit: Do not lead the wires through those side walls. You'll be in trouble when mounting the body.
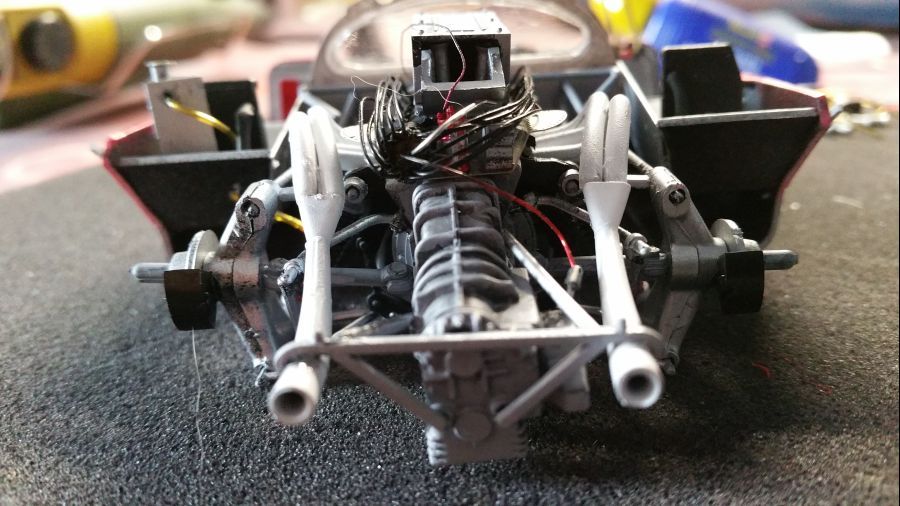
Oops.. ik vergat de anti rol stang.. even improviseren. Ik heb het middenstuk verwijderd. Naar mijn oordeel zie je daar niets van.
Oops.. i forgot the anti roll bar.. have to improvise. I cut the middle piece of it. I think you will not see it.

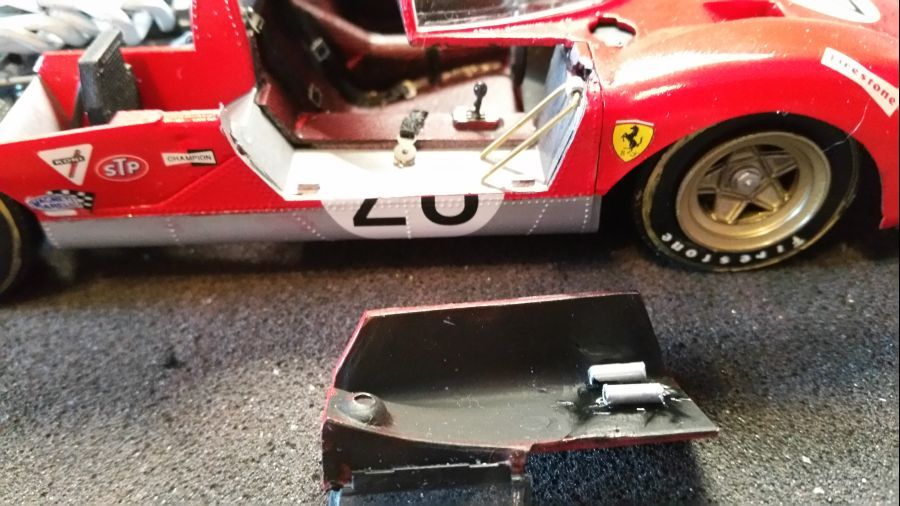
Nu plaats ik het deurscharnier. De deur zelf volgt nog... Eerst de lijm goed laten drogen.
Now i will attach the hinge. The door will come later... First the glue has to set.
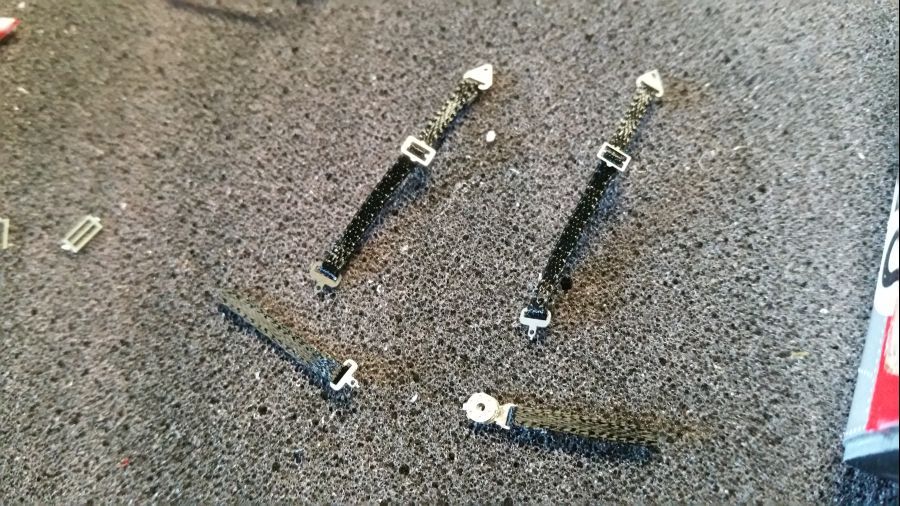
Verder met de gordels.. Ik heb een setje gekocht van Scale Production. Daar zitten etched gespen en zijdelint bij. Dit vind ik altijd het mooiste.
Now continue with the belts.. I bought a set from Scale Productions. It contains buckles and silk ribbon. I always like it this way.
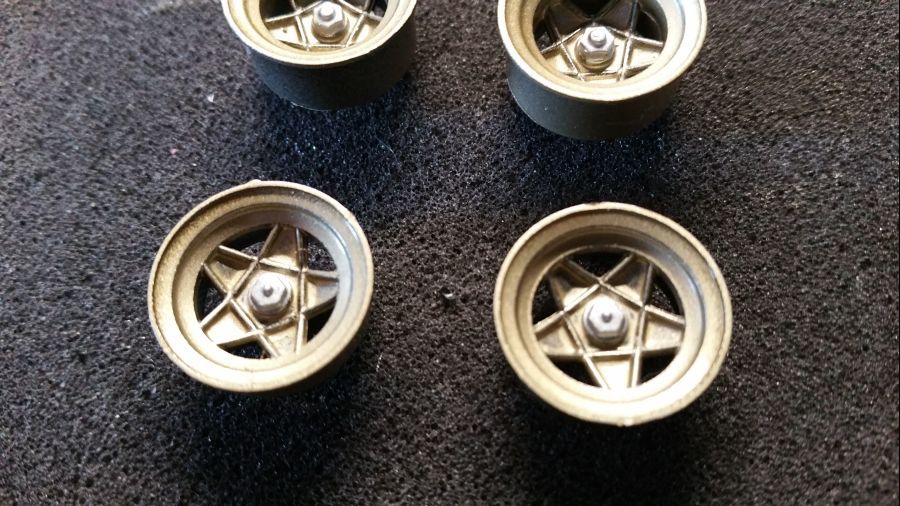
Ik gebruik de standaard velgen van de kit. Ik weet dat er vervangende exemplaren te koop zijn, maar ik doe het hier mee. Ik bespuit ze met Tamiya TS-87 Titanium Gold. De grote moer krijgt een zilver kleurtje.
I will use the rims as provided in the kit. I know there are replacements available, but i will use these. I paint them with Tamiya TS-87 Titanium Gold. The big nut is painted silver.
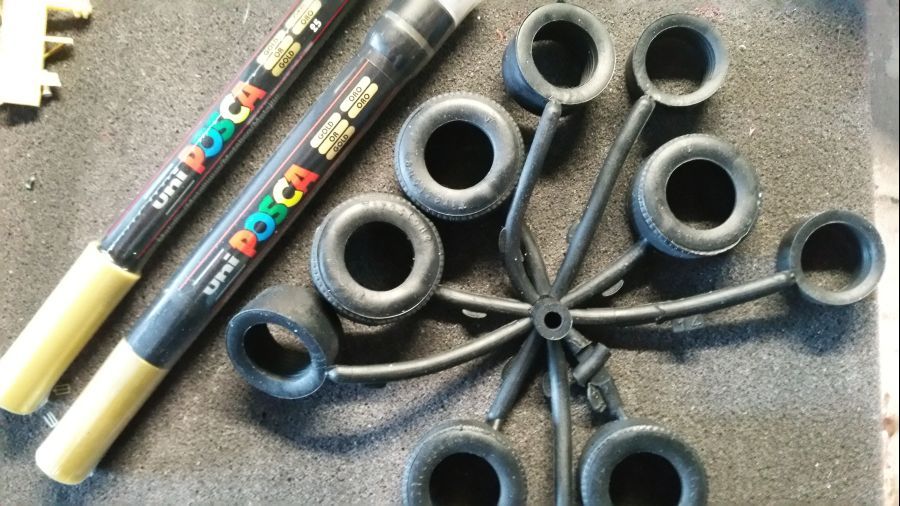
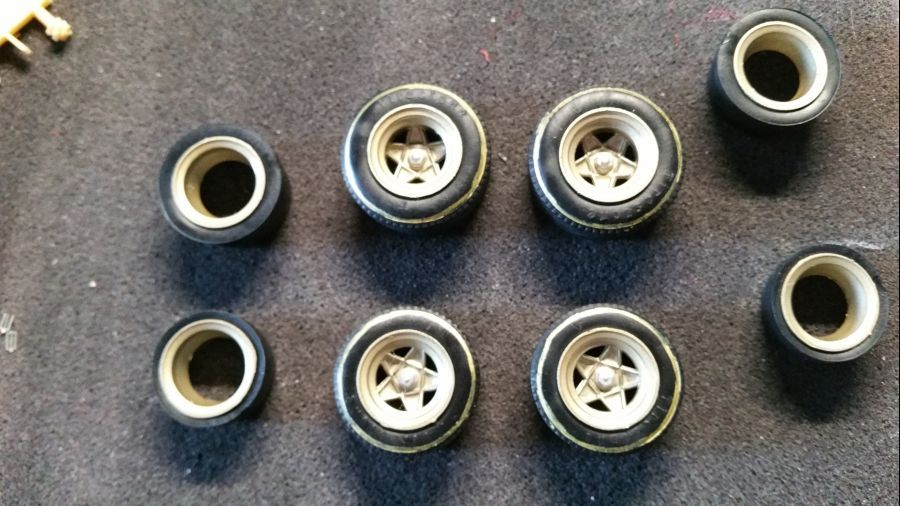
De banden is een ander verhaal. Deze moeten worden voorzien van een goudkleurige cirkel op de wang. Deze cirkels zijn niet op het decalpapier aanwezig. Dat wordt dus handwerk. Ik heb 2 soorten stiften gekocht om te proberen wat het beste is. De eerste is een soort fijnschrijver, de tweede een dun kwastje. De belettering van Firestone is wit. Deze zijn wel op het decalpapier aanwezig. Ook hiervan ga ik bekijken of het mooier is om ze te verven met een stift.
The tires is a different story. These need to have this gold cicle on the side. These circles are not present on the decal sheet. So i have to do it by hand. I bought 2 markers for this to see what's best. The first is a kind of gel pen, the second a kind of brush. The Firestone marks on the side need to be white. These are present on the decal sheet. I will see what works best, decals or paint.
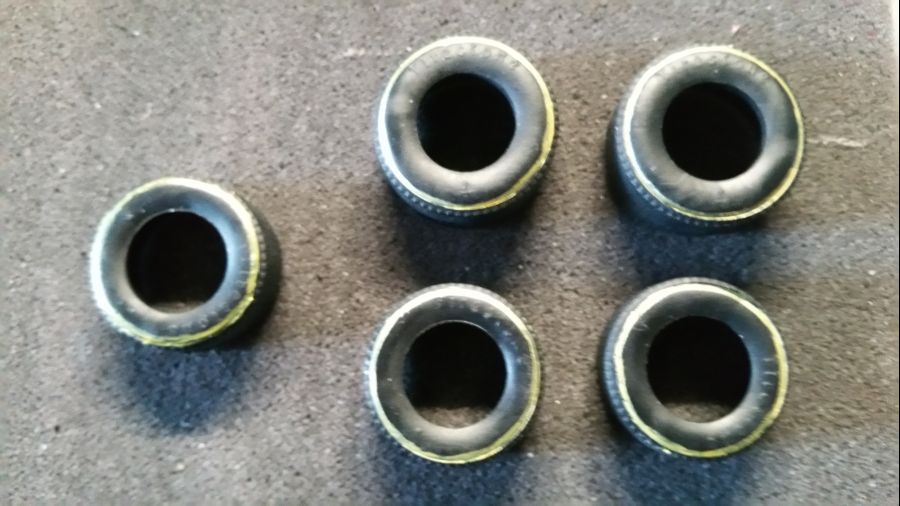
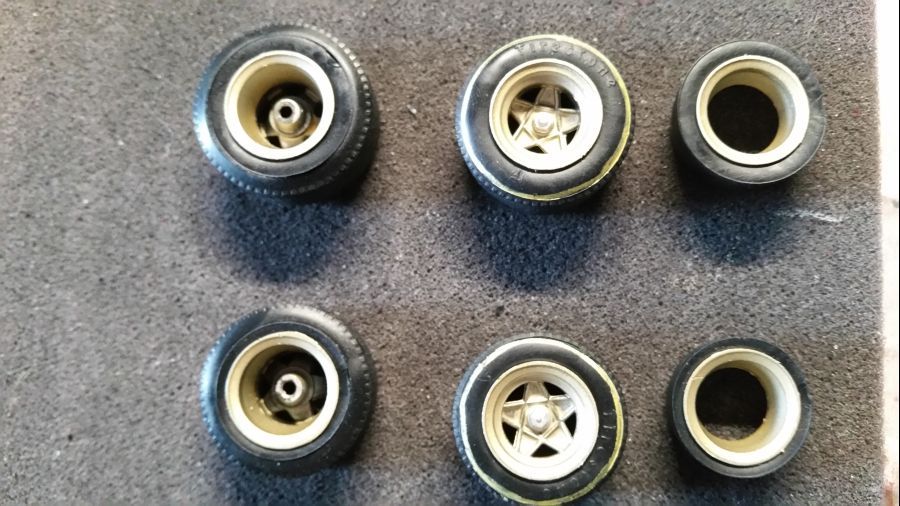
De band links it met het kwastje gedaan, de banden rechts met de gel pen. De verf van de pen pakt beter.
The tires to the left was done with the brush, the tires to the right with the gel pen. The paint from the gel pen works better.
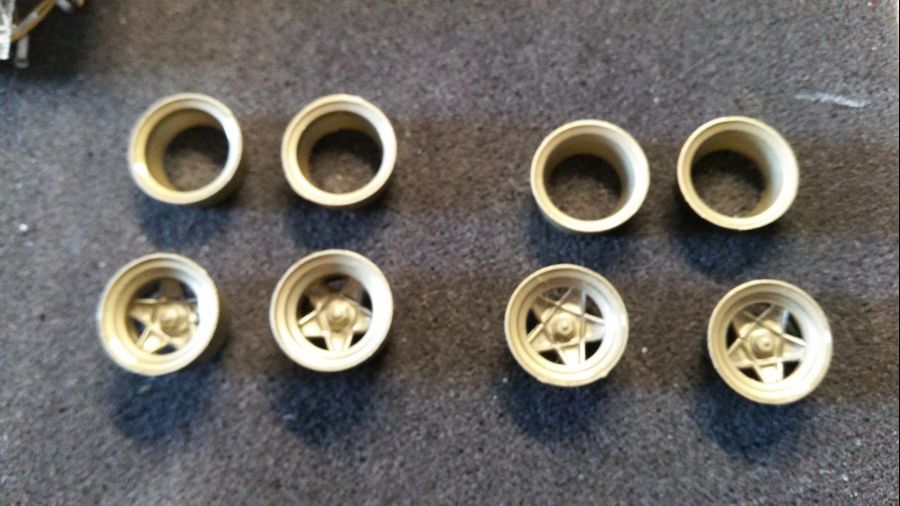
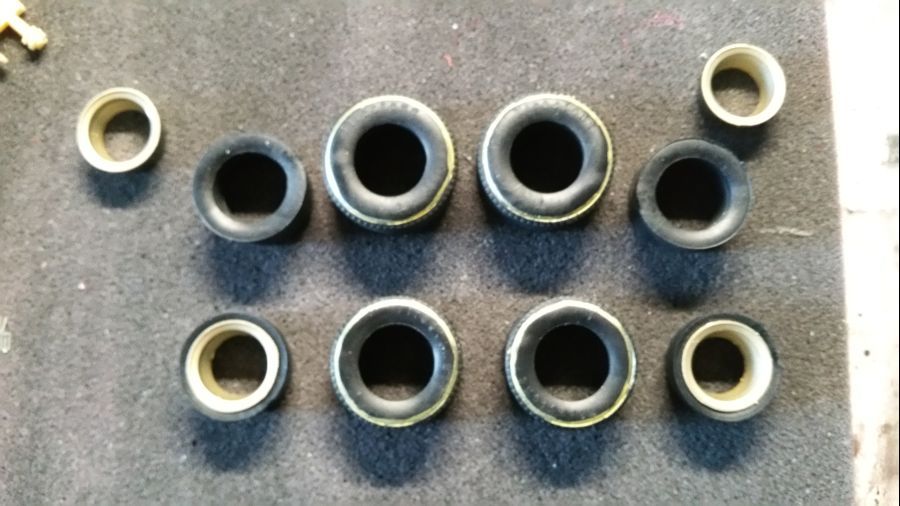
Normaal gesproken zet ik de velgen in elkaar en schuif de banden er over heen. Fujimi heeft een andere methode gekozen. De voor- en de achterkant worden appart in elkaar gezet en daarna gecombineerd tot 1 band.
Normally i combine the rims and put the tires over it. Fujimi decided to do a different approach. The front and back side are combined separately and then combined to 1 tire.
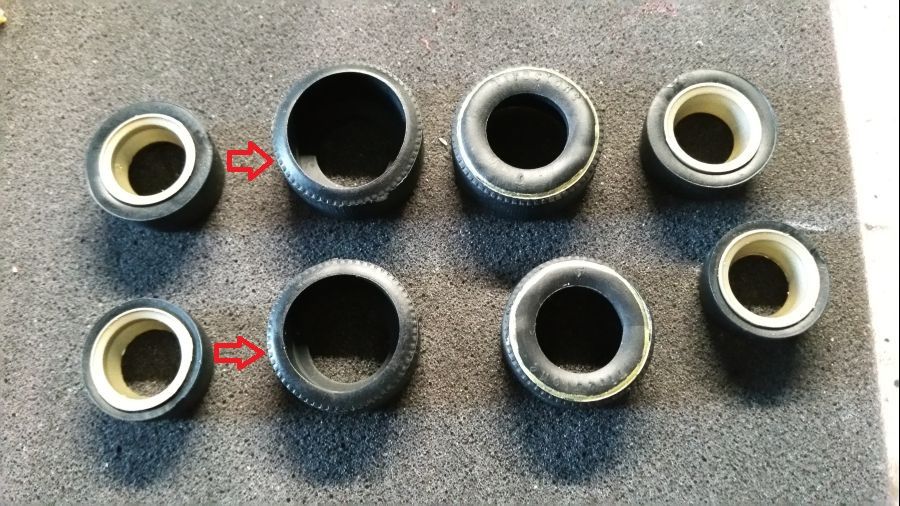
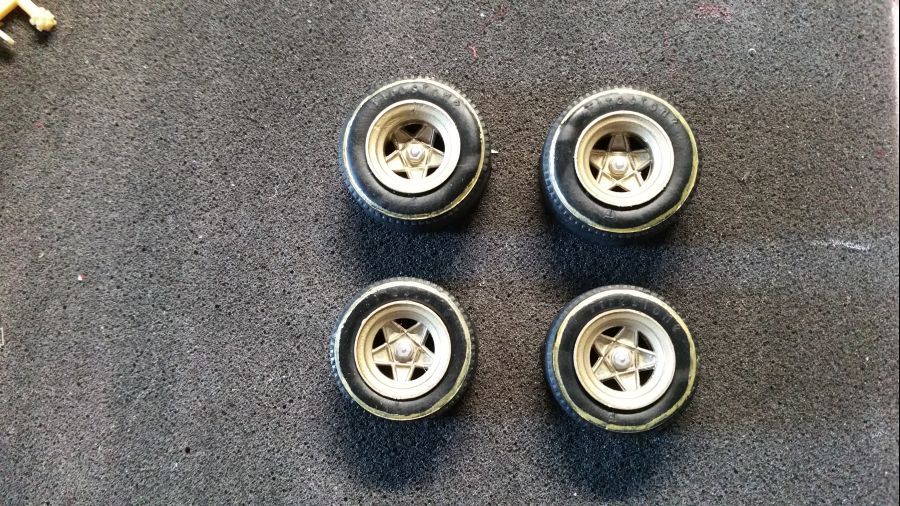
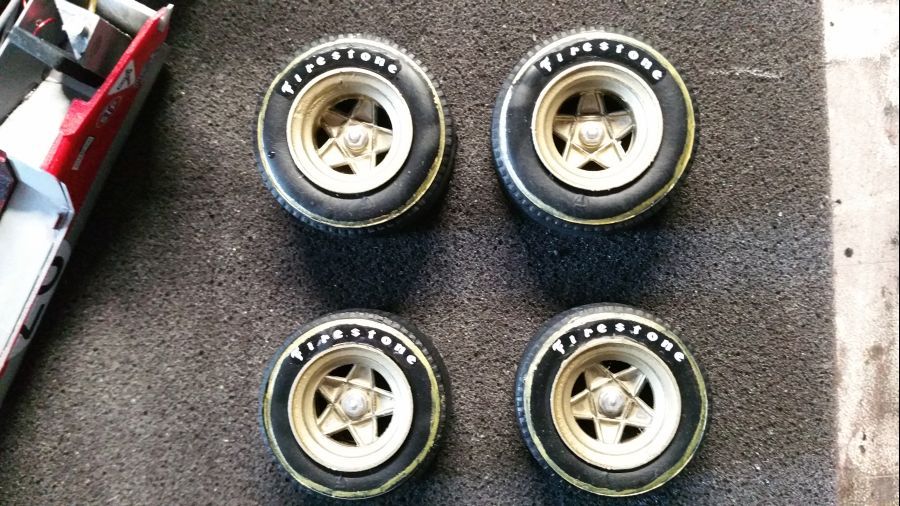
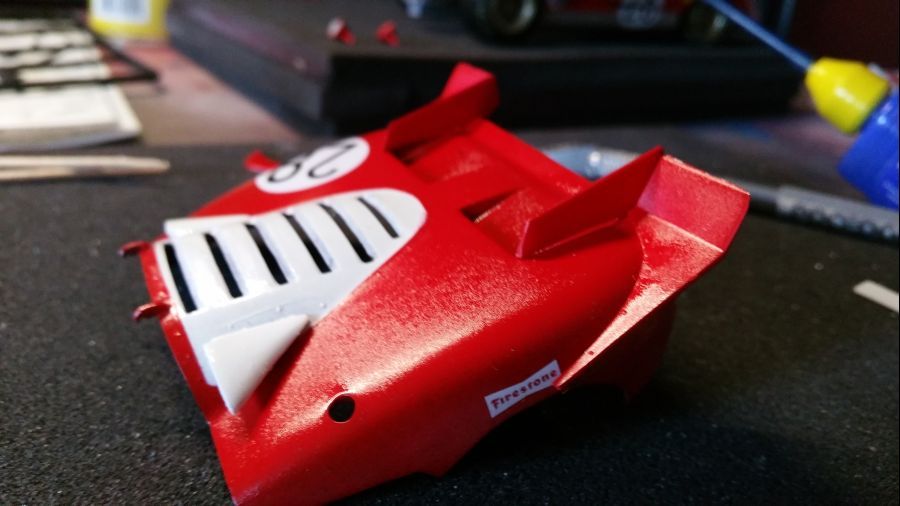
De Firestone decals op deze Ferrari 512S zien er goed uit, dat logo ga ik dus niet met een gel pen doen.
The Firestone decals on this Ferrari 512S look great, so i will not do the logo with a gel pen.
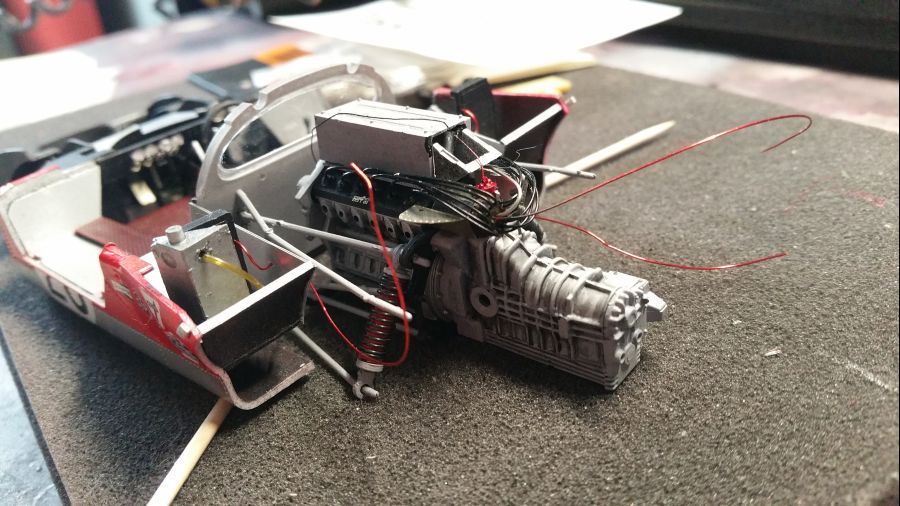
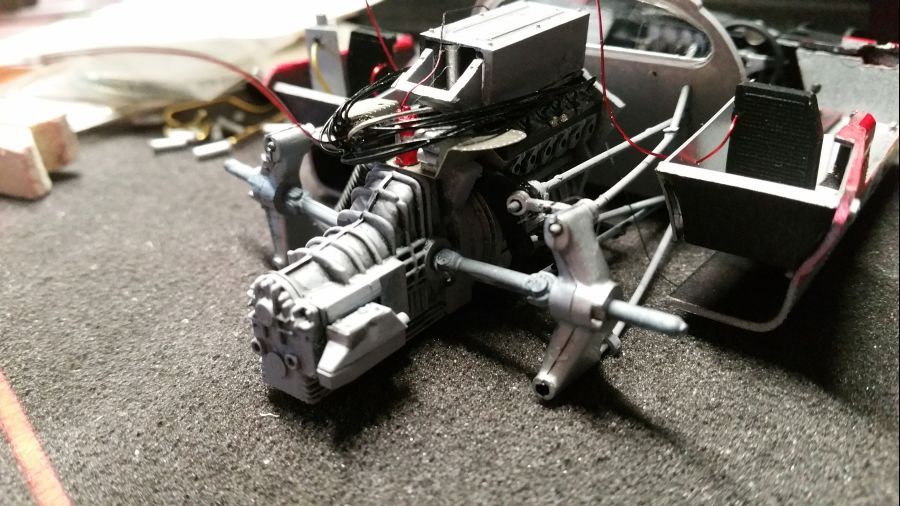
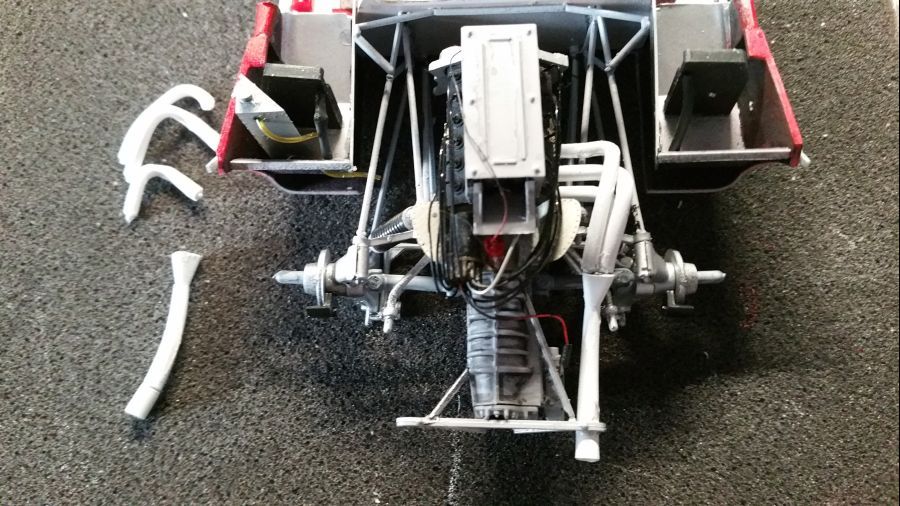
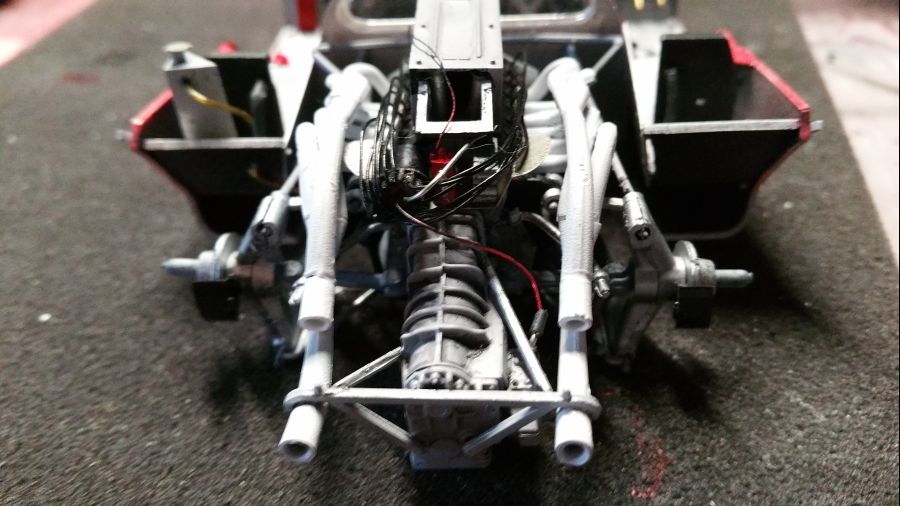
Ik moest de draden die door de zijwanden lopen doorknippen. Ze leveren problemen op wanneer de body wordt geplaatst. Ik maak op een later moment nog wat nieuwe leidingen. Ik wil nu eerst zien hoeveel ruimte er nog is wanneer de uitlaten zijn geplaatst.
I had to cut the wires that go through the side walls. They will give you trouble when mounting the body. I will create more wires at a later time. I first want to see how much space there is after attaching the exhausts.
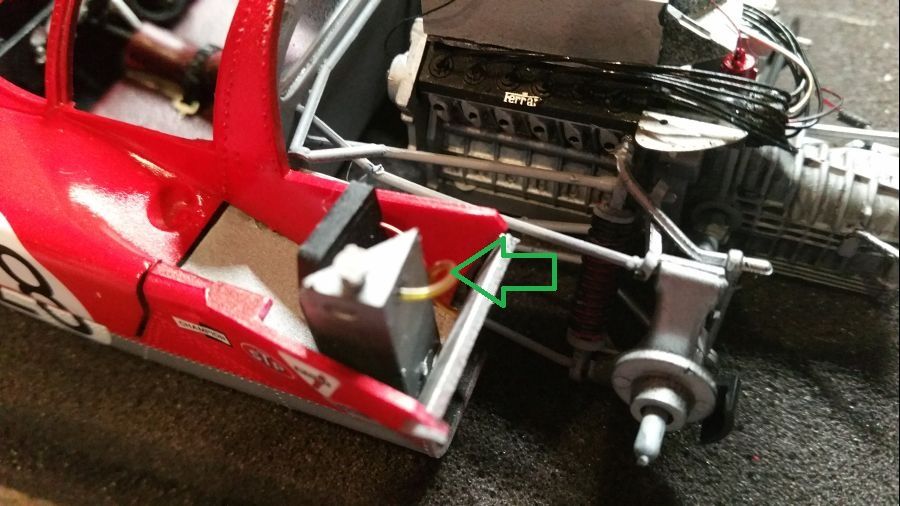
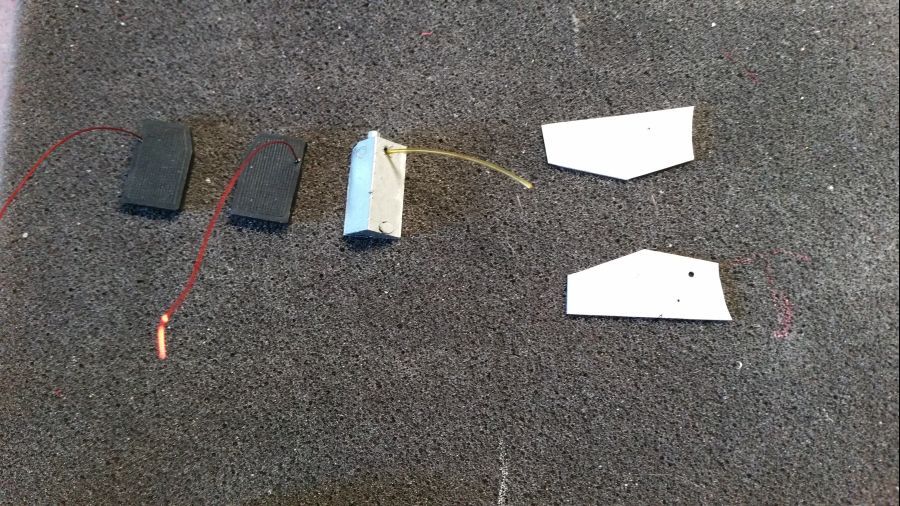
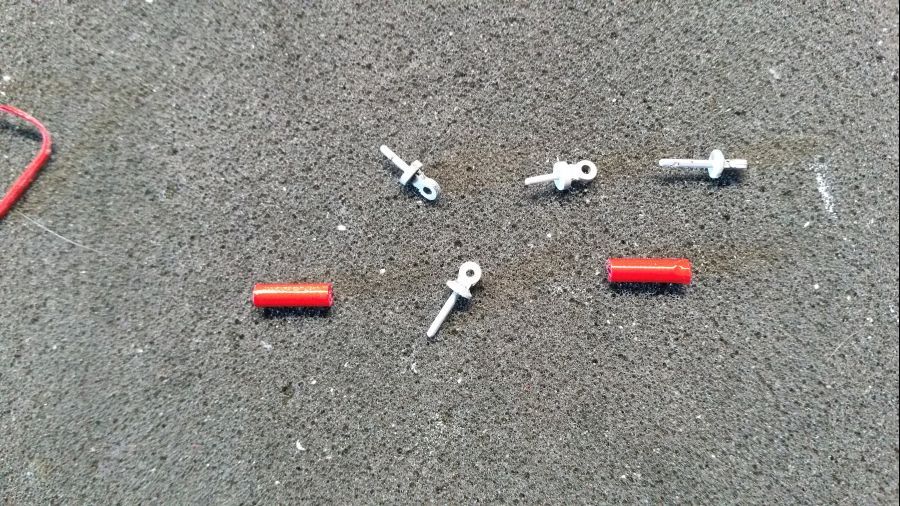
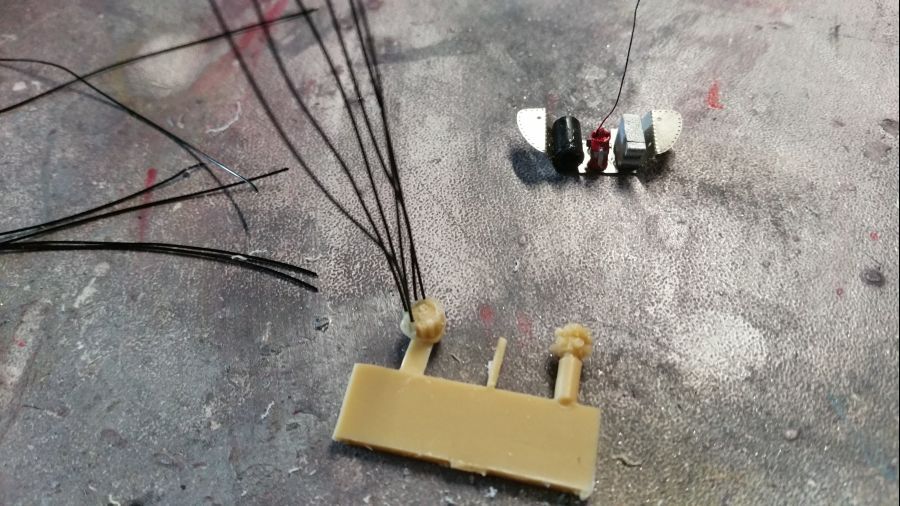
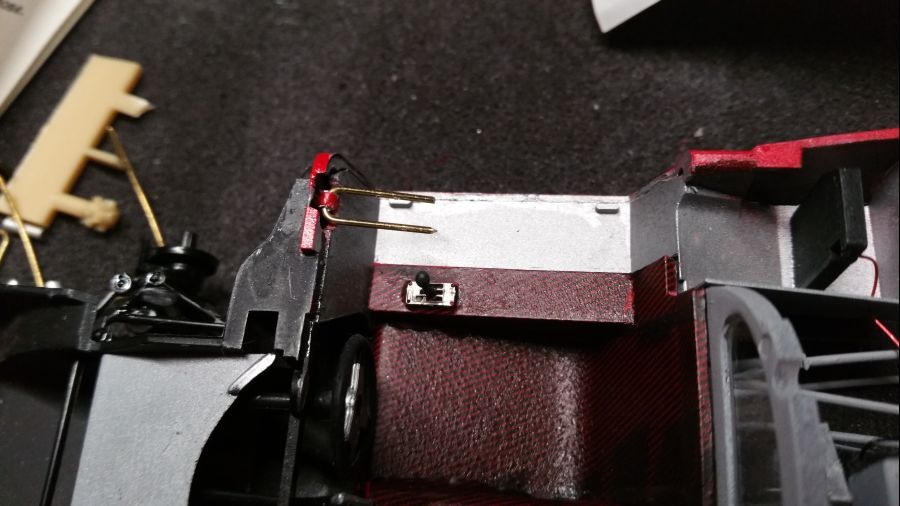
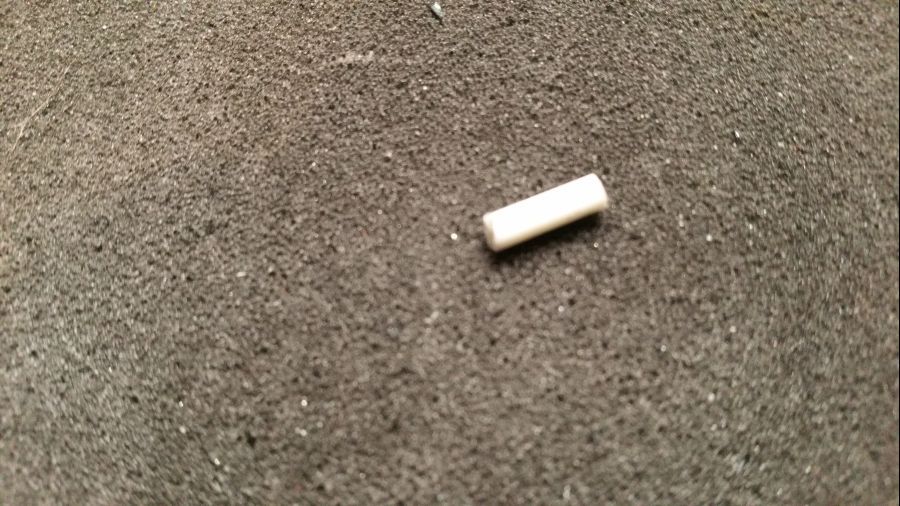
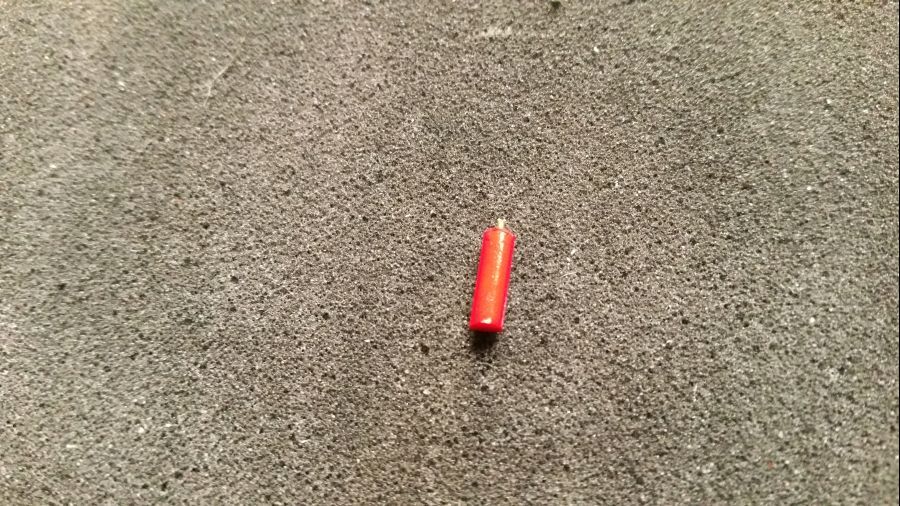
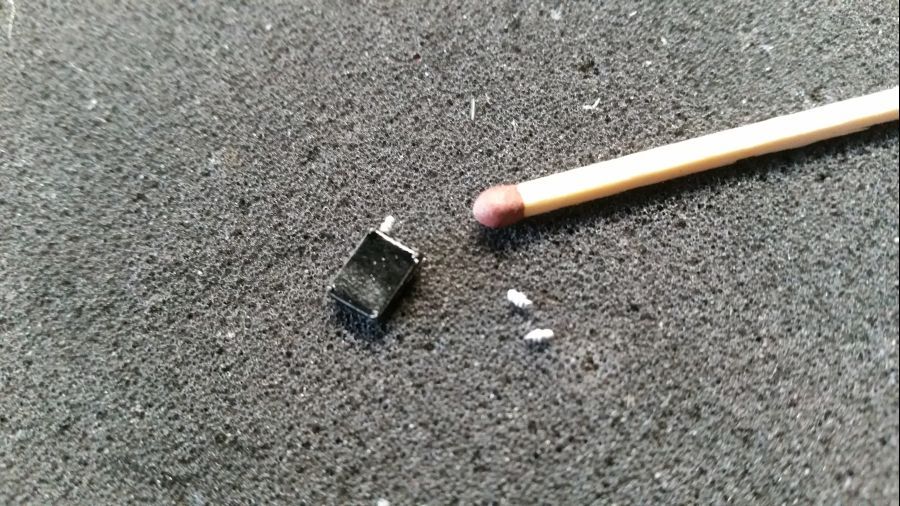
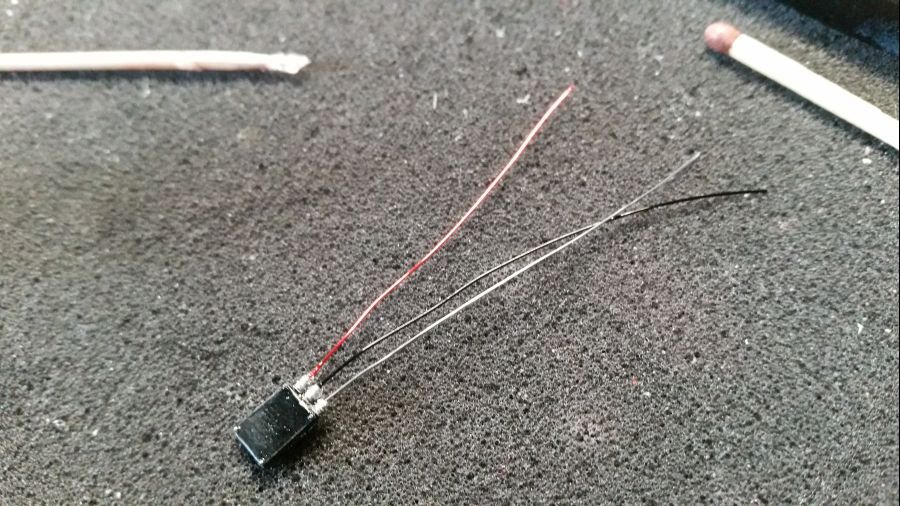
Dan een brandblusser maken en wat electronica voor de binnenkant..
Then creating a fire extinguisher and some electronics for the inner side..
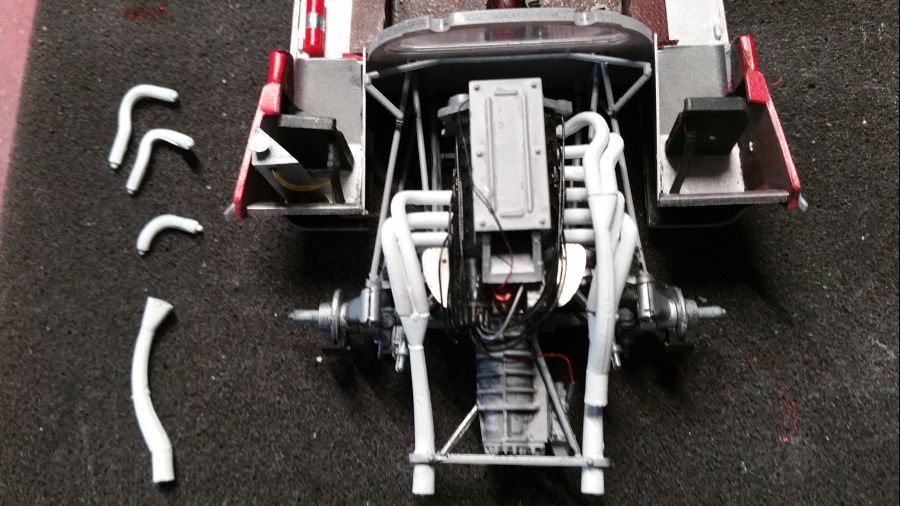
Nu eerst maar verder met de uitlaten. Er moeten vier uitlaten gemaakt worden. Iedere uitlaat bestaat uit 6 delen. Oppassen dus om alles goed passend te krijgen. Ik zet de achterste 3 delen eerst in elkaar. Daarna alles wit spuiten.
Now i will continue with the exhausts. Four exhausts need to be made. Each consists of 6 parts. So be careful to get everything fitted correct. I will combined the last 3 parts first. Then spray everything white.
De eerste set wordt geplaatst...
The first set is being attached...
En dan de tweede set... Alles met alles een lastig klusje. Dit heeft veel tijd genomen.. De uitlaten worden niet verouderd. Ik heb foto's van de wagen aan het begin van de wedstrijd en de uitlaten zijn echt spierwit zonder gebruikssporen.
And the second set... All and all a tricky job. This took a while.. I will not use weathering on these. I have pictures of the car at the beginning of the race and the exhausts are really white with no traces of use.
De wielen gaan er op...
Time to mount the wheels...
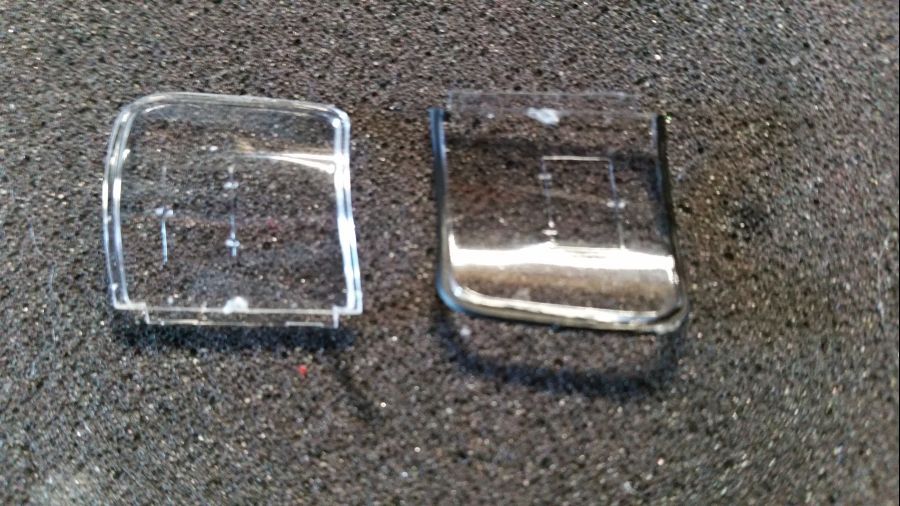
Nu ga ik eerst verder met de zijramen. Ik verwacht niet veel problemen. Eerst de rubbers nabootsen door de randen te verven. Ik laat ze daarna rusten. Het glas wil ik pas als laatste aanbrengen om kans op schade zo klein mogelijk te houden.
Now i will continue with the side windows. I don't expect much trouble. First create the rubbers by painting the edges. Then i will leave them alone. The glass will be mounted as last to minimize the chance of damage.
Verder met de koplampen. Hier hoef ik niet al te moeilijk over te doen. Aan het eind zie je er eigenlijk niets van. De versie van de Ferrari 512S die ik bouw reflecteert de wagen aan het begin van de race. De koplampen waren toen afgeplakt met rode tape. De mistlampen met grijze tape. Dit breng ik pas op het eind aan.
Now i will go on with the headlights. There will be no fuzz. At the end you will almost not see them. The version of the Ferrari 512S i am building depicts the car at the beginning of the race. The headlights were covered with red tape. The foglights were covered with grey tape. I will do this at the end of the build.
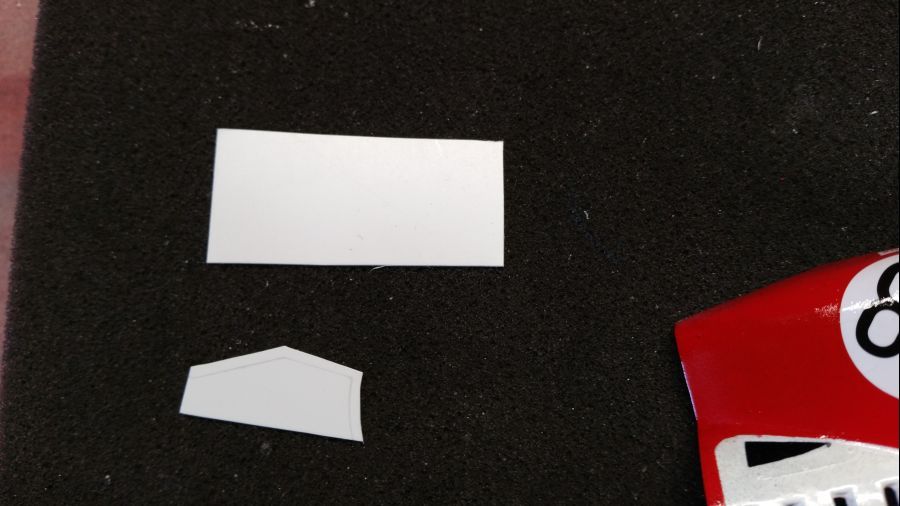
Voordat ik het glas van de koplampen plaats maak ik er nog even templates van. Deze gebruik ik later voor het simuleren van de afplaktape.
Before attaching the glass parts of the headlights i am making some templates. I will use these for simulation of the masking tape.

Dan wordt de boel geplaatst en wat kleine onderdelen worden geprepareerd.
The headlights are put in place and some small parts are being prepared.
Het eerste zijraam wordt gelijmd.
The first side window is being attached.
Daarna het werk aan de beweegbare deur. Deze zet ik met tape op zijn plaats. Daarna hou ik het model op zijn kop. Het scharnier komt dan binnenin op de deur te liggen en deze zet ik vast met een drup superglue. Zien of het gaat werken.
Then the job regarding the movable door. I fixate this with tape. Then i hold the part upside down. The hinge will lie down inside on the door and i will attach it woth a drop of superglue. Let's see if it works.
Het werkt! Niet zo soepel als ik zou willen, maar goed, de deur zal toch altijd open staan denk ik. Volgende keer over een ander systeem nadenken. Ook nu twijfel ik nog. Misschien maak ik nog een aanpassing door 2 buisjes op de deur te lijmen waar het gebogen draadje doorheen gaat.
It's working! Not as smooth as i hoped, but will do, the door will be open most of the time anyway. Have to think of another system for the next time. Maybe i will make adjustments now by gluing 2 tubes at the door where the metal wire will fit in.

Nu wordt de body even tijdelijk geplaatst zodat ik het raam van de open deur kan richten.
Now the body is put in place temporarily, so i can attach the window of the open door correct.
De voorruit zit erin. Altijd een lastig karwei. Zeker in dit geval omdat het lijkt alsof the body een beetje gedraaid is. En je wilt de lijm niet overal hebben. Normaal gebruik ik de witte lijm, maar nu leek me dat niet stevig genoeg. Dus de gewone plasticlijm erop losgelaten.
The front windshield has been mounted. Always a difficult job. Especially because the body seems to be a bit warped. You don't want the glue to go everywhere. Normally i would use white glue, but i didn't trust it to be strong enough. So it's the normal plastic glue.
De achterklep is nu aan de beurt. Fujimi heeft daar een scharniersysteem voor. Het lijkt me maar gammel moet ik zeggen. En het plaatsen is niet eenvoudig.
The engine cover's turn. Fujimi added some kind of hinge system. No good quality though. And it's not easy to mount.
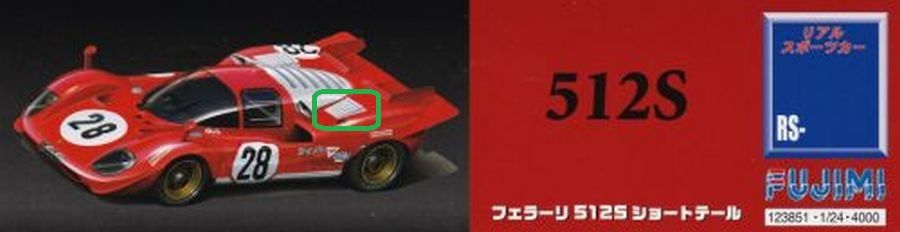
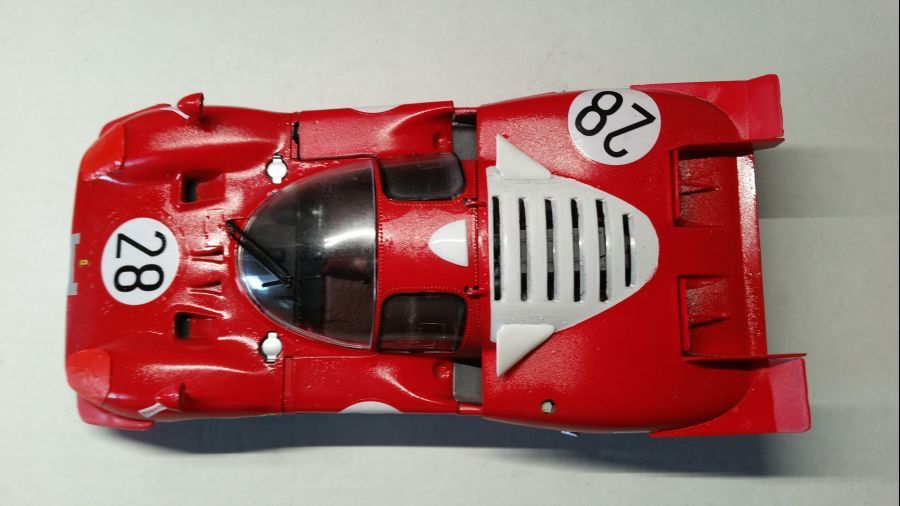
Terwijl ik aan de achterkant van de wagen werk valt me iets op. Op de doos staan een paar ventilatieopeningen die op deze Daytona versie zouden moeten zitten. Deze vind je echter nergens in de doos en ook niet op de instructies. Foutje Fujimi?!
While i am working on the back of the car i noticed something. On the box the car shows some vents that should be applied on this Dyatona version. However you will not find them in the box and in the instructions. Mistake Fujimi?!
Helaas moet ik voor het monteren van de body op bodemplaat de achterklep weer losmaken. Er is geen andere weg. Dit gaat echter super gemakkelijk, want zoals ik al zei, het scharniersysteem werkt gewoon niet goed.
Unfortunately i have to unmount the rear to be able to connect the body to the floor. There is no other way. This is very easy as, like i said, the hinge system does not work at all.
En voor de derde keer ga ik met het deurscharnier aan de gang. Nu met 2 buisjes die ik op de deur plak. Daarmee is de boel min of meer beweegbaar. Hopen dat dit beter werkt.
And working on the door hinge for the third time. Now working with 2 tubes which i will mount to the door. Thus everything is movable more or less. Hope this turns out well.
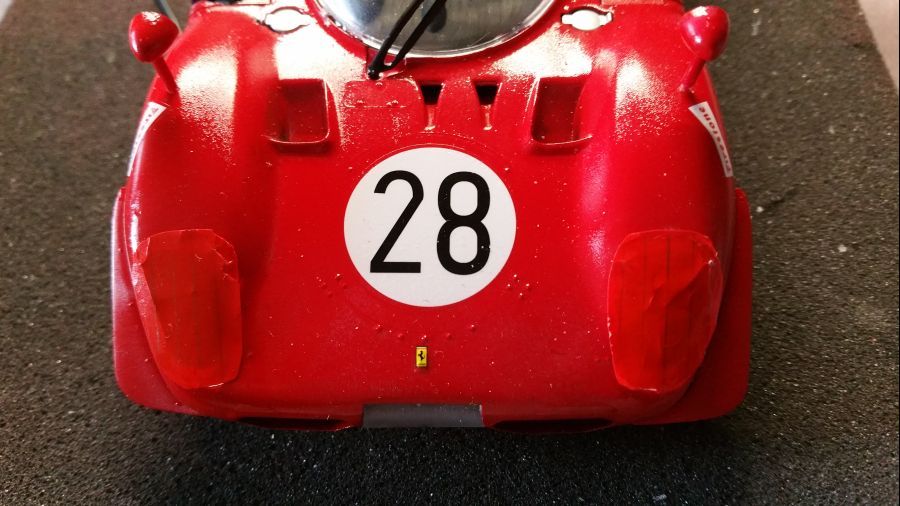
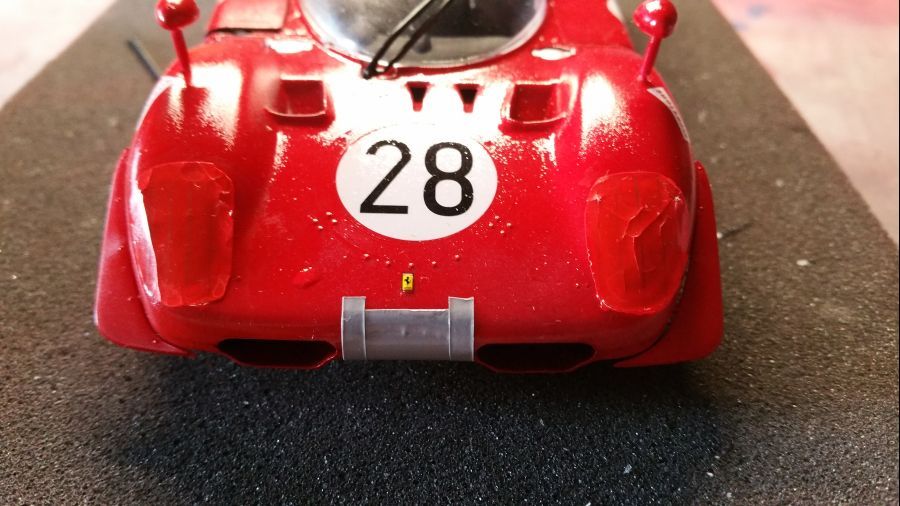
De achterkant en de vulopeningen zitten er nu op.
The rear end and the filling caps are put into place.
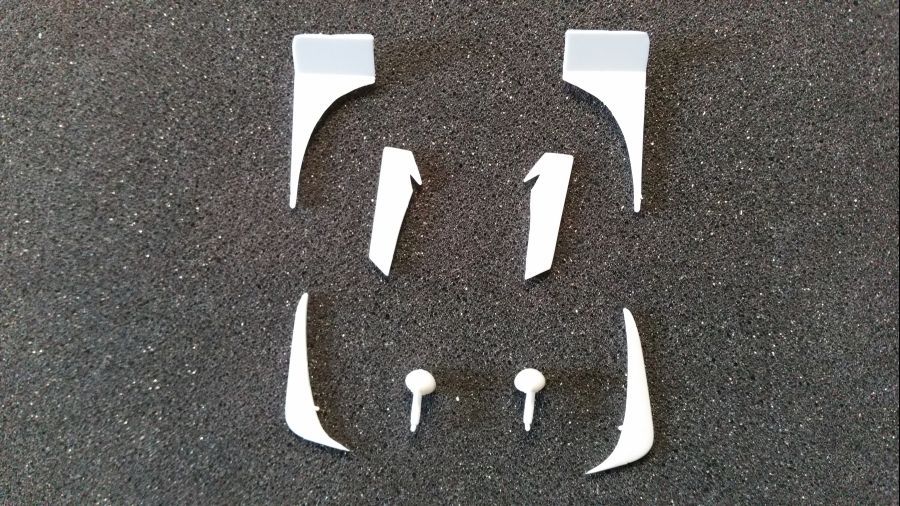
Wat vleugels moeten worden gespoten en geplaatst...
Some wings need paint and attached...
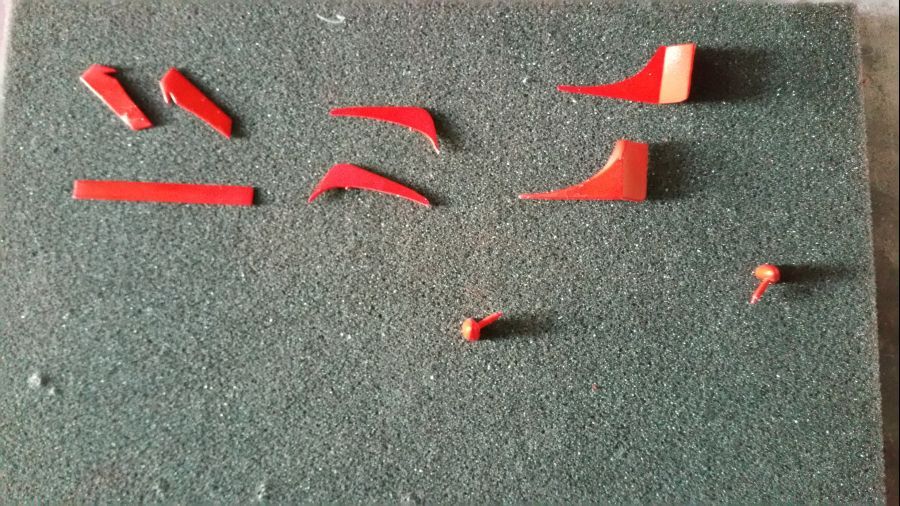
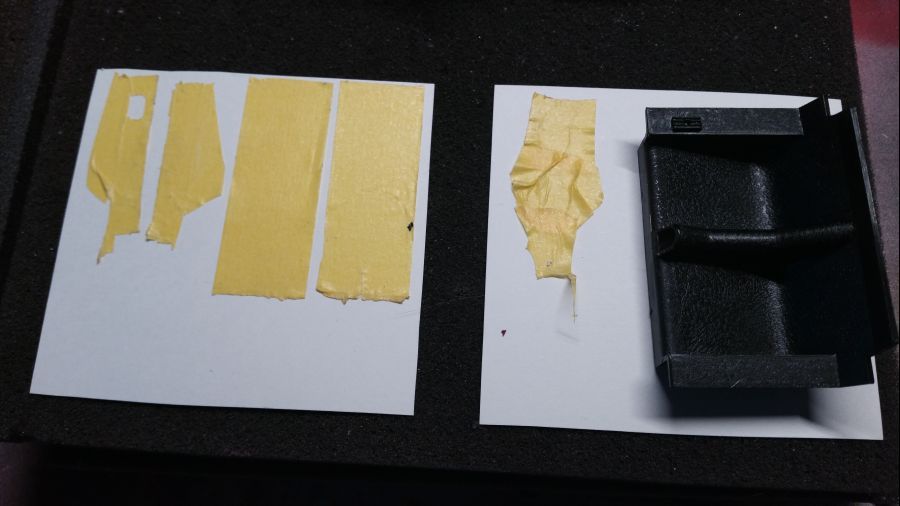
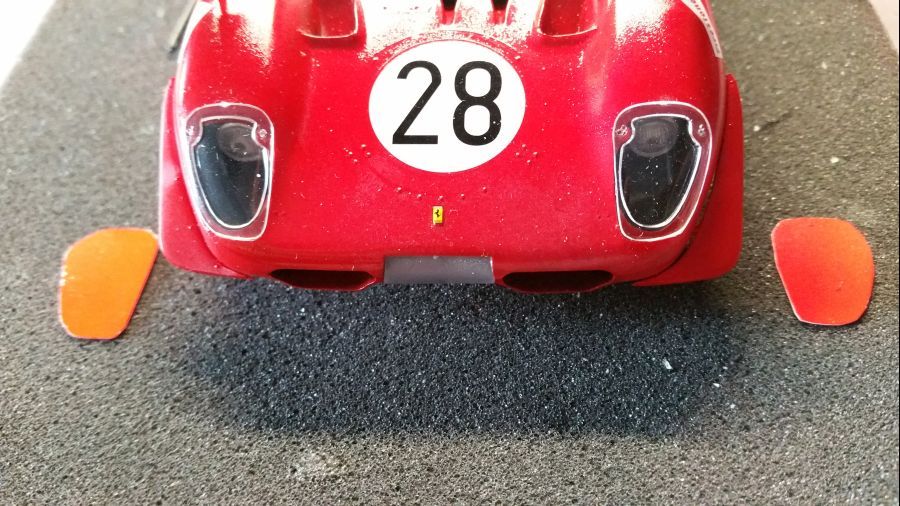
Nu de tape maken voor het afplakken van de verlichting aan de voorkant. Ik heb een stuk decal papier rood gespoten en daarna met behulp van de malletjes uitgeknipt. Met een potloot heb ik heel licht de scheiding van de stukken tape getekend. Ook heb ik een stuk grijs gespoten en gewoon een rechthoek uitgeknipt met 2 streepjes.
Now i will create the tape for masking the lights at the front. I painted a piece of decal paper red and cut it with the use of the templates. With a pencil i drew the lines to create stripes of tape. Also i painted a piece grey. I then cut a rectangle and 2 stripes.
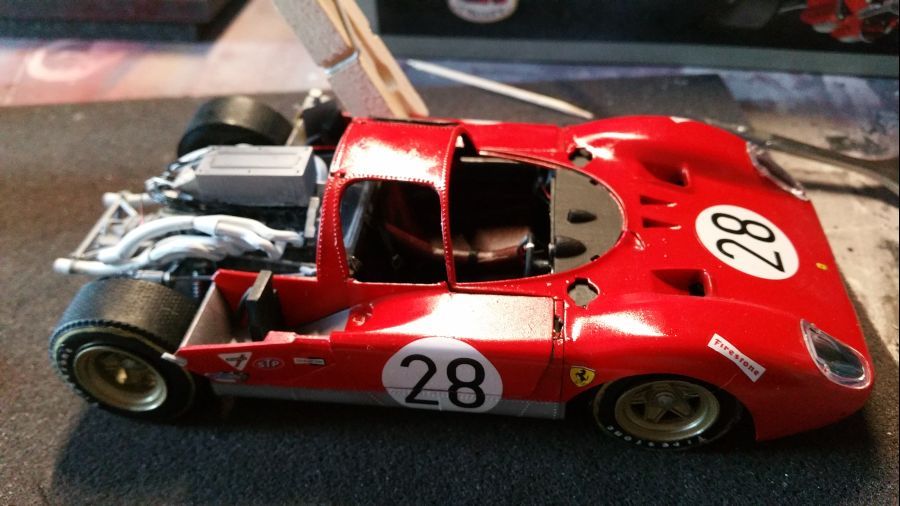
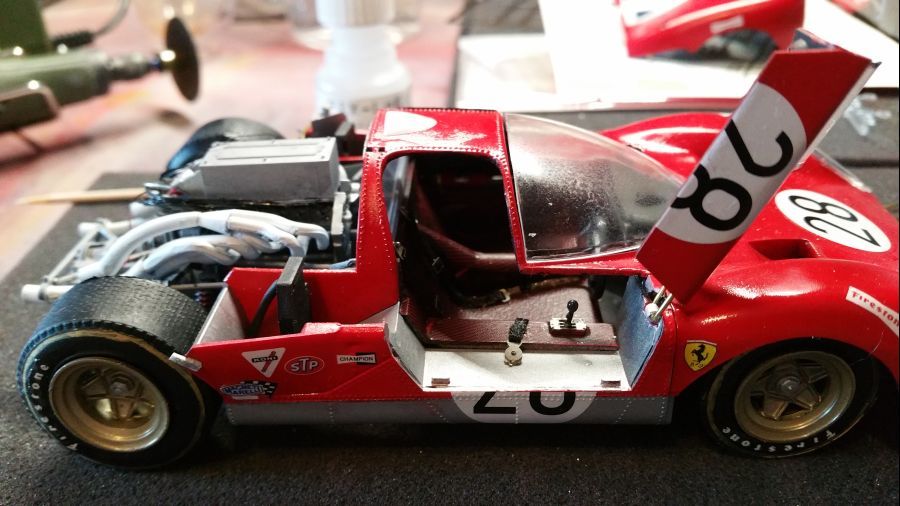
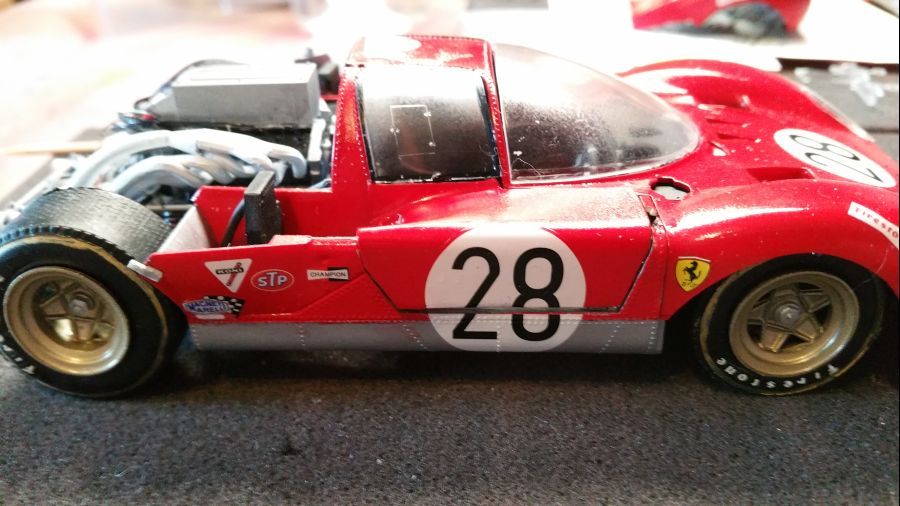
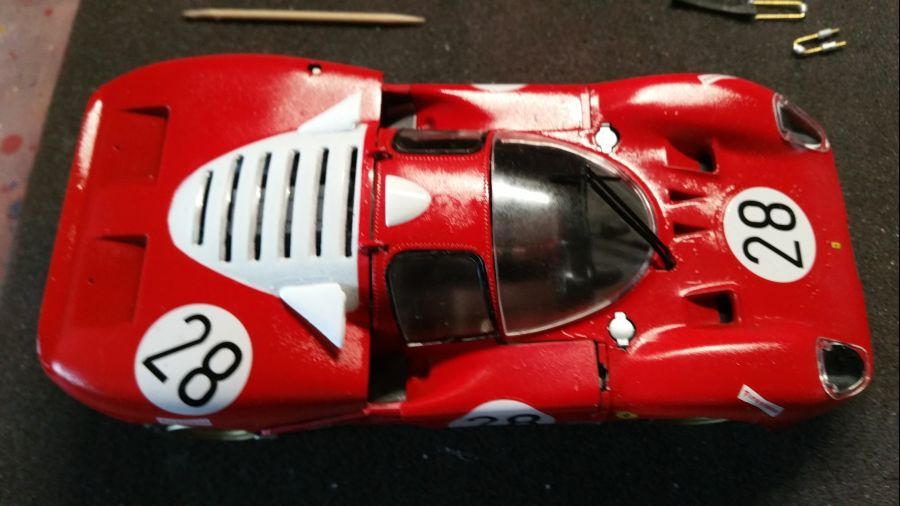
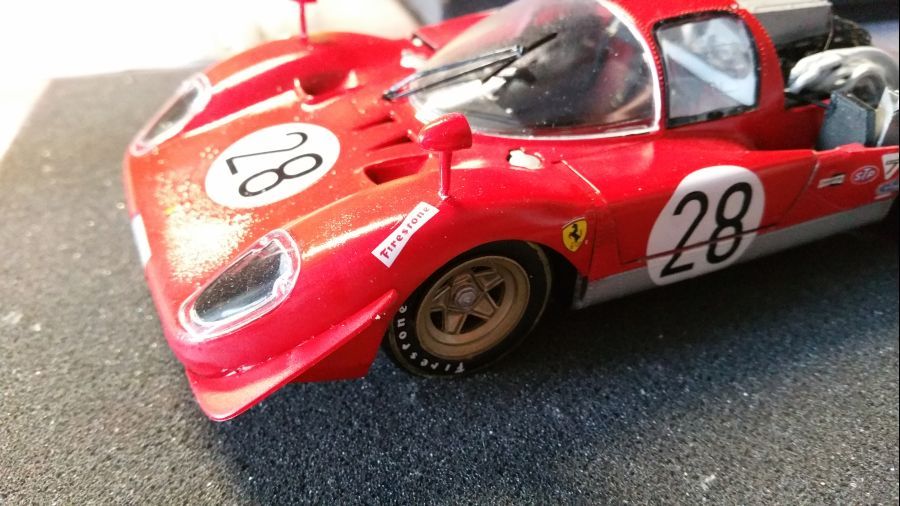
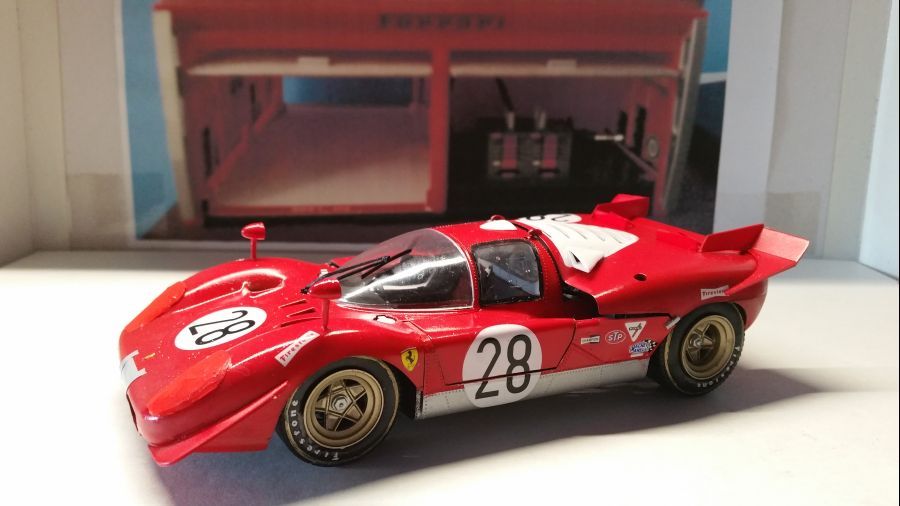
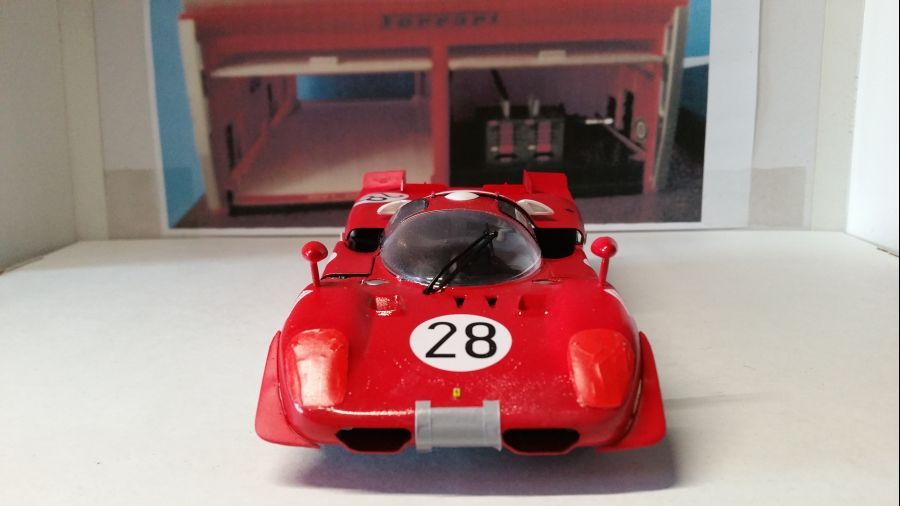
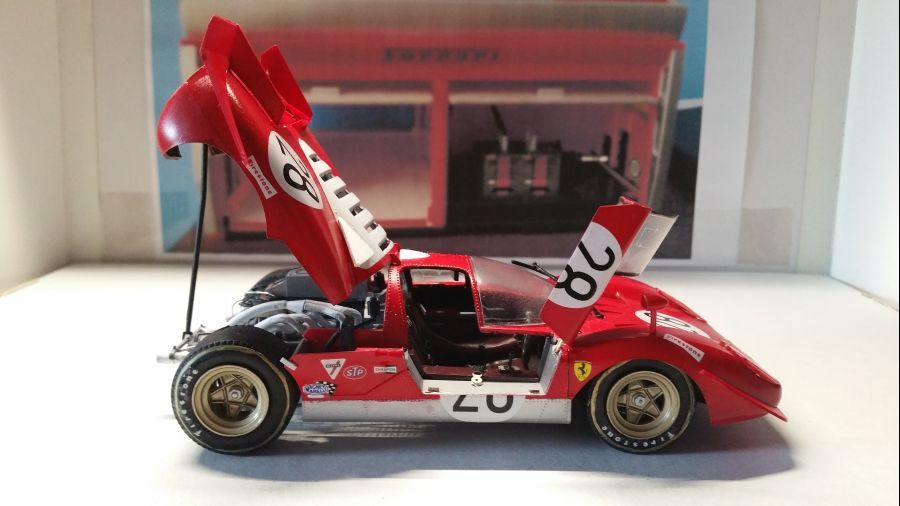
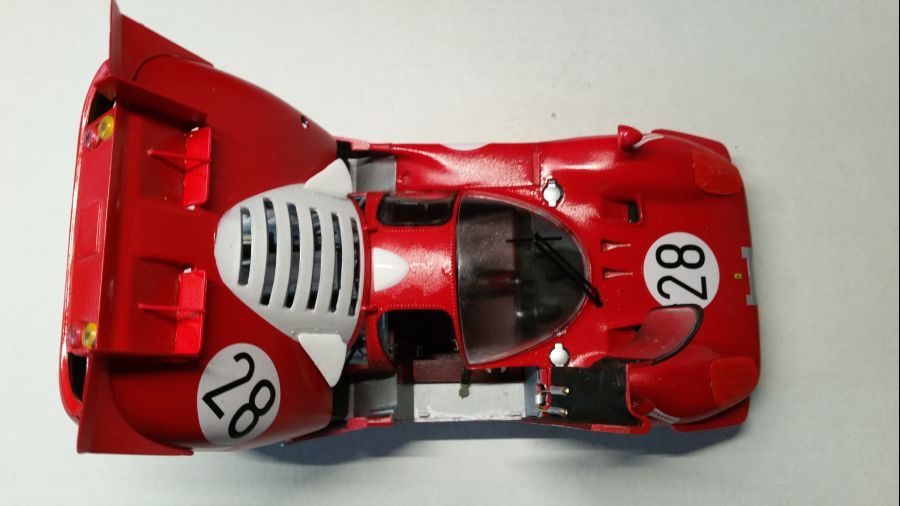
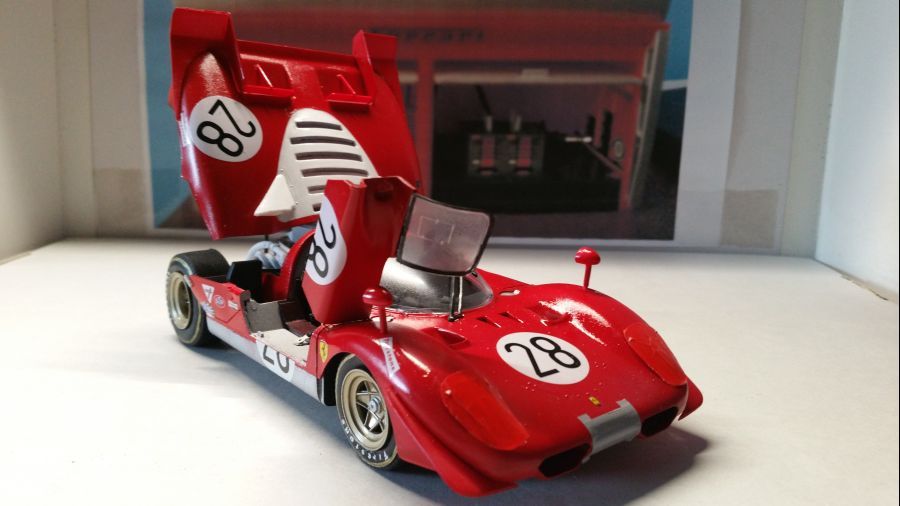
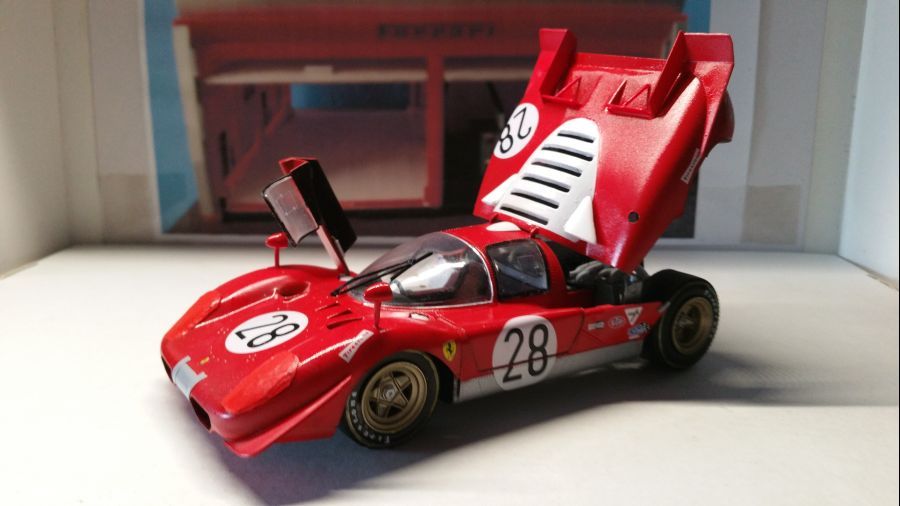
En ik denk dat ie nu wel klaar is...
And i think this one is ready...
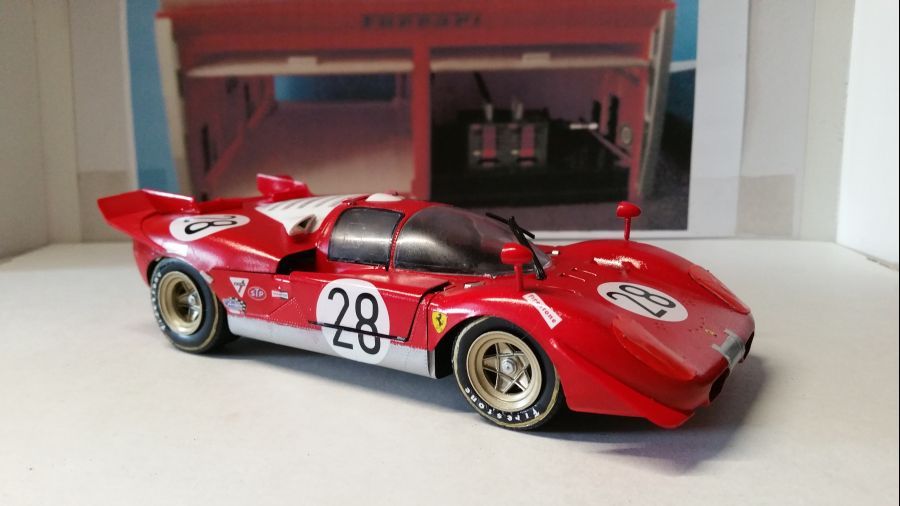


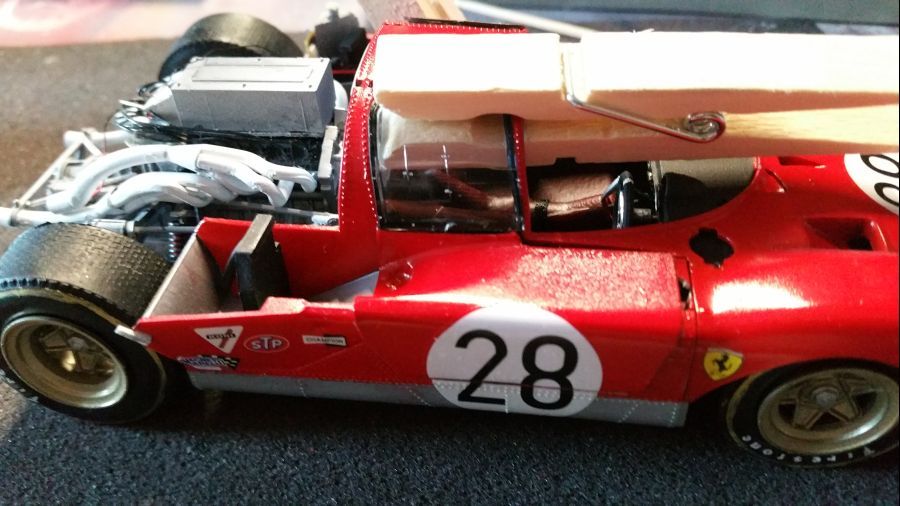
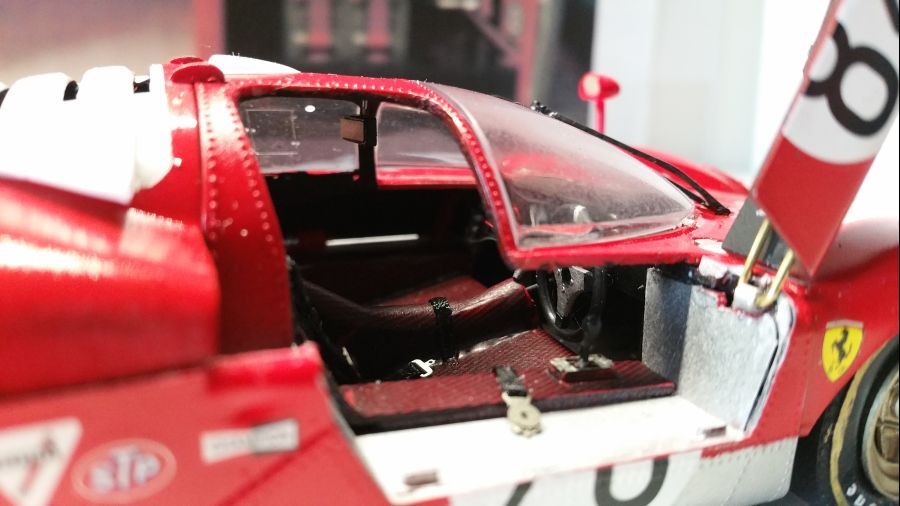
De deur kan open gemaakt...
The door can be opened...
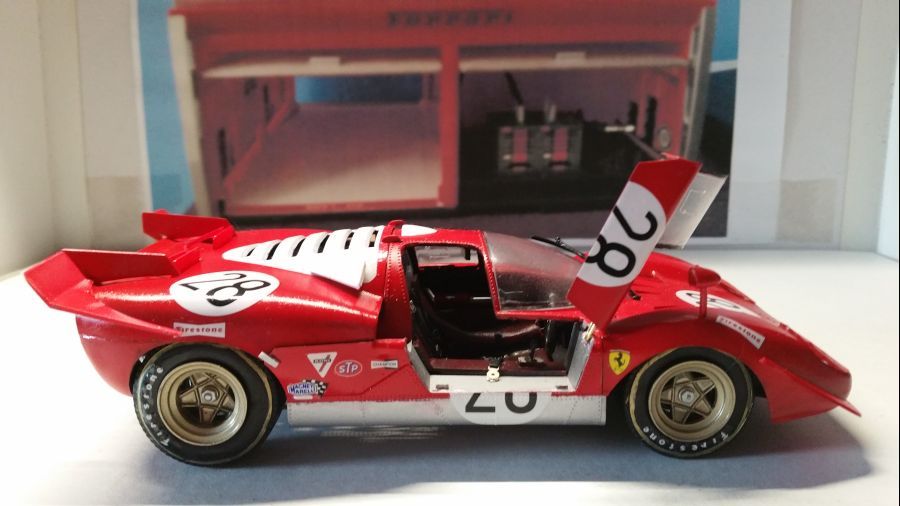
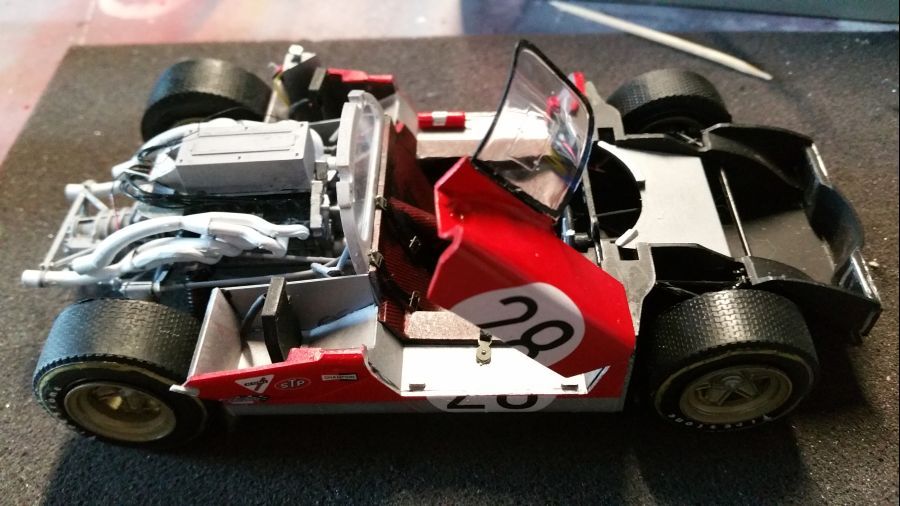
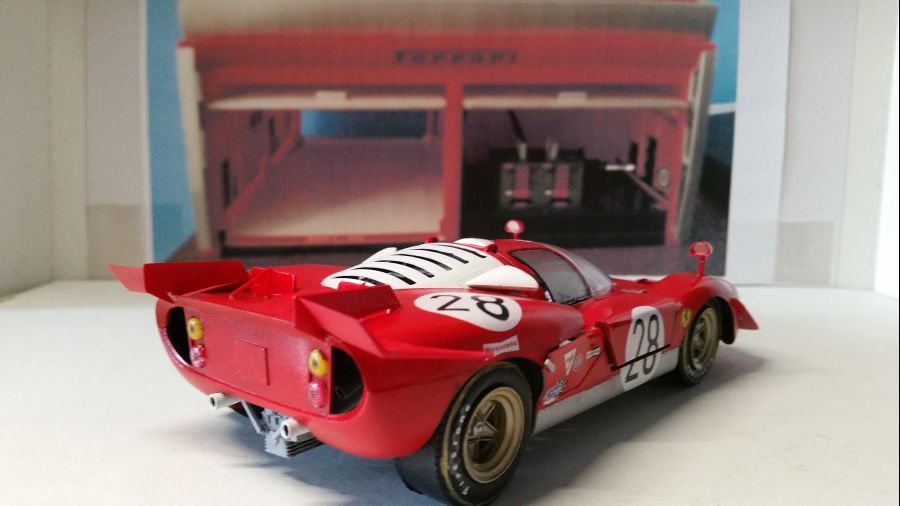
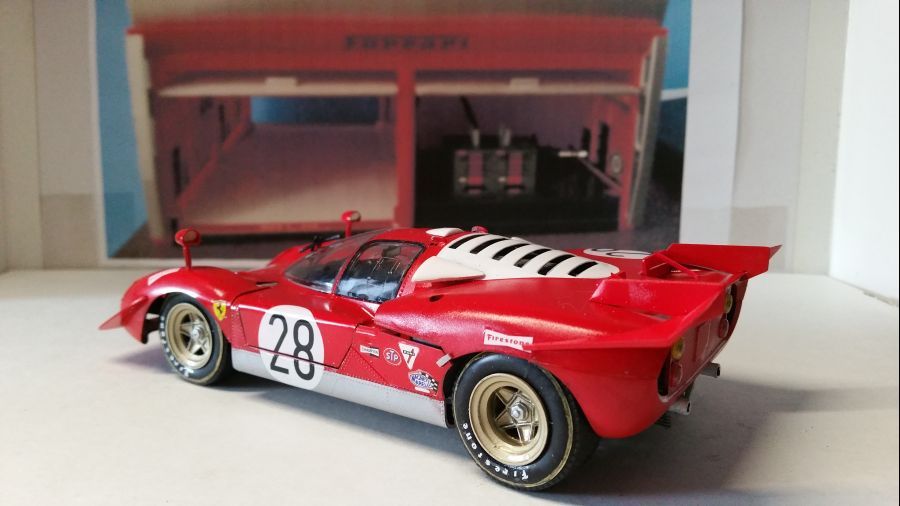
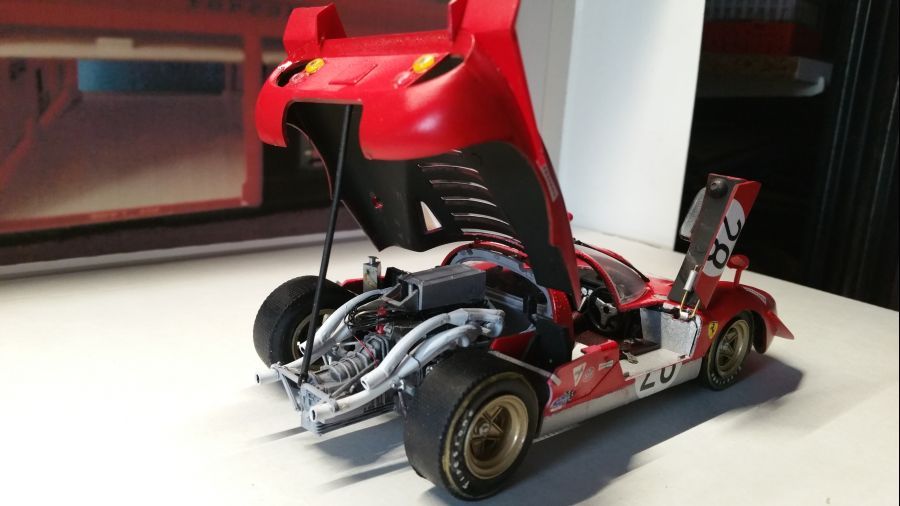
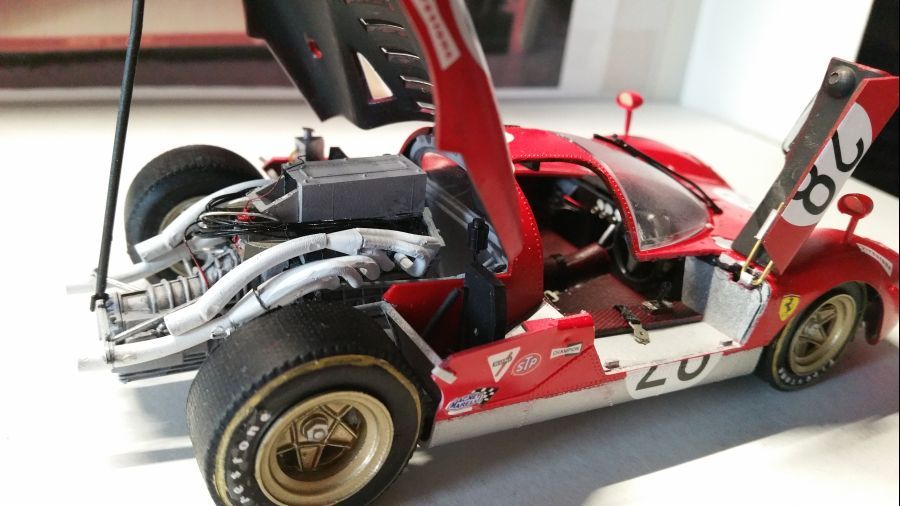
Net als de achterkant...
Just like the back side...
Al met al geen gemakkelijke klus. Zelfs het bouwen uit de doos kan veel problemen opleveren. Veel onderdelen lijken wat gedraaid te zijn. Met name dus opletten bij de body, de bodemplaat en de achterkant. Ook het ophangen van de motor aan het buizenframe is niet eenvoudig. Wanneer alles niet juist is gesteld blijf je met een onbruikbare kit zitten. Alles zal dan scheef zijn. Ook moet ik voor de volgende keer eens nadenken over een beter scharniersysteem.
All and all no easy job. Even building it straight from the box might give you trouble. Many parts seem to be warped a bit. So pay attention with the body, the floor and the rear cover. Also attaching the engine to the frame is not easy. When everything isn't glued at the correct height and angle, you will end up with an unusable kit. Everything will be out of balance. For the next time i need to think about a better hinge system.